Closet to Mudroom

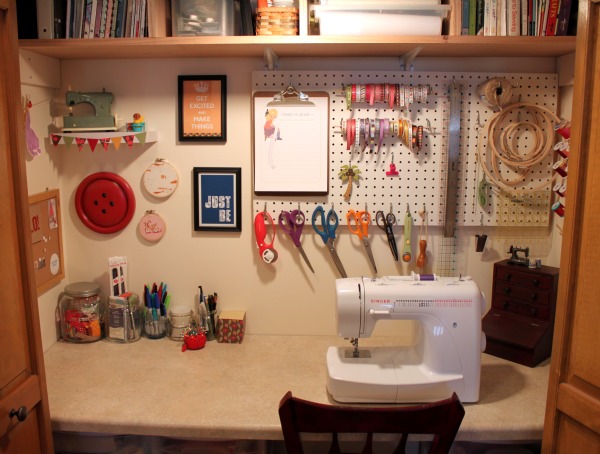
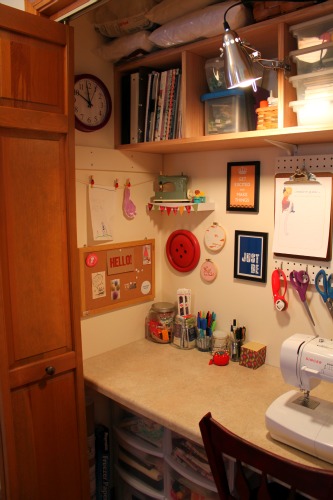
I love when closets become new fun spaces – little rooms like my cloak room makeover and Gwenny Penny’s sewing/craft space featured earlier in the week.  Take a look at Amy from The Mistress of Oxford‘s closet turned entryway mudroom!
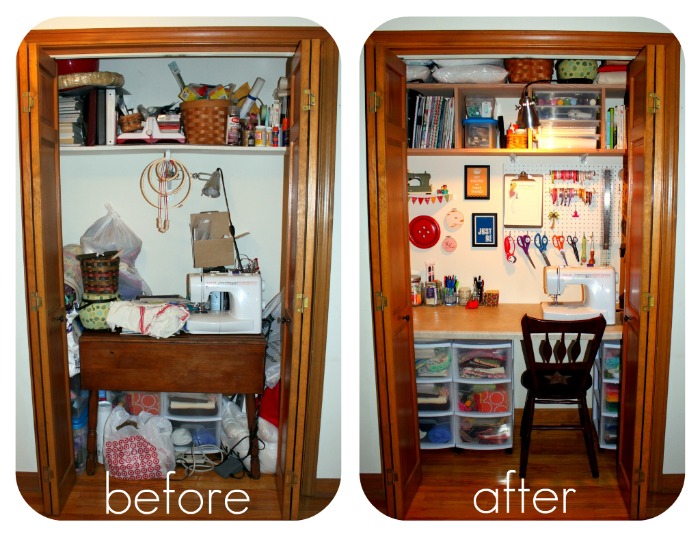
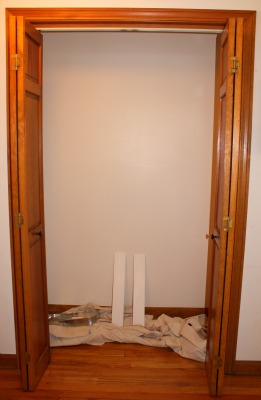
Before:

They have a row of three closets on one wall. They needed a functioning space in the entryway so they retiled for the space, took the doors off and made a half wall. They relocated the light switch for a pass through and the closet turned mudroom/entryway was born. 


See all of the progress at the Mistress of Oxford Part I and Part II.


THE DETAILS
Antique leaded window = $40
(We installed 3 individual hooks)

Entryway bench = $75 KohlsWicker baskets = $20 ($10/basket) Pier OnePillow = $12 HomeGoodsRug = $15 HomeGoodsLetter “S” (pictured above) = $6 HomeGoods

Cast iron hook = $15 Elements (Local décor store)

Keyholder = $8 HomeGoods (This is on the wall next to the entryway)

Don’t you love it?! When there’s 3 closets in a hallway, what a great idea to make one into a functional entryway space to put on shoes, hang keys and store a purse or backpack!  Great idea and beautiful job, Amy!  Thank you so much for sharing!  It really
makes a beautiful change – lightening and opening up the area.  Love the bench and decor too!


Making a Creative Space

Creating a small space for yourself might be easier than you think.  I love this idea from Gwenny Penny.  A cluttered closet becomes a useful spot for sewing and crafts.  Click the link to see the full post.

New Sewing Closet!

Closet before and after:

Isn’t it awesome?  I have to admit that I did a double take.  The before looks like some of the closets in our house!
Gwen and her husband transformed it in just one weekend with some built-ins and paint.

Now it’s SEW organized…

Doesn’t it make you just want to dive in and organize YOUR creative space?  
Thanks so much, Gwen, for sharing your creative space.
I look forward to seeing your craft and sewing projects!

A DIY Closet Update

There’s progress in the closet!


The closet now:

and here it was before – a chaotic mess:
We built about a year ago.  This space was just an awkward cubby that ran beside the basement stairs.
After building out the space and adding a door (total of which was around $200), we painted the door. I always use a Purdy paintbrush – no tape, perfect straight lines where the wall meets the ceiling. The walls are a pretty, light blue color (Dutch Boy Refresh paint) called Fountain of Youth.  Two coats, no VOC with Arm & Hammer to eliminate odors – perfect since this is where our shoes will be stored.  A great option for a potentially musty, stinky, small enclosed area!
I used Cutting Edge Stencils Whispering Elms wall pattern kit to create a wallpapered look.  See the stencil wall pattern tutorial here that I shared a few weeks ago. 
We installed custom shelving
I grabbed these coat hooks from a church garage sale – 50 cents a piece!
The coat hooks were painted with Krylon‘s Indoor/Outdoor in Satin White.
Sand to give a distressed look using a Dremel Multi-Max tool:
and give it a coat of Deft Clear Wood finish (Rockler) to protect them.
Hang the coat racks using toggle bolts to support the weight of several heavy winter coats.
All ready for hosting holiday get-togethers with a pretty place for guests’ coats and extra storage.