DIY Project Parade

Time to show off what you’ve been working on!  It has been raining all week, but I was able to get some pictures (with long grass because it’s been rainy) and of course, it was windy when it’s not raining.  Oh well.  I get too excited to hold off for perfect weather and for perfectly complete (that could be a few years).

As you know from last week, I’ve been working on fixing up the bistro set I scored for $15 at a yard sale. It’s painted to match our existing patio furniture for extra seating under the grape arbor.
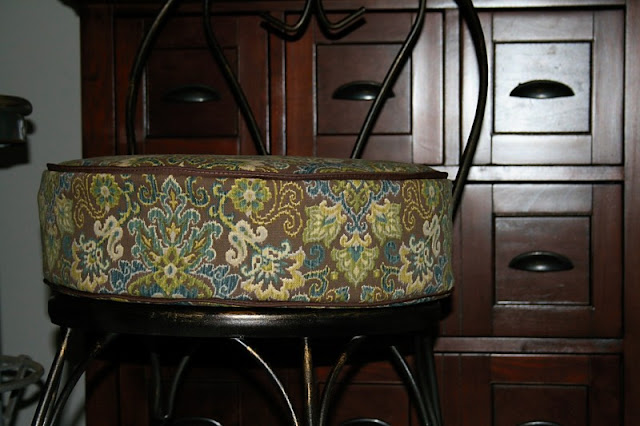
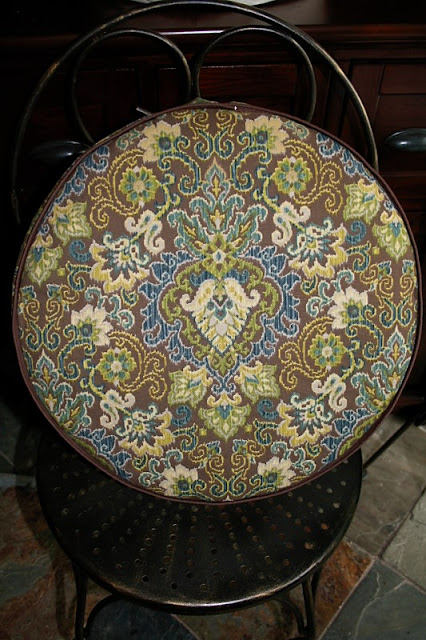
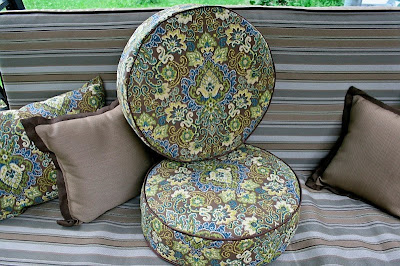
The cushions we have are brown for the most part except for the swing which has sage/tan and gold stripes so I felt limited by that.  🙁  But, I was able to find a fabric that looks good with everything!

It’s called Magic Carpet (walnut) by Waverly.

I wanted round extra-poofy cushions for the chairs.  Goal achieved and then some. Oops! It’s cushion overkill.  But, it is what it is.  No pattern and my first attempt at round, 3D cushions with piping.  Not too bad but definitely  Poofy. Tall. Unique.  🙂

I did document my DIY steps in pictures so if anyone is interested in some helpful round cushion tips, I will create a tutorial. 

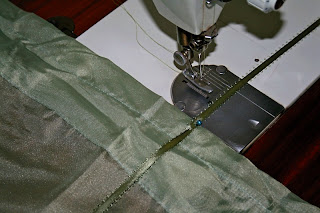
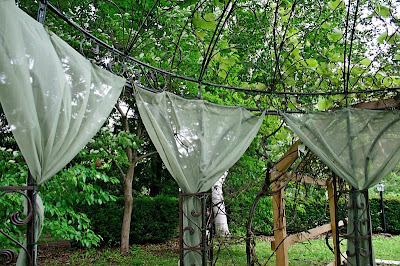
I sewed ribbon to sheers that I got here to tie to the grape arbor to disguise the imperfections…I mean create a romantic atmosphere.  CHEAP source for sheers! $2.99/panel!

Before I continue, I have to point out what’s not done (because that’s usually what I see).  🙂

Don’t mind the “floor” of the grape arbor.  It’s weeds and a mess right now but we have DIY plans for that when the budget allows.  And next year I will be staining the wood structure..so please overlook that right now too. Oh – and Mr. DIY says the weed-wacker needs blades, so pretend you don’t notice the overgrowth at this time too, please.  Plus rain every single day = long grass that needs mowed.  🙂  Now that I have that out of the way…

First, here was the grape arbor when we bought the house.  Quite a rustic eyesore but potential beauty in those old vines regardless and a 50 foot mostly shaded area not to mention tons of grapes! 

 Here’s a close up.  “Hello Chippy!”


Even at it’s ugliest, it was a beautiful space for my brother’s small wedding in 2008.

And a great space for shaded seating for my sister’s baby shower last year.

 
Mr. DIY (and family friend) built up the new wood structure around the old rusty iron skeleton, lifting and shifting the grapes in the process before removing the old iron poles.  It’s about 7’x7’x50′ (except for the gazebo area).  The grapes survived the stress!


Here are the after pictures with the new bistro set and sheers.

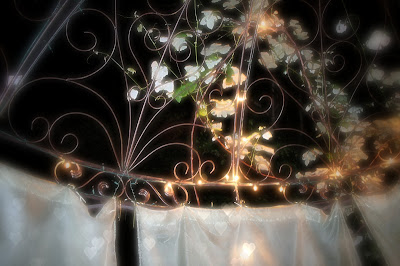
Too windy for candles in the candelier but we do have white lights at night that follow the lines of the gazebo.

And the grape arbor now ‘in progress’

Here are some pictures of the grape arbor and gazebo at night.  So pretty! 

Still a little work with the pavers or flagstone path underneath.  It’ll look so much better after staining the wood structure, but what do you think so far?   Care to join me for a glass of wine and relaxing under the rotunda?  Perhaps with Keanu Reeves from a Walk in the Clouds?  🙂

And some new pillow covers for the existing patio furniture (and the swing fabric that I had to consider with the new fabric).

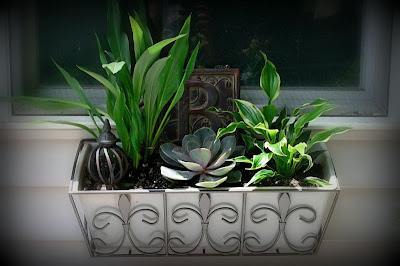
And my window boxes this year:

So...that’s what I’ve been up to.  What about you?  Feel free to link up!

The DIY Show Off

If you’d like to link YOUR DIY project post to The DIY Show Off Project Parade:
  1. You must use the button above and link to this post to share the linky love.
  2. Include your name or blog name and project title. Add your permalink (not your blog url, but your DIY project post url). Feel free to link a Past Post, just invite your readers in a current post with a quick note.
  3. Or email your link to thediyshowoff@gmail.com and I will add it for you.
  4. If you notice your link has disappeared please add the link back to The DIY Show Off to your post today with a quick note to your readers about the party and try again! I love when everyone participates and readers check out everyone’s links, but I think the return favor of linking back is the nice thing to do so everyone plays fair and enjoys all of the projects and links. Also – this blog party is for DIY projects only. Links not related to DIY will be deleted.
This post is brought to you by 
 Tired of the summer heat, get a portable misting fan that will take care of you and your guests.

DIY Planter Box – The Neglected Nest

This is something that inspires me to ‘copy’ it. Brenna from The Neglected Nest built a planter box using recycled pallet wood. Here is her post:

Living inside the box

You may have noticed this in yesterday’s post on the backyard facelift.

Well that picture just doesn’t do it justice. Let’s take a real look at it.

Remember those pallets we used for the floating deck? Well, we took one apart and made this planter box. I absolutely love it! The reclaimed look steals my heart. And the price wasn’t bad either: FREE!!!

There’s no bottom- just the 4 sides, so I stapled some weed blocking fabric to the bottom sides. I also left 1/16th” gaps between the boards for drainage. The biggest expense was filling them with dirt! It took 6 cubic feet to fill it 3/4 of the way, which came out to around $18. But I can’t complain! I think it’s a bargain at almost any price when you get exactly what you want.

If you try this project, just know that you’ll need a few hours just to take the pallet apart. You’ll also need a hammer and a pry bar to separate the wood from the nails. When picking pallets, look for ones that are not dried out, cracking, or damaged. Also, look for pallets that are 48″x40″ as these are most always made in the US. The US has standards that pallets must meet to ensure bugs and plant disease aren’t unknowingly introduced to the environment. Most pallets have “IPPC” stamped on them somewhere, so you can be sure these ones meet those standards. The last thing you want when building a planter box is to introduce harmful disease and chemicals to your plants. So a little work on the front end will ensure a good outcome in the long run.

Have fun!

I love it! I love the almost free budget and how using wood from pallets makes it look vintage! Thanks so much for sharing your creativity, Brenna!


In case you haven’t heard, Glidden is giving away free paint testers! Click HERE for details! I chose two pretty blue/gray colors and can’t wait to test it!
(June 1-7 or while supplies last so hurry!)

This post is brought to you by

DIY Home Center has a solution for that space underneath your 2nd story deck? Try underdecking, and maximize the space you have.

DIY Project Parade

Long day of good food and sun = worn out! I’ll edit this post and share what I did this week tomorrow but if you’ve had a chance to DIY this weekend, let’s see it!

I hope you’re having a wonderful Memorial Day weekend!

Edited: Remember this bistro set I snagged for $15 at a yard sale? It was ivory and rusty.

After some sanding, I used spray primer.

Then, I was going to do something fun and crazy but after some thought, I decided to make it match the existing patio furniture and to put it under the grape arbor for extra seating closer to the patio.

Our patio furniture looks like this. Aged bronze:
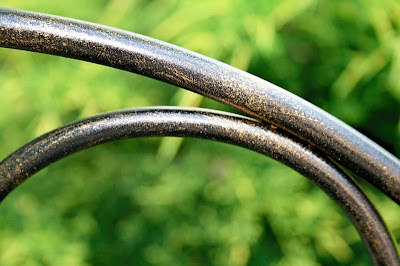
I gave it a coat of oil rubbed bronze spray paint:

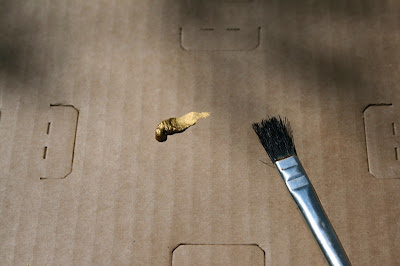
And then, I used the gold leaf Rub-n-Buff using a dry brush to create the gold markings that my other patio furniture has.
A little goes a long way!

And came up with this:


Side by side, before and after:

The Rub-n-Buff is awesome. At first I used a rag and learned that a little goes a long way so then I applied it with the dry brush to get the aged bronze look. I can’t wait to try it on another project. The coverage is amazing. I think it’d be perfect for creating a French Provincial look since it covers so well. We have a bedroom set that look like this:

and it would be perfect for the same effect! It’s permanent and dries really fast.
I love the metallic sparkle.

More to come! I’m working on cushions and throw pillow covers for all of the patio furniture along with something else pretty for the grape arbor seating area. 🙂

The DIY Show Off

If you’d like to link YOUR DIY project post to The DIY Show Off Project Parade:
  1. You must use the button above and link to this post to share the linky love.
  2. Include your name or blog name and project title. Add your permalink (not your blog url, but your DIY project post url). Feel free to link a Past Post, just invite your readers in a current post with a quick note.
  3. Or email your link to thediyshowoff@gmail.com and I will add it for you.
  4. If you notice your link has disappeared please add the link back to The DIY Show Off to your post today with a quick note to your readers about the party and try again! I love when everyone participates and readers check out everyone’s links, but I think the return favor of linking back is the nice thing to do so everyone plays fair and enjoys all of the projects and links. Also – this blog party is for DIY projects only. Links not related to DIY will be deleted.


This post is brought to you by

Need more livable space, try underdecking for that raised deck and get more room.