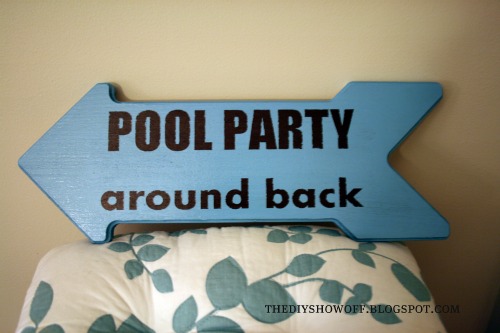
When there’s a pool party going on, my mom handwrites a note and tapes it to the front door to direct guests to the back yard. I thought a yard sign leading the way would be a fun idea.
Category Archives: Outdoor Areas
6
Good morning! I posted about these projects at The DIY Club a couple of weeks ago but I want to share the tutorial here too. 🙂
For Mother’s Day this year, I made two outdoor signs for my mom. She loved them!
Materials:
Wooden Plaques
Fabric
Vinyl letters/stencils
Minwax Polycrilic
Dowel rod
2 screw eyes
Tools:
Paint brushes
Rockler Bench Cookies
Here is how I made them. I had the opportunity to use Deco Art’s Patio Paint. It’s specifically designed to hold up outdoors in different weather conditions.
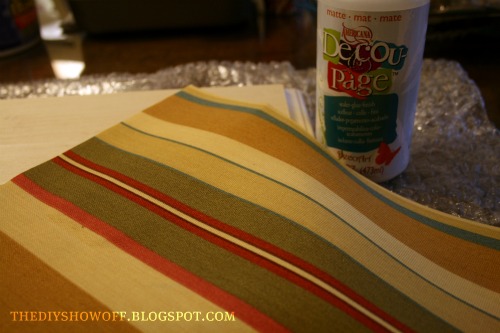
My mom purchased this Waverly fabric last year to recover her swing and outdoor cushions.
I cut a piece of fabric to fit the top of the wooden plaque.
Apply a layer of Decoupage to the top of the plaque.
Smooth the fabric into place (the Decoupage acts as a glue).
Coat the fabric with a layer of Decoupage.
It goes on white but dries clear…
Rockler Bench Cookies elevate my projects and make painting so much easier!
Deco Art Patio Paint is perfect for outdoor crafts!
I painted the frame using the pretty “Larkspur Blue”.
Let paint and decoupage dry.
For this project, I used vinyl for my lettering. You could also use stencils and paint or free hand if you’re good at that sort of thing.
I applied another coat of Decoupage over the vinyl lettering to seal.
Once the Decoupage was dry, I sealed everything with Minwax Polycrylic.
All done. I used two screw eyes and ribbon at the top for hanging.
It’s hanging by two small chains from her top deck as a sign to the bottom pool patio underneath.
I painted a wooden plaque in the shape of an arrow using Deco Art’s Patio Paint in Woodland Brown.
Just the front/top side.
This time I applied my vinyl letters…
(bench cookies!)
and painted the entire sign using Larkspur Blue Patio Paint.
I painted over the vinyl ‘sticker’ letters.
Then pulled them off when I finished the coat of blue, revealing the brown underneath.
Finish with a coat of Polycrilic.
All done!
For the arrow sign, on the back I made a “welcome” so she could just turn the sign when there’s no party going on.
I don’t have pictures of this step, but drill a hole in the bottom of the arrow sign. Insert a little Gorilla Glue into the hole and insert the dowel rod. The arrow post sticks into the ground and is positioned in the front yard.
I can’t wait for the long Memorial Day weekend to get here – POOL PARTY! What are your holiday weekend plans?
Porch Makeovers
Sun porch. Back porch. It’s the perfect time of year to freshen up these relaxing spaces. I have two makeovers to share with you. Beautiful inspiration for getting your enclosed porch area ready for warmer temps.
The first is the back porch at On Sutton Place…
Not much to look at before but lots of potential. So much light coming in those gorgeous windows.
After is so pretty and comfortable in a palette of whites, blues and greens….
I love the coordinating navy and white fabrics.
See ALL of the details at On Sutton Place Back Porch Before & After.

~*~*~*~
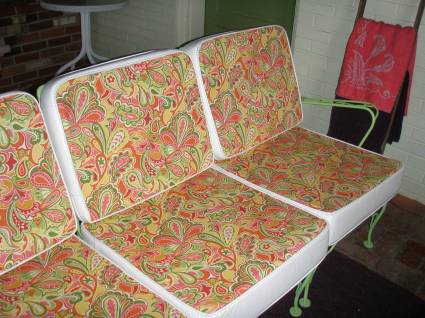
The 2nd back porch makeover is by new blogger, Dana from Circa Dee. She’s a new blogger who decided to start documenting all of her vintage related projects. Her sun room furniture rehab is just the beginning! She’s created a beautiful space on a tight budget. I love the mix of coral and green.
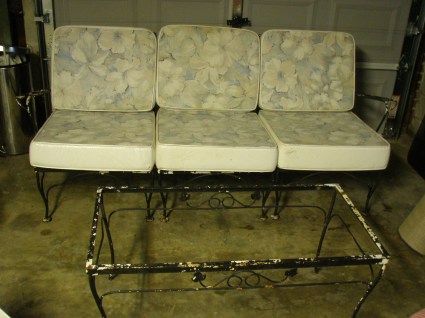
Flea Market Found Furniture Before…
After!

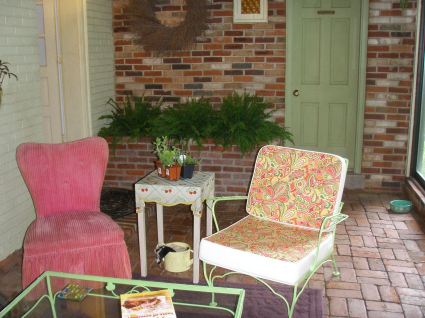
See all details at Circa Dee Sun Room Makeover.
I love the pretty coordinating window boxes!

~*~*~*~
See more DIY projects from

&
Thanks for sharing, ladies!
Do you have an enclosed porch? Do show & tell! We’d love to see your ideas!
DIY Project Parade and Grape Arbor Sneak Peek
We’ve had so much rain this month so outdoor projects have been impatiently waiting. However yesterday we had 1 day of sun! I was able to get started on staining the wood on our grape arbor.
More details at
Sneak peek:
Reveal coming soon (pending sunny skies)!
Get the details of what it looked like when we bought our home by clicking the picture below. It’s come a long way!
~*~*~*~
Do you have a DIY project to show off this week? I’d LOVE to see it! Or please visit the links to get inspired!
If you’d like to link YOUR DIY project post to The DIY Show Off Project Parade:
1.You must use the button above (ADD BUTTON HTML CODE FROM SIDE BAR TO YOUR POST) and link to this post to share the linky love.
2.Include your name or blog name and project title. Add your permalink (not your blog url, but your DIY project post url). Feel free to link a Past Post, just invite your readers in a current post with a quick note.
3.Or email your link to thediyshowoff@gmail.com and I will add it for you.
4.If you notice your link has disappeared -please add the link back to The DIY Show Off to your post today, a button or a quick note to your readers about the party and try again! I love when everyone participates and readers check out everyone’s links, but I think the return favor of linking back is the nice thing to do so everyone plays fair and enjoys all of the projects and links. Also – this blog party is for DIY projects only. Links not related to DIY will be deleted.
The winner of the DIY Project Helper Giveaway is… Kristin!
1) A casual monogrammed “D” for some blank space on the top of the built-in in our DR.
OR…..
2) Cool, fun vinyl numbers (1-5) to put on the back stairs leading from the kitchen to the backyard. This area was always an afterthought but I am currently painting (BM’s Saybrook Sage – so pretty!), beadboarding, sanding, staining, plate wall displaying (!) and making this small area part of our home.


