Beautiful Bathroom Makeover and More – Casa Brasi

I‘d like to introduce you to another amazing DIY’er! I love this bathroom makeover from Amanda at Casa Brasi. The color with the black accents is stunning. Here is her post:
 

We closed on our house in August 2007. Since then, the room in the house that has seen the least decorating action is our half-bath. It’s a real shame too because it’s one of the rooms that gets used the most. For starters it’s the only bathroom on the first floor, so we use it all the time, but more importantly our guests use it when they come to visit!
When it came to decorating this bathroom, I was stumped. We painted the walls. Fine. No sparks. I painted the cabinet black last year. It then matched the mirror, but other than that…still no sparks, no vision, no nothing.
It wasn’t until we had the old countertop replaced with granite that it hit me. I knew exactly what to do.
Half Bath Before:

 
Inspirational Granite:
 

This granite is not the same as the granite in the kitchen. It’s more striped and has a lot more brown/gray in it. As soon as the granite was installed, I could tell right away that the walls had to go. They looked entirely too gold against it. The question then became: what color should I paint the walls? I mean I knew it should be gray of some sort, but there are a million grays out there. Then I remembered that I had ordered a sample pot of Mouse’s Back by Pratt & Lambert. I tested it out on the walls. In one word: perfection.

On Saturday I went to Lowe’s to have P&L’s Mouse’s Back color matched into a Valspar paint. I did this because (1) Lowe’s is closer than the guy who sells Pratt & Lambert paint and (2) Pratt & Lambert paint is more expensive than Valspar paint. While I was at Lowe’s, I also picked up a new light fixture (way overdue although not as bad as my master bathroom lights. Just wait till you see those.)
Sunday, I painted the bathroom. Oh, and I wired the light fixture. All by myself! House is still standing. Painter, electrician. Whatev.

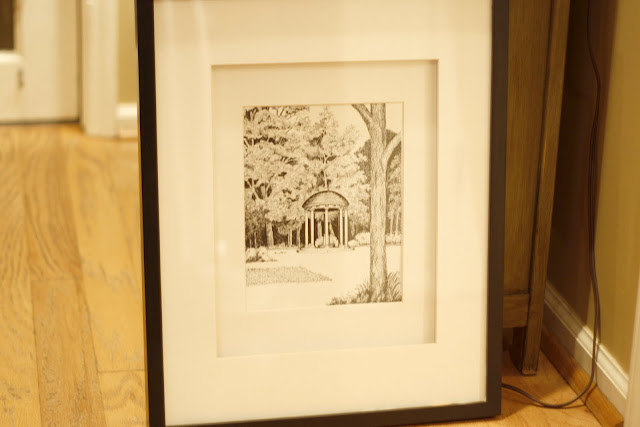
Then I got to work on the art. A few weeks ago I went to my local Old Time Pottery and found two 16×20 frames (double mat). $10.00 each. Awesome price. Not awesome color. So I painted them.
They started out this color:

And ended up this color:

This sketch is of a local landmark. I got two different ones at a local antique store for $3.00 each.
Last night I put it all back together.
Half Bath After:

My apologies for the toilet seat being up! It was the best picture so I had to post it.

 
Better, huh? Not finished though. Working on a little DIY I plan to share with you shortly.


Gorgeous photography and more creativity and inspiration. If you get a chance, pop over and check things out. Don’t you love making new friends?

Thanks for sharing Amanda! 😉

The Wonderful World of Woodworking

One of my goals this summer is to learn how to use the saw, as you’ve heard me say and I have more motivation than ever. I ‘met’ Kevin aka Grover recently and love his new feature

There’s also this:


There is so much inspiration! I’m thankful for the tips and love seeing what others are creating. It’s so helpful in overcoming my fears. It’s no secret that I love design and DIY but making my own furniture or accents would be so rewarding!

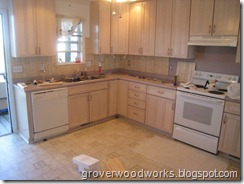
I love what he’s doing to his beach house kitchen. Check out the backsplash! Here is his post:

IMG_3452_1024x768

IMG_3453_1024x768

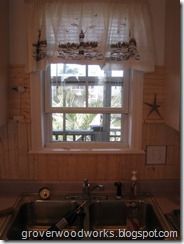
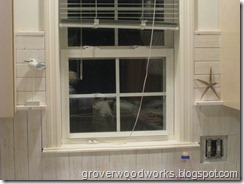
I decided to add some small shelves on each side of the window and also changed the orientation of the wood for some additional contrast.

IMG_3458_1024x768

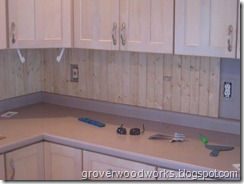
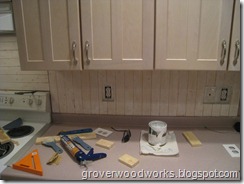
I got things moving down the side wall. It’s looking good. We debated leaving the wood natural but between having glued directly to the Formica backer board and having a good amount of it showing and not really being able to extend the power outlets to sit flush on the boards we decided it would be best to continue with out plan of painting the boards.

IMG_3462_1024x768

Here is the window with the shelves painted. You will notice we did a kind of whitewash/distressed look. I think it is turning out real well.

IMG_3464_1024x768

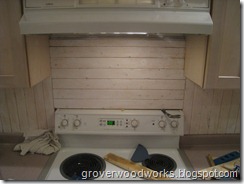
I also changed the orientation of the wood over the stove, it might be hard to see in the picture but the last board has 45 degree bevel towards the wall to allot for removal of the range hood if needed. I even tested getting to the screws and didn’t have any trouble.

IMG_3465_1024x768


J
ealous? YES! So, if you’re like me and want to learn more, head over and become a follower! There is an extra incentive you won’t want to miss too – an awesome giveaway! My goal in the next few months is to have this:

posted on my side bar. 🙂

Thanks Grover for sharing your projects! Welcome to blogging!

————————

This post is brought to you by Tiger Claw hidden deck fasteners – found at DIY Home Center your source for premium & unique products for your home, deck and patio area.

Beautiful Bedroom Makeover and More Inspiration

Shellagh from

always has the best inspiration, just my style … farmhouse and feminine. I’m showing off just a sneak peek of her bedroom makeover because it has inspired me to add redoing mine to my makeover list this spring but you have to go meet her if you haven’t already. She has some exciting news to share AND she has an amazing giveaway going on (but…you don’t have to sign up for that because I want to win! I NEED to win!)

Without further ado, here is what you’ll want to go see more of:


Isn’t is beautiful? It’s so pretty and fresh and spring and crisp and…you get the idea. I love it! 🙂