Hello DIY SHOWOFF READERS!
I am Cheri from Its So Very Cheri.
I am Cheri from Its So Very Cheri.
It is a pleasure to be here.
Thank you so much for having me.
Thank you so much for having me.
I adore Roeshel–her style and grace are a special treat.
I am blessed to call her a friend.
Thanks for having me Roeshel!
I will tell you a little about me-In case you have never been to my site:
I am married and have 4 great kiddos.
I home school as well.
We currently live in SW Florida but we are from the Midwest and consider it home.
I have a fun party that starts each Sunday – it is open all week long.
DIY — LOVE LOVE LOVE DIY projects.
(I am one of the gals on the DIY Club too.)
Today I am going to show you a project I worked on for a bathroom theme that I came up with.
{The bathroom is not completed yet-it’s a work in progress.}
My husband is in school to become a nurse anesthesis and I thought a Vintage Apothecary Spa theme would be fun and relaxing. So where to begin–that was the question of the day.
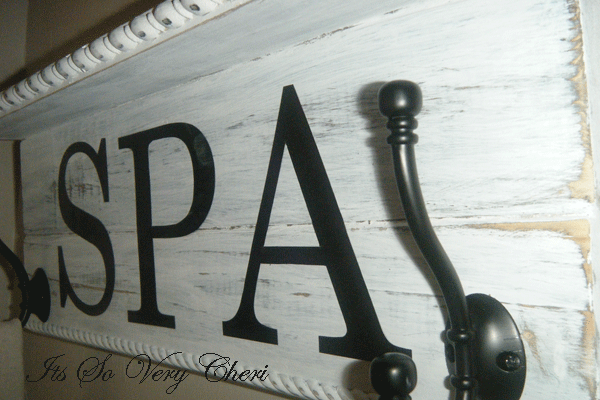
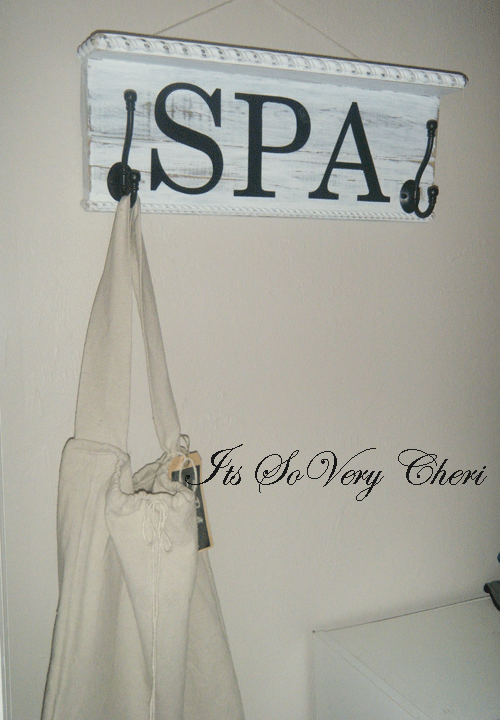
PROJECT NUMBER 1–I decided that we needed a SPA SIGN.
It needed big bold lettering.
It needed cool hooks to hang a SPA BAG.
Every SPA sign needs a SPA BAG right?
It needed to look vintage, shabby and chic.
I love how it turned out. Head on over to The DIY Club for the full tutorial on how to make this cool signage.
We also have a coupon code (on the side bar) for 40% off custom lettering at Say It On The Wall over at the DIY Club.
To recreate this project you will need:
DecoArt Raw Umber and White Paint
I ordered my hooks from Rockler
They have amazing products. These hooks were only $6.29 each.
I ordered my SPA vinyl from Say It On The Wall
It is a SPECIAL ORDER head over to for a special deal on this vinyl
(Look for the SPA Button on the side bar)
a paint brush
A sanding bug or some sand paper
a little spakling
a recepticle for your paint–an old bowl will do
water
2 x 4
1 x 4
wood trim
saw
clamps
I also made a SPA bag for our essential spa items. I will be posting that at Its So Very Cheri on Wednesday.
I am working on more projects for the bathroom so stay tuned.
I am also working on the kitchen and living room makeover too-just call me crazy.
I hope you will come on over and check out Its So Very Cheri.
Be sure to check out my TAPE Party!
It starts March 13-31.
Thanks so much for having me today. I hope you love the SPA Sign.
It is always fun checking out what is going on here at the DIY SHOWOFF so it is an extra special treat to be a guest.
Special Giveaway from It’s So Very Cheri!
This cute little faux zinc vintage bird is perfect for updating your spring vignette!

How to win?
1 entry = Comment below your plans for your first DIY project this spring? Getting outdoors to spray paint or tend to flowers? Decorate for Easter and spring? Spring cleaning? Excited for the long days and warmer temps?
1 entry = Visit It’s So Very Cheri and become a follower. Come back and comment that you are!
Giveaway starts today 3/8 and ends Friday 3/11 at midnight EST.
Winner will be chosen using random.org and announced shortly after.
Please include your email address if you can’t be reached via link to your blog.
Good luck!


