Feminine Features – Surprise Party

Note: Feminine features is a post about feminine DIY home improvement, decor and craft projects. I apologize in advance if you came here looking for another type of “feminine features/show & tell”…you won’t find that here but you will find DIY eye candy. Enjoy!

Surprise! It’s a party! You’re invited! A Girls’ Day Out!

Here are some beautiful feminine DIY projects. Click the links to visit the original post for more details and tutorials. Then feel free to link up your own feminine DIY project (see instructions below).


Picture A
Picture B

Homemade Strawberry Shortcake (costume) at Chrissie Grace

Jewelry Organizer from The Crafty Clique
Tutorial

After

Thanks so much for sharing

Adreann, Christy, Shanna, Chrissie, Lyssa, Marjorie and K
~~~~~~~~~~~~~~~~~
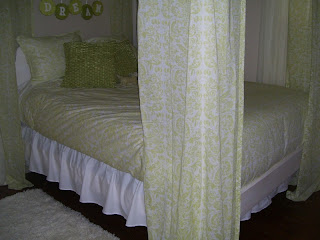
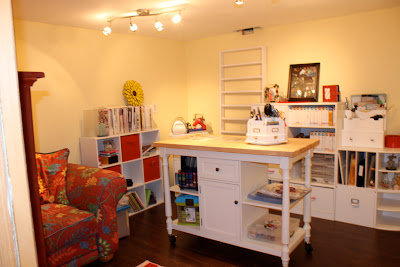
I love my feminine office space/guest bedroom. Here are a few photos:


My powder room has feminine touches too.

And so does my guest room.

How about you? Do you have a pretty feminine DIY project to share? Let’s see it! Email it to me and I’ll add your photo and link to your project in this post or share your link below.
~~~~~~~~~~~~~~~~~~~~~~~~~~
If you’d like to link YOUR DIY FEMININE PROJECT post to the party:

  1. It’s always a surprise with a different theme and no specific date planned…just pops up out of the blue when the inbox is full of great DIY projects.
  2. You must use the button above and link to this post to share the linky love.
  3. Add your permalink (not your blog url, but your Show & Tell post url). Feel free to link a Past Post, just invite your readers in a current post with a quick note.
  4. Or email your link to thediyshowoff@gmail.com and I will add it for you.
  5. The party will run for a few days…so showing up fashionably late is acceptable. I will probably take tomorrow off from blogging so keep checking back for more links!
  6. Have fun!

I'm Telling! A Home Improvement Show & Tell Recap.

I thought it would be fun to spotlight some of the projects from the Show & Tell Surprise Party earlier this week. Here are the DIY home improvement projects that I thought were creative, beautiful and fun. If you’re featured, Make sure you grab an “I’m featured” button from the right side bar. Thank you to EVERYONE participating. I’m amazed and grateful for your participation without warning. 🙂 In real life…I’d need hours to “get ready”. Those of you with the amazing kitchen makeovers – you’re killing me! I’m so jealous! Click on the links to visit for more pictures of each project!

Red Writing
(Dining Room Hidden Storage)

I Love My 5 Kids
(Kitchen Re-do)
Before

After
Polka Dot Thought
(Kitchen Makeover)
Before: KitchenAfter: KitchenForever Daisies
(Scrapbook Room)
Before

After

Moore Minutes
(Dining Room Makeover)
Before
After

Thrifty Living
(Office Makeover)
Before

After

Proud Feet
(Built In Bookcase)
Before

After
The Proud Feet
(Kitchen Makeover)
Before
After
Mother of 3 Fellows
(Craft Room)

My Creative Attempts
(Entry Room Makeover)
BeforeAfter


Something To Do
(Kitchen Makeover)
Before
After
The Craft Monkey
(Laundry Room Makeover)
Before

After

(Playroom Makeover)
Before
After


Craig, Blair & Turbo
(Kitchen Makeover)
Before
After
Home to Three Duncan Boys
(Closet Office)
Before
After
The Meckleys
(Laundry Room Makeover)
Before

After


Modern Country
(Master Suite)

Fingerprints on the Fridge
(Kitchen Remodel)
Before
After


Making It Mine

(Kitchen Makeover)
Before

After

I bow down to these DIY queens! Each of your home improvement projects are awesome!
So many beautiful spaces. I wish I was a traveling blogger…
I’d pop by to see your projects in person.
Thank you SO much for sharing your makeover stories!
I’m inspired!
(See all of the amazing Show & Tell submissions! Check them out here if you missed them!)

What are you up to this weekend?

This post is brought to you by Hotpoint-Spares.co.uk, for all of your Hotpoint washing machine spares.

Trash to Treasure – Ribbon Organization

Introducing another creative & crafty DIY blog:

A group of crafters who love to create.
This is the place that we show off what we make and show you how to make it!

Here is one of the projects you’ll find there, submitted by Lyssa.

Ribbon Holder tutorial

I am amazed at what you can create when you have no or hardly any money. I love going to DI or Goodwill these days because I’m learning to see past what things are to what they could become.
Such is the case with my Ribbon Holder. This is what I found at DI for $2:
(Does anyone know what this is?!)
After some TLC, it now looks like this:
Beauty is in the eye of the beholder, right?
And it was really simple to transform it. I’ll break it down for you!
Step 1: Using my trusty Tomboy Tools, Trim the wood with a hack saw so that a dowel can slide in and out of the hooks.
Step 2: Sand them down a bit using a sanding block or paper.
Step 3: Take out frame piece to decorate later.
Step 4: If you are pregnant, nag and nag and nag your husband to spray paint it. If not, then you can do it (so jealous because it took my husband a week to finally do this step and I was dying!…something about fumes and the baby..I have no idea….)
Step 4: Decorate frame piece and place back in Holder.
I just traced the shape on scrapbook paper and used a glue runner to hold in place. Then I took black stickers and made the label.
Step 5: Hang on wall, making sure to use a level to they hand straight! Something that helps with this is called a Picture Perfect Level, you must check this out!
Step 6: Place ribbon on dowels and place on your holder.
Step 7: Stand back and look at what you’ve accomplished!
boy, what a feeling!

All of that pretty ribbon – so organized. I love it! Thanks for sharing Lyssa! Great job! Now if I could just find a “whateverthatis”! But, your project is inspiration to keep my eyes open to seeing the potential in everything.