Scraps and Scribbles – Burlap Pumpkins

This post is brought to you by crafty genius, Courtney from 

When I first saw the orange burlap at Joann’s, I knew I had to have some.  And I knew I wanted to make some fun fall decor with it.  I have insomnia some nights and one of the nights I was lying awake, starting at the ceiling, the idea hit me.  An orange burlap pumpkin!  I could see the whole thing in my mind-all the details, where I’d put it once it was done, the works.  I got so excited I got up and wrote it all down.  So here is the fruit of my sleepless night.


What do you think?  

And now I’m going to show you how to make your own!  This is a super-easy project that’s both inexpensive and fast-the whole thing took me under a half hour.

To make yours, you’ll need:
  • About 1/2 yard of orange burlap
  • Brown embroidery thread
  • Polyfill
  • Thread
  • Hot glue gun
  • A large circle to use as a guide

I wanted my pumpkin to be a good size so I needed to use a BIG circle to use.  I flipped over my hamper and traced around the top onto the burlap, then cut it out.


This will be the “body” of your pumpkin.

Cut 6 pieces of embroidery thread about a foot long and thread them through the center of the circle. Tie the ends in a knot.


With the knot on the inside, stitch around the outer edge of the circle and pull tight, gathering it all together.


Fill with polyfil before tying the thread.


Flip over and arrange the 6 pieces of thread like so.

Pull them tight over the pumpkin and tie together at the top.  Tuck the ends into the hole at the top.


I made a little stem using a scrap of green burlap that I had.  You could use a stick or felt or fabric-whatever floats your boat, really.  Attach it to the top of your pumpkin with hot glue.

There you have it!  I love the way the thread gives the look of ribs.


Right now it’s keeping my rolly-polly scarecrow company on my kitchen counter.


I’m a stay-at-home mommy who loves all things crafty and fashion-related.  I hope you come on by Scraps and Scribbles and say hi-I’d love to meet you! 
post signature

Thanks for the great tutorial, Courtney!  So cute – orange burlap – I had no idea!  More fall ideas at the DIY Show Off Fall Festival!

FALL FOR ALL – DIY Fall Festival #6

HAPPY FALL

The last Fall Festival party post featured Fall Mantels and it was Fall Wreaths before that.  This week…it’s a FALL FOR ALL!  Here are some fun and easy DIY ideas submitted by readers.  So creative!  Then check out the links here and on past posts for DIY Fall heaven.   If you’re like me, you’ll be inspired to DIY and decorate, throw on a sweater, be warmed by a pumpkin spiced chai tea and enjoy your autumn decorated home.  Click the links for more details/tutorials.

I usually post this Thursday night but it’s so fall like here, I’m a little early today.  I have fall fever! And I scheduled it to post tomorrow morning – but for some reason “OOPS” – it posted asap.  So what is usually scheduled to post tomorrow evening for Friday is 24 hours early.  Oh well!  It’s fall, let’s celebrate!

 
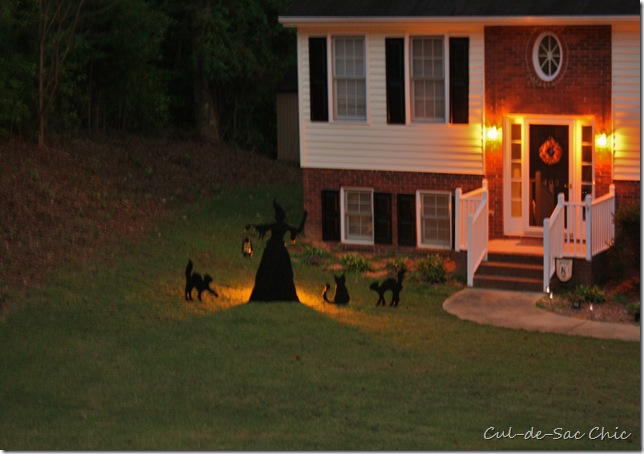
Outdoor Halloween Silhouettes at Cul-de-Sac Chic:

Yard Witch  (60)

 Pumpkin Topiary tutorial at Our SouthernNest:

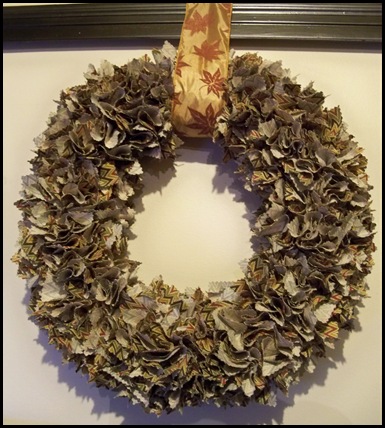
Jennifer from the Perillo Four made this pretty fall wreath (inspired by my burlap/fabric wreath!). Great job, Jennifer!
Sharon at Keen Inspirations made one too – I love how she framed it.
100_2707
And Ashley from A Forty Year Old Ranch did one too – a great example how using different fabrics can make a unique look.

Let’s see! Show off your Fall projects!

Rules:
  • Create a blog post about an Autumn/Fall project that you’ve done
  • Add your project title to Mcklinky (example: House # Pumpkins)
  • Type in the permalink address, not your basic blog address. A permalink is the address that links directly to your specific post. (example: http://thediyshowoff.blogspot.com/2009/08/house-number-pumpkins)
  • Please use the DIY button or link to this post to share the party with your readers.
  • Although a tutorial is helpful, it’s not required. Anything DIY – autumn related is permitted.
  • Please follow all steps above or your link will be deleted.  If you notice that you’re link disappeared, please make the correction according to the rules above and re-link!
  • Enjoy and be inspired!

~*~*~*~
Reminders:  
Last day to enter for the $100 True Value gift card and/or the True Value Design SOS (enter to win $2500 True Value makeover for YOU and a friend!). More details here!  Not many entries for the $100 True value gift card  or the mystery prize (just takes a comment about your design SOS, minor/major/little/big – let’s hear it)!
And…double check your DIY projects.  Have you used a DIY Club sponsor product? 
DIY Club

  • Rockler
  • Gorilla Glue
  • PK Glitter
  • Deco Art
  • Mythic Paint
  • Dischangers
  • Cutting Edge Stencils
  • Design Divas 
  • Dremel
  • Orchid Ceramics
If so – head over and link up! You’ll be entered to win a prize pack valued at $1500 – it’s a DIY’ers dream prize! 🙂
 *~*~*~*
HURRY!  Owens Corning is currently running a contest called ‘That’s My Roof!’ (http://www.thatsmyroof.com)Until October 31, 2010, purchasers of a new roof with the company’s Duration® Series Designer Colors Collection shingles can submit a photo of their new roofs and be entered to win monthly $500 prizes or the grand prize: a refund for the cost of the new roof!

You can also take this fun online quiz to determine your own roofing color personality. 


DIY Show Off Fall Festival #5 (Fall Mantel Inspiration)

HAPPY FALL! It’s official!  I’m celebrating by heading to the Country Living Magazine Fair in Columbus tomorrow morning!  If you’re going, be sure to check out the DIY Club at the Gorilla Glue booth!  Woohoo!  I’d love to meet you and you’ll see our projects featured there!  So exciting!
I HOPE TO SEE YOU THERE!
I went through the previous Fall Festivals to feature Fall Mantels this week.  Our tv is over the mantel in our living room so decorating is tough but here is what I did last year (remember when my walls were red?!).  Maybe next week I’ll decorate with the new wall color – can’t wait!  Last year:


Mantel shelves last year:

Looking for fall mantel inspiration? Check out these ideas.  Please click the link to be directed to the original post.

This is great inspiration for when your tv takes up most of the mantel space. Simple. Beautiful.
If you don’t have a mantel – create a similar look with a decorative shelf or existing nook/niche/ledge.

IMG_20100910_215916

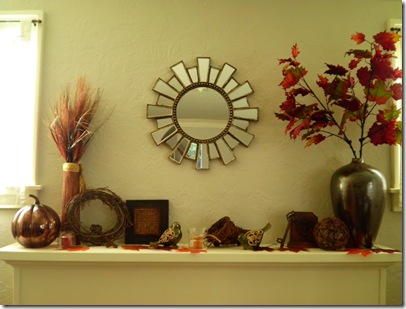
Use a mix of existing fall decor to create a beautiful display.
SANY0271
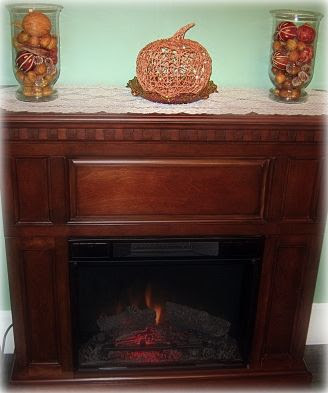
Who’s says you need a fireplace? Love this!
Now this is my kinda mantel! I could look at this for hours.  She did a beautiful job!
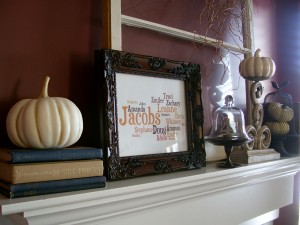
I love her word art!

So warm and inviting!

My favorite mantel maestro has always been Sarah from Pewter & Sage.
Beautiful!

More fall mantels linked in the party below!


Show off your Fall projects!

Rules:
  • Create a blog post about an Autumn/Fall project that you’ve done
  • Add your project title to Mcklinky (example: House # Pumpkins)
  • Type in the permalink address, not your basic blog address. A permalink is the address that links directly to your specific post. (example: http://thediyshowoff.blogspot.com/2009/08/house-number-pumpkins)
  • Please use the DIY button or link to this post to share the party with your readers.
  • Although a tutorial is helpful, it’s not required. Anything DIY – autumn related is permitted.
  • Please follow all steps above or your link will be deleted.  If you notice that you’re link disappeared, please make the correction according to the rules above and re-link!
  • Enjoy and be inspired!