Meet: Catie, a wife and mom and DIY girl who blogs about her DIY, cooking, decorating and whatever else she feels like talking about. My favorite type of blog! Variety!
Even with our farmhouse style, a fun DIY sunburst mirror makes me smile. Besides, our home is a design mutt…we just do what we love and I’d love to make one for our home. Anyway, here’s Catie…
Ok, so I did it. After months of drooling over other’s DIY sunburst mirrors I finally decided to make one myself. Fortunately for me I had the perfect little round mirror to start with. I’ve seen other blogs where they used a mirror and embroidery hoop as the “base” of the project, but I didn’t have to worry about that. My mirror was gold to begin with and the back is just like a frame, it comes off and the mirror comes right out. (I was too anxious to get started and didn’t even think to take before pictures. heehee)
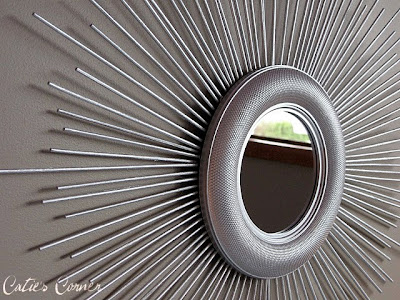
I started with a package of 100 kabob skewers and a hot glue gun. First I glued on the N, S, E, W sticks and then I went from there. With a pink marker I’d mark the length on a bunch of sticks to make sure they were going on at the same length. After a while I found I was repositioning them and it didn’t really matter if they were marked or not, but it did help at the beginning, so I would recommend doing it. For the shorter sticks, I had to break a couple inches or more off so they weren’t overlapping. I was amazed how the sticks kept adding up and adding up. After using the entire package I had to dip into an already opened one I had already. There are over 100 hundred skewers on there!! To hang it I doubled up a piece of wire and glued it on the back. Lastly I spray painted it with Krylon’s silver.
| She ain’t pretty from the back!! |
| See the pink marks? |
And the big revel. Drum roll please…..
| LOVE!!!!! |
Isn’t she gorgeous??? I’m in love, for real. Is it wrong to love a mirror? In this case, I think no. I can’t believe how well it turned out. Our bedroom is slowly coming together and this baby just made the biggest impact on the overall look. I thought I’d add, this mirror only cost me $6 to make. That’s right! I had the mirror, so that cost nada. The sticks were a buck and $5 for the spray paint. Now that’s what I c
all DIY on the cheap. The side tables in this room have been changed. If you’d like a peek at the new cuties click here and here.
all DIY on the cheap. The side tables in this room have been changed. If you’d like a peek at the new cuties click here and here.
Beautiful job, Catie and your bedroom is looking so pretty!
Visit Catie at Catie’s Corner.
One of my favorite features is her new:

It’s where I love getting wardrobe ideas like this one…you can see me in this, right? Keeping warm and stylish!

Now excuse me while I head over to visit her. She has a fabulous giveaway going on and I want to enter!
~*~*~*~
HAPPY BELATED {21st!!! lol} BIRTHDAY, CATIE!!!
Celebrate all weekend long! Eat lots of cake!
~*~*~*~


Thank you, thank you, thank you!!! I know, I'm a dork. haha : )
~ Catie
This is stupendous! Cheap and stylish. I love the combination.
YAY! We love Catie and we are so thrilled to see her featured here Roeshel! 🙂
Vanessa
What a clever idea! I love it!
Catie did such a great job on the mirror! Hope you gals have a grand day. Toodles, Kathryn @TheDedicatedHouse
super fabulous outfit…that purse is soooo GREAT!