Good morning! I posted about these projects at The DIY Club a couple of weeks ago but I want to share the tutorial here too. 🙂
For Mother’s Day this year, I made two outdoor signs for my mom. She loved them!
Materials:
Wooden Plaques
Fabric
Vinyl letters/stencils
Minwax Polycrilic
Dowel rod
2 screw eyes
Tools:
Paint brushes
Rockler Bench Cookies
Here is how I made them. I had the opportunity to use Deco Art’s Patio Paint. It’s specifically designed to hold up outdoors in different weather conditions.
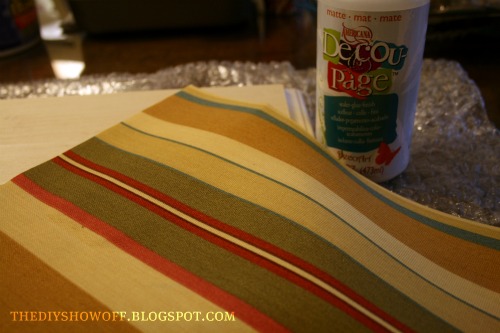
My mom purchased this Waverly fabric last year to recover her swing and outdoor cushions.
I cut a piece of fabric to fit the top of the wooden plaque.
Apply a layer of Decoupage to the top of the plaque.
Smooth the fabric into place (the Decoupage acts as a glue).
Coat the fabric with a layer of Decoupage.
It goes on white but dries clear…
Rockler Bench Cookies elevate my projects and make painting so much easier!
Deco Art Patio Paint is perfect for outdoor crafts!
I painted the frame using the pretty “Larkspur Blue”.
Let paint and decoupage dry.
For this project, I used vinyl for my lettering. You could also use stencils and paint or free hand if you’re good at that sort of thing.
I applied another coat of Decoupage over the vinyl lettering to seal.
Once the Decoupage was dry, I sealed everything with Minwax Polycrylic.
All done. I used two screw eyes and ribbon at the top for hanging.
It’s hanging by two small chains from her top deck as a sign to the bottom pool patio underneath.
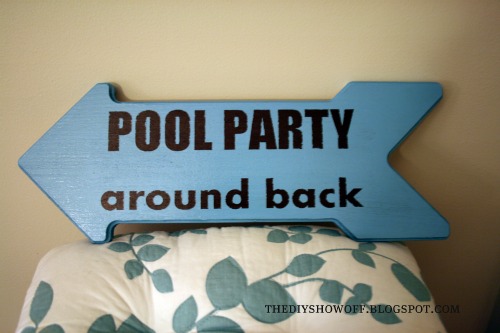
When there’s a pool party going on, my mom handwrites a note and tapes it to the front door to direct guests to the back yard. I thought a yard sign leading the way would be a fun idea.
I painted a wooden plaque in the shape of an arrow using Deco Art’s Patio Paint in Woodland Brown.
Just the front/top side.
This time I applied my vinyl letters…
(bench cookies!)
and painted the entire sign using Larkspur Blue Patio Paint.
I painted over the vinyl ‘sticker’ letters.
Then pulled them off when I finished the coat of blue, revealing the brown underneath.
Finish with a coat of Polycrilic.
All done!
For the arrow sign, on the back I made a “welcome” so she could just turn the sign when there’s no party going on.
I don’t have pictures of this step, but drill a hole in the bottom of the arrow sign. Insert a little Gorilla Glue into the hole and insert the dowel rod. The arrow post sticks into the ground and is positioned in the front yard.
I can’t wait for the long Memorial Day weekend to get here – POOL PARTY! What are your holiday weekend plans?


The are cute. I want to do a large one over my french doors in the pool house.
These are way cute! I could see a Don't pee in the pool sign…..
Nice tutorial with lots of great pics! Thanks!
So cute!!
Love the DIY touch!
Deborah xoxo
Pingback: Prepping our pool for summer | Feed Your Health
Pingback: How to make a DIY distressed painted wood plank signDIY Show Off ™ – DIY Decorating and Home Improvement Blog