Happy Wednesday, DIYers! Meet: Stephanie from
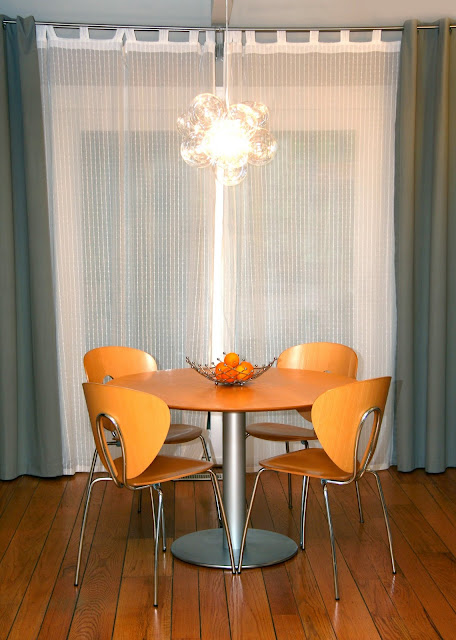
Today she’s sharing her totally fun bubble ball chandelier tutorial!
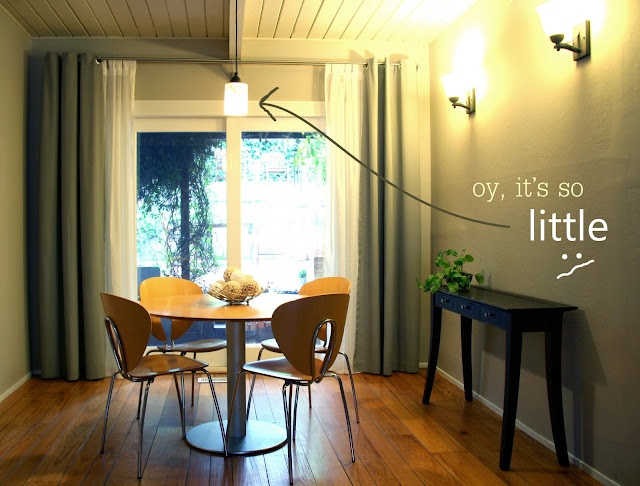
The pendant light that came with the house was, um….small. Observe:
She first spotted the bubble chandelier’s likeness on a trip to CB2, where it was hanging in the store with no price tag. Stephanie and her boyfriend jumped on the computer as soon as they got home and googled it. What they found was that a designer named Jean Pelle originally came up with this whimsical lamp in 2008 using glass spheres from CB2. The best part about it is that she was originally featured in Readymade magazine, which included the FULL step-by-step DIY tutorial!
Stephanie gives a step-by-step that focuses on the changes they made and clarifying some of the more vague parts in the tutorial.
Materials:
- 8 large and 6 small bubble balls (CB2) – $47
- 4″ clear light bulbs (Amazon.com) – $15
- 3 porcelain sockets with exposed wires (any hardware store) – $10
- Canopy kit (any hardware store) $6
- Lamp cord (cut to desired length) $1
- White electrical tape – $3
- Clear fishing line – already had
- 14 white-coated paper clips – already had
- Thin cotton string – already had
- TOTAL COST: $82
NOTE: This was their first serious electrical project with real electrocution potential, so they did a lot of research before diving in and recommends you do the same.
They started off by screwing some light bulbs into their sockets and padding them with paper since they would be handling them a lot during the wiring process.
Now the important thing to remember when dealing with wiring is to put all the blacks with the blacks and the whites with the whites. Your lamp wire will also have two wires that may or may not be colored. In their case, they went for a clear lamp wire which did not have the helpful colors, so they just had to remember which side was which (marking with a Sharpie helped). One of these will connect to your bunch of black wires and the other connects to your white ones. Gather wires together and strip the plastic casing from the tips. Twisted these together and wrap them with electrical tape. They also wrapped the black wires with white electrical tape.
Once you have a cluster of light bulbs assembled, it’s time to hook it up to the power. TURN OFF THE ELECTRICITY before you stick your hands anywhere! Then unscrew the old canopy. Hook up the new soon-to-be chandelier, making sure to trace the black line and white line through the clear wire, cover it with the new canopy and switch the power back on.
Now we were finally ready to start hanging up some bubble balls. Instead of the acrylic rods that the recipe calls for (you can find these on Amazon, but note that 1/4″ rods will be too big to fit through the holes in the bubble balls; go for 1/8″) , they went with white-coated paper clips bent into the shape seen below and used a fishing knot called a “trilene knot” to secure the fishing line to the paper clip.
I used the same trilene knot to secure the other end to the lamp cord. You’ll notice here that they wrapped the “business area” where all the wires connect with very thin cotton string (over the electrical tape). The reason for this is two-fold: 1) it keeps the various loops of fishing line from sliding down and 2) it will help hide the stray ends of fishing line when everything has been hung (more on that in a bit).
Here’s some progress. Four large bubble balls have been hung! They highly recommend two people for this part, one to hold the ball in place and the other to tie it to the cord. (If you’re wondering where the black wires went, they wrapped them with white electrical tape too).
They have plans to swap out the sconces too!
Once they secured all 14 of the bubble balls, it was time to clean up this mess:
As you can see in the above photo, Stephanie left myself a generous length of string at the top and wound it back down around the cord. As she worked her way down, she hid fishing line ends under the string. This process is delicate and tedious, so be careful!
So that’s how they did it! Here it is in the room:
And a little before-after action:
Awesome!
I love it! See more details and information on this tutorial at Swing~n~Cocoa. You might also want to snoop around and check out her other fun DIY projects!
~*~*~*~*~
Dont’ forget to enter the $50 American Express gift card giveaway and see the dressing room reveal!


How lovely!
Vanessa
I’ve seen TONS of these for sale, and it’s awesome to see someone posted a DIY tutorial!!!! NOW, it’s affordable! Thanks for all these awesome ideas. I can’t wait to check her out!
i love it 🙂
This is so groovy!
Thank you so much for the feature, Roeshel! I encourage anyone who wants one of these to try it out. It’s much easier and quicker than I thought it would be and I think you will find this the case as well. Even the original designer, Jean Pelle, said she gets excited when other people copy her chandelier.
If you prefer to buy, however, she sells them in her Etsy shop for a fairly reasonable price:
http://www.etsy.com/shop/PELLEshop
Thanks again for the feature!
That’s very cool, I like the fact that it’s so easy to do. I’m a home lighting enthusiast, this is going in my arsenal.
: )
fantastic! so nice of stephanie to leave the original source’s etsy shop, as well!
Very cool – love it!
wow!!!
fantastic idea 🙂
xo
Wow that looks amazing!! I can’t wait to give this project a go on the weekend. Thanks for sharing 🙂 – Cathy Pieroz at Ray White Alexandra Hills
I am going to do this for sure. I was wondering if you leave it on a lot? Those bulbs are so thin, I get anxious about having such hot bulbs next to the thin glass… Could it shatter? Do you leave it on for long periods of time?
Hi Christina! I’m not sure since this was a DIY feature. Please visit the link to the original post/blog. I’m sure she’ll be able to answer your question! 🙂