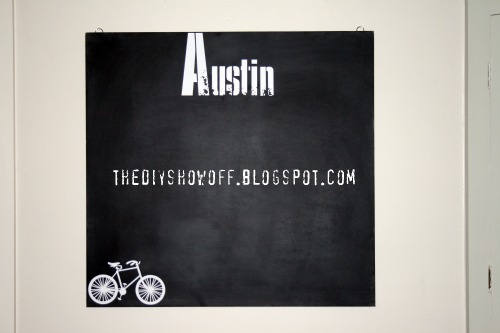
My nephew’s birthday is coming up soon. Being a mom to two girls, I’m a little clueless when it comes to boys. However, we’ve had a piece of chipboard from furniture packaging just sitting around waiting for a DIY idea. I decided to make my nephew a personalized chalkboard for his birthday.
Materials:
Recycled chipboard (Could also be directly applied to smooth walls with taping off a blackboard shape.)
Decor Art Americana Chalkboard Paint
Dischangers x 2
Gorilla Glue tape – Handy 1″ Roll
Vinyl decals
Chalk and eraser
I found that using an Xacto knife to remove intricate parts of the vinyl design is more helpful than using a fingernail.
I purchased the bike and LD Survivor font from the Silhouette online store.
~*~*~*~
THIS JUST IN – Miranda from Just Drink Coke is hosting a new linky party called
“The Reality Collection”! With the popularity of reality tv, she is hosting a party about real life – your beautiful mess. Like she says, it happens to the best of us. It happens to all of us. So share your beautiful mess – you don’t have to spend a lot of time making it like you do with DIY, it’s probably already made. She’s right.
My pictures above are close ups but below is me zooming out. I displayed the chalkboard on the dining room wall for photo purposes. I am more of an “organized messer”. This my beautiful mess. The others are ugly messes not meant for blog friends’ eyes! Trust me. You’d be scared.
Do you do this too – zoom the unwanted things out of your ‘after’ shots?
Share your reality at
Just Drink a Coke.
~*~*~*~


What a fun gift! I'm sure he'll enjoy it!
So cute!!! Love the font you used — perfect for a boy!
What a great gift. I'm sure he'll love it! I love the bicycle too, how cute!
Super duper idea…love the font!
Blessings,
Linda
Hey Roeshel!
Fun gift! I love how you aged the letters by removing pieces. Very cool effect! Great personalized gift for your nephew.
You just made me hungry for Girl Scout cookies 🙂
Have a wonderful weekend!
xo,
Michelle
Love the chalkboard, what a great idea and I bet he will love it!! I had to giggle at your picture, I so do the same thing! I throw things to the other side of the room or hide them behind chairs or zoom in!! 🙂 I love it!
Thanks for for the shout-out and linking your beautiful mess, Roeshel. My Reality Collection is striking a special cord in all of our hearts. We all just living this very real life together 🙂
Miranda
http://www.justdrinkacoke.blogspot.com