Family Room – sneak peek {repurposed headboard to door pediment}

The family room makeover has been on hold while we’re renovating the apartment but I wanted to share a little repurposed headboard project I finished up a couple of weeks ago.

Using an old headboard {a gift from Amber – thanks, Amber!}, Gorilla Wood Glue, Bessy ESZ Clamps (Rockler), TransTint Dye, vinyl stencil (created using Silhouette Cameo) and craft paint, I gave an old headboad a new purpose.

Here’s a little of what’s going on in the family room:

family room design

{see more about operation family room here}

The headboard was in very poor condition, broken and falling apart. I removed the legs and repaired the main wooden part of the headboard and added a stencil.

Before…{pardon the mess, it’s a work in progress!}
family room before
So easy! The space above the family room door just needed something, ya know? {French door color is Benjamin Moore Pacific Ocean Blue with a dark glaze}.
DIY pediment
Much better, don’t you think?
Happy Friday! Enjoy the weekend!
DIY Club Photobucket
Funky Junk's Sat Nite Special SouthernHospThriftyTreasures copy_thumb

DIY Show Off - FacebookDIY Show Off - TwitterDIY Show Off - PinterestDIY Show Off - Feed

Apartment Progress ~ floors are sanded!

It’s been a mega DIY couple of weeks here folks! Where I challenge myself to see just how much DIY I can squeeze into a tight deadline (6 wks.) in the apartment renovation. Sounds like work to most people I know but for me, I say “let the fun begin!”. This rental is my life sized mini-doll house! Here’s an update:

how-to-sand-hardwood-floors

{graphic courtesy of Fox Hollow Cottage}

Apartment Progress!

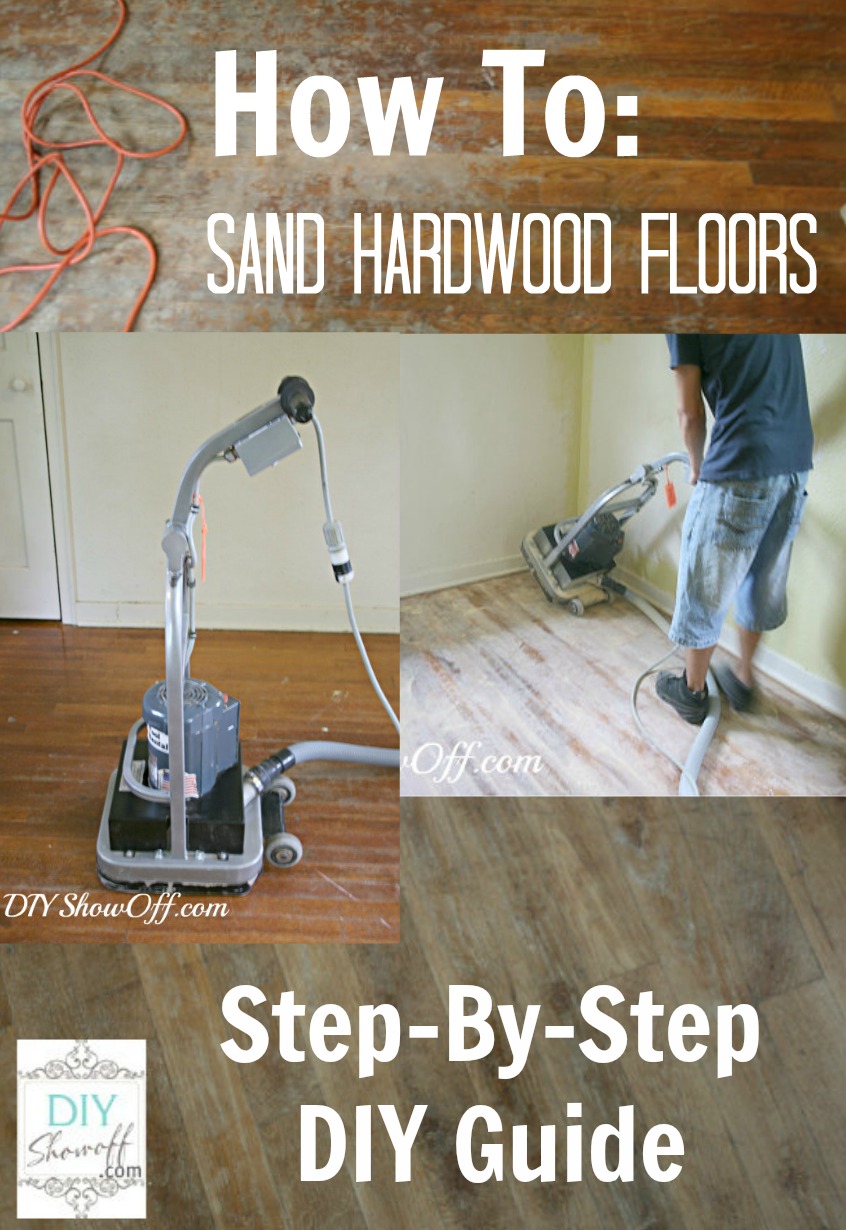
I rented an orbital sander and I enlisted the help from my 19 year old nephew, Kaleb. {muscles, people – I don’t have them!}

orbital sander

HOW TO SAND HARDWOOD FLOORS

{How we did it.}

  1. Floors were cleaned.
  2. Floors were sanded (24 grit) with the orbital sander. Thank goodness my nephew helped because I seriously doubt I could have carried that thing up the stairs and from the looks of it, once the power was turned on, that thing had a mind of it’s own and took off! I know my limitations. And orbital sander wrangling ain’t one of them. Paying a nephew was a wise choice. Much better for Kaleb to restrain the monster sander than me being spun around in circles and crashing through walls, gouging the floor as I go. (It really wasn’t that bad…I’m just little and wimpy but most people would control the orbital sander without difficulty.)
  3. I swept up the dust.
  4. Then he sanded again (60 grit).
  5. Then swept.
  6. Then sanded again (120 grit).
  7. Then swept again!
  8. I used my Dremel Multi-Max and a palm sander where needed in corners, under radiators and around the edges where floor met baseboards. My little muscles could handle those guys. I did the edging with the 3 levels of sandpaper.

{Please don’t mistake these legs for mine…they’re Kaleb’s!}

how to sand hardwood floors

I really don’t know anything about the previous renter/owner. Perhaps their situation wasn’t so easy, but they definitely were not clean and did some damage.

hardwood floors before

So, floors are now sanded!

sanding hardwood floor

There’s a method to my out-of-order renovating madness. I sanded the floors first before painting the walls because I didn’t want to have to scrub the walls twice (1 – the grime before and 2 – after sanding due to the fine layer of saw dust after sanding floors). Next up is covering the floors and painting the ceiling, walls then trim because I don’t want to lose the weekend waiting for the floor stain to dry.

As you’re reading this, I’m probably at the rental DIY’ing! More to come!

Oh! Hoping for better pictures in the near future. I always have trouble making what I’ve learned ‘stick’ and resort to shooting in auto but I sat in on the Photography session at the Haven Conference and Josh and Kevin really had a way with making it more interesting.  I’m all signed up for Photography 101 to learn how to use my DSLR and to finally learn the skills to take better pictures…

ShootFlyShoot.com

I’m also giving their affiliate program a try and invite you to join me in learning! DIY Show Off - FacebookDIY Show Off - TwitterDIY Show Off - PinterestDIY Show Off - Feed

DIY Project Parade and patching holes

Mr. DIY installed recess lighting in our kitchen and one of the holes was put in the wrong spot.  No biggy.  Patching drywall is easier than it sounds. Please ignore the fingerprints. I always joke with Mr. DIY that he would not make it in a life of crime…he leave his prints everywhere!  Our ceiling is plaster and lathe.  We patch using drywall.

How to patch a hole:
1.  Insert a scrap piece of wood into the hole (for new drywall to attach to). If you’re patching a hole in the wall, you’ll need to add support or cut around the hole to a stud so that there is a way to support and attach a new piece.

2.  Screw the wood block into place.
3.  To get an idea of the shape/size of the hole, use a piece of paper to do a rough trace and cut small matching piece out of drywall (we have a lot of scraps).
4.  Secure the drywall into open hole using screws into the wood.
5.  Thanks to our friends at True Value, we used a drywall patch kit which consists of aluminum sticky mesh tape to help the drywall mud adhere.  
6.  Smooth on drywall mud (joint compound) in two even layers, allowing time to dry in between skim coats.
7.  Once dry, sand smooth.
8.  Apply a coat of primer and clean fingerprints if necessary. 
9.  Paint.
Can you tell where the mistaken hole was?  We can’t!
~*~*~*~

If your project is holiday related, please feel free to link up to the DIY Holiday Highlights party as well!
The DIY Show Off
If you’d like to link YOUR DIY project post to The DIY Show Off Project Parade:
1.You must use the button above and link to this post to share the linky love.
2.Include your name or blog name and project title. Add your permalink (not your blog url, but your DIY project post url). Feel free to link a Past Post, just invite your readers in a current post with a quick note.
3.Or email your link to thediyshowoff@gmail.com and I will add it for you.
4.If you notice your link has disappeared -please add the link back to The DIY Show Off to your post today, a button or a quick note to your readers about the party and try again! I love when everyone participates and readers check out everyone’s links, but I think the return favor of linking back is the nice thing to do so everyone plays fair and enjoys all of the projects and links. Also – this blog party is for DIY projects only. Links not related to DIY will be deleted.

*~*~*~*~*~*~*~*~*~*~*~*~*~*~*~*~*~*~*~
I was one of the bloggers selected by True Value to work on the DIY Squad. I have been compensated for my time commitment to the program as well as my writing about my experience. I have also been compensated for the materials needed for my DIY project. However, my opinions are entirely my own and I have not been paid to publish positive comments.
~*~*~*~*~

Once again…thank you for sharing our sorrow and comforting words for us during our loss of our doxie, Niski.  It means SO much to us!