Pantry Lighting Details

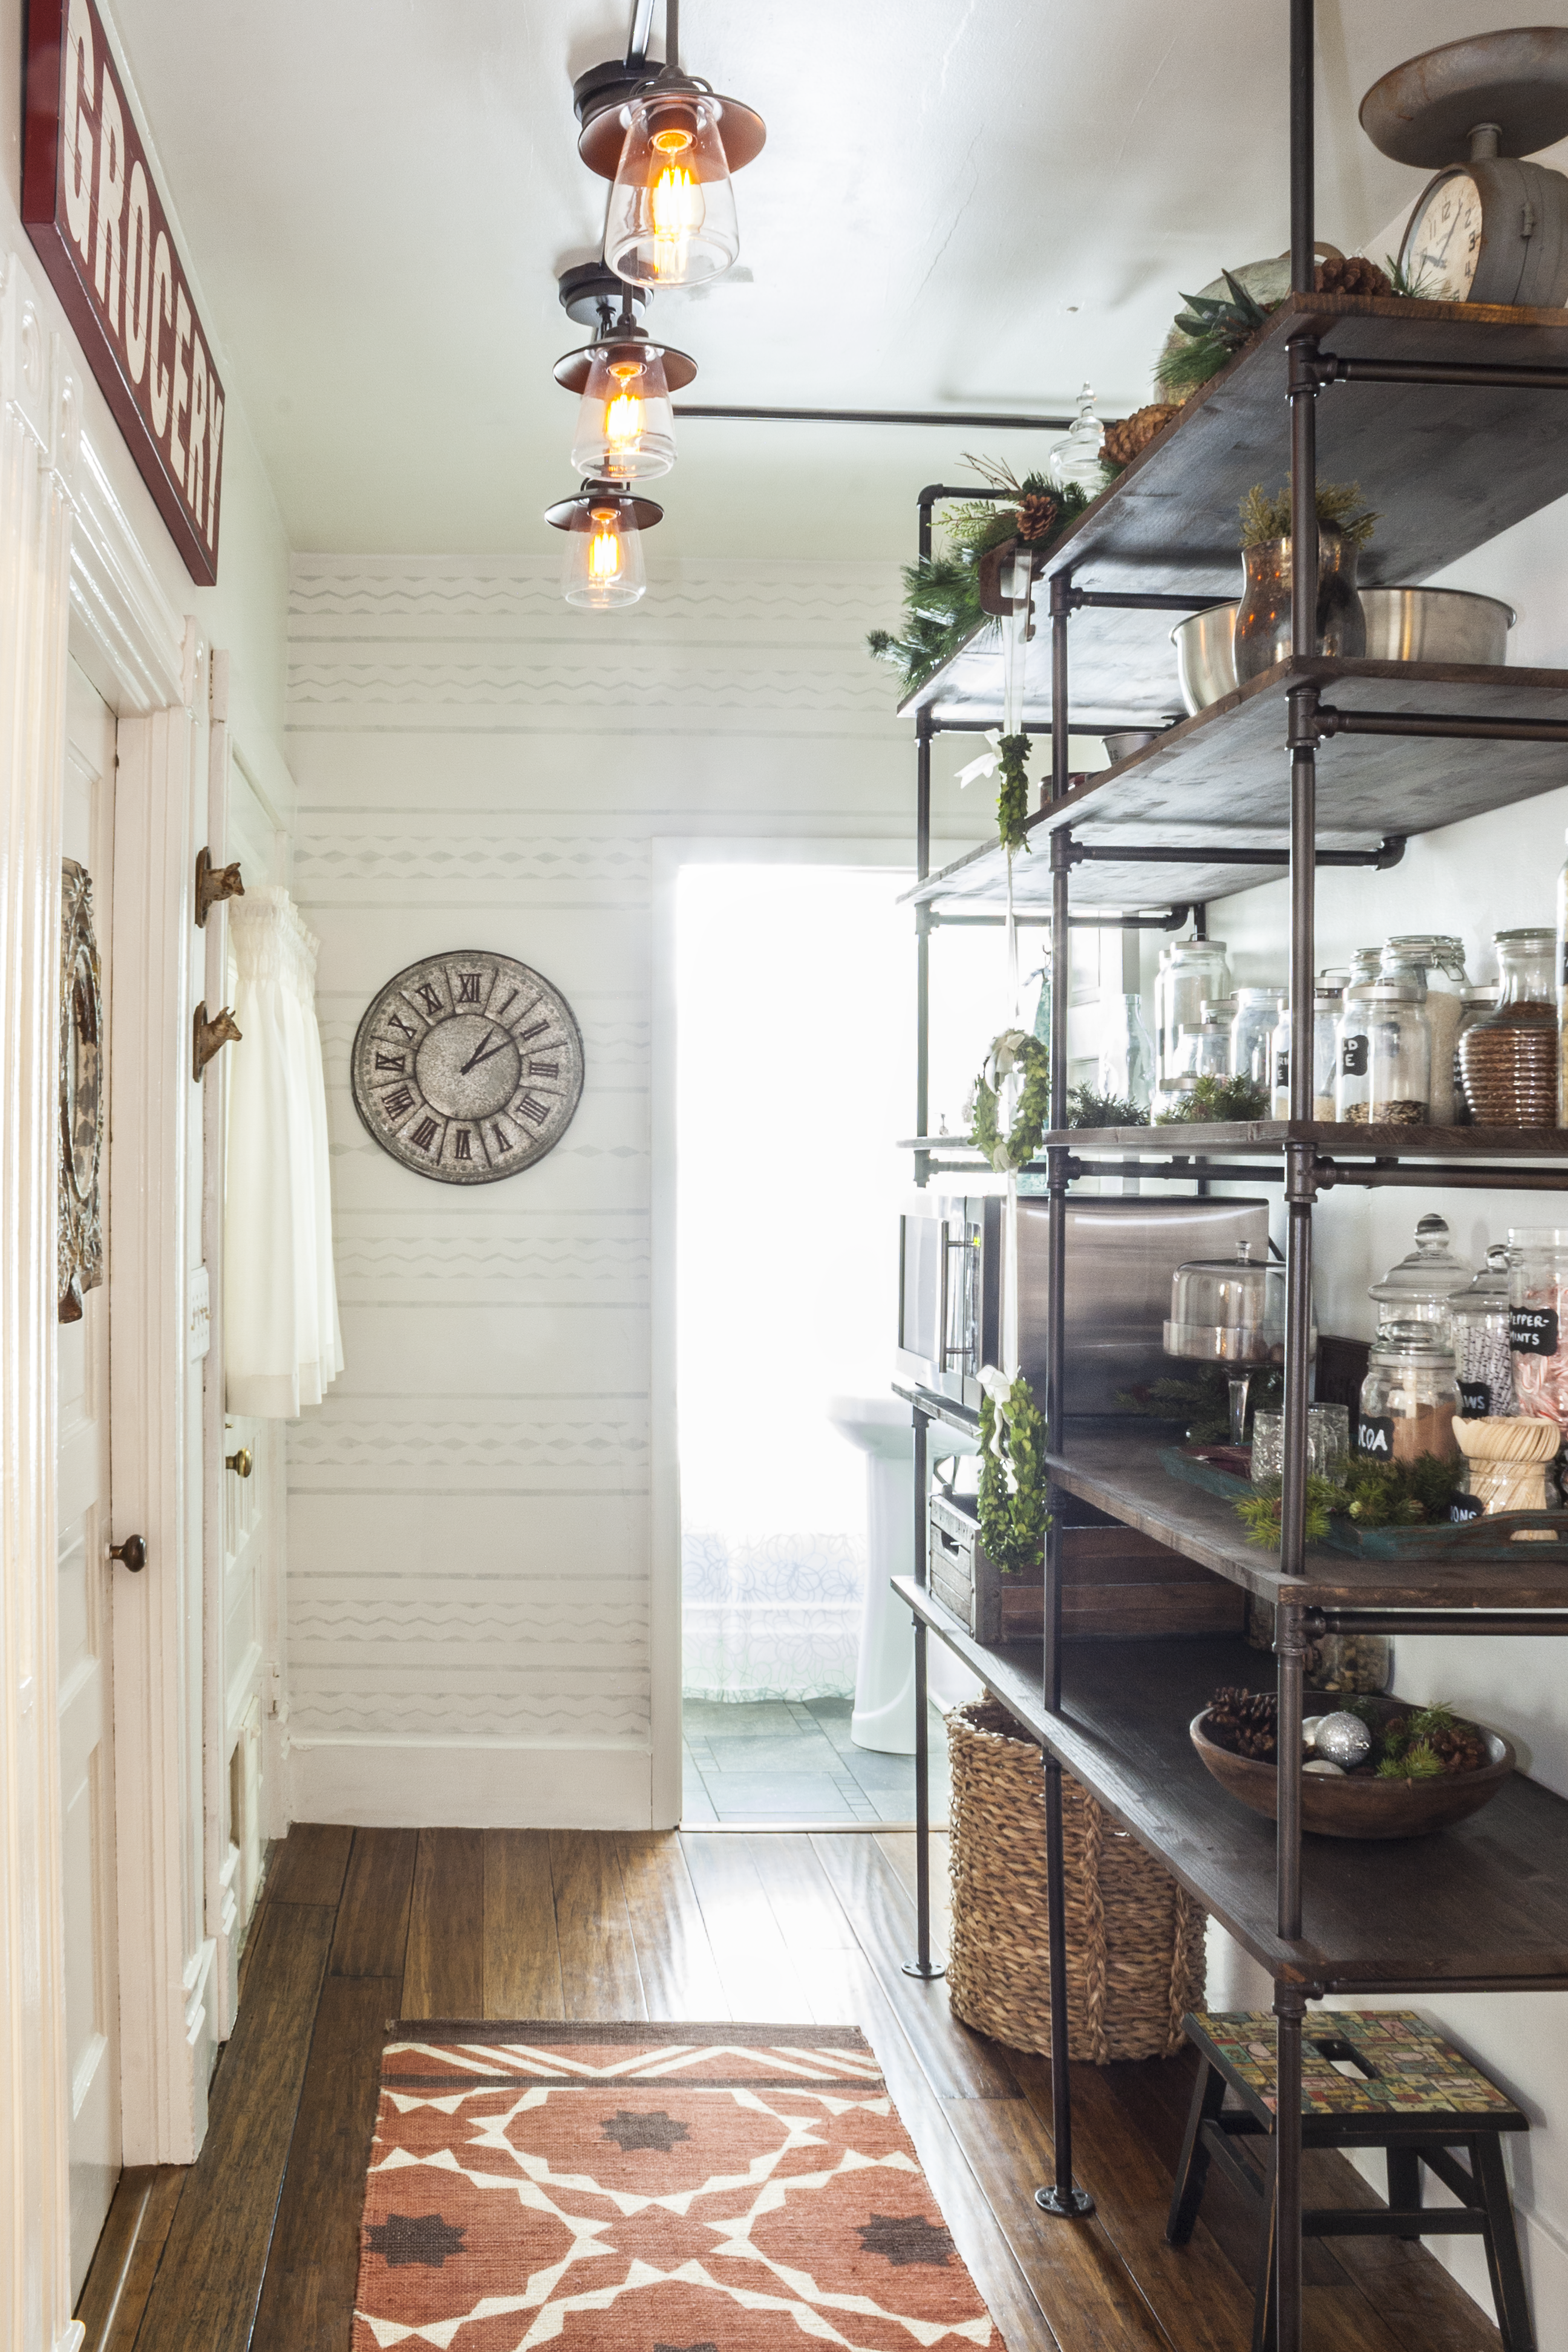
Some of you were wanting more details on the lighting when I shared the pantry reveal. The lighting in the open pantry area was a challenge. 1. There was no overhead/ceiling light to begin with. 2. Walls and ceiling are plaster. 3. Outlet was old and controlled by a switch on the wall. 

farmhouse pantry

Electrical work for the lighting was not DIY. My husband has installed recessed lighting in the kitchen but he was able to run electrical from the previously installed ceiling light, so it wasn’t quite so challenging. For the pantry area, no previous lighting meant pulling the wires from the wall to the ceiling. He started with drilling holes in the plaster wall and ceiling but the wood beam where wall meets ceiling had us realizing this job was ‘over our heads’ and not just literally. It was at this point that we decided to hire an electrician.

outlets

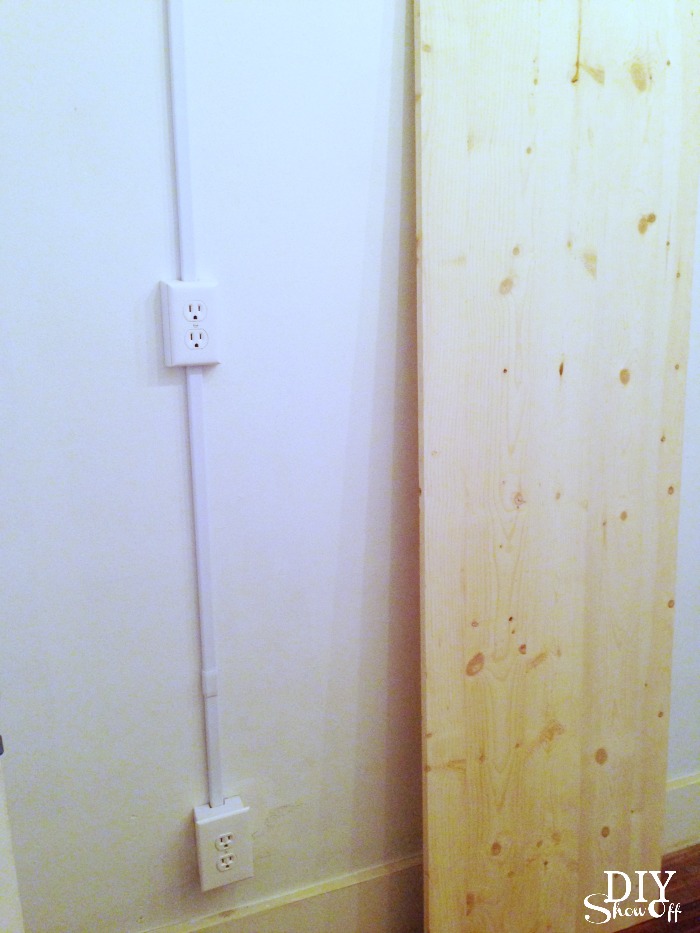
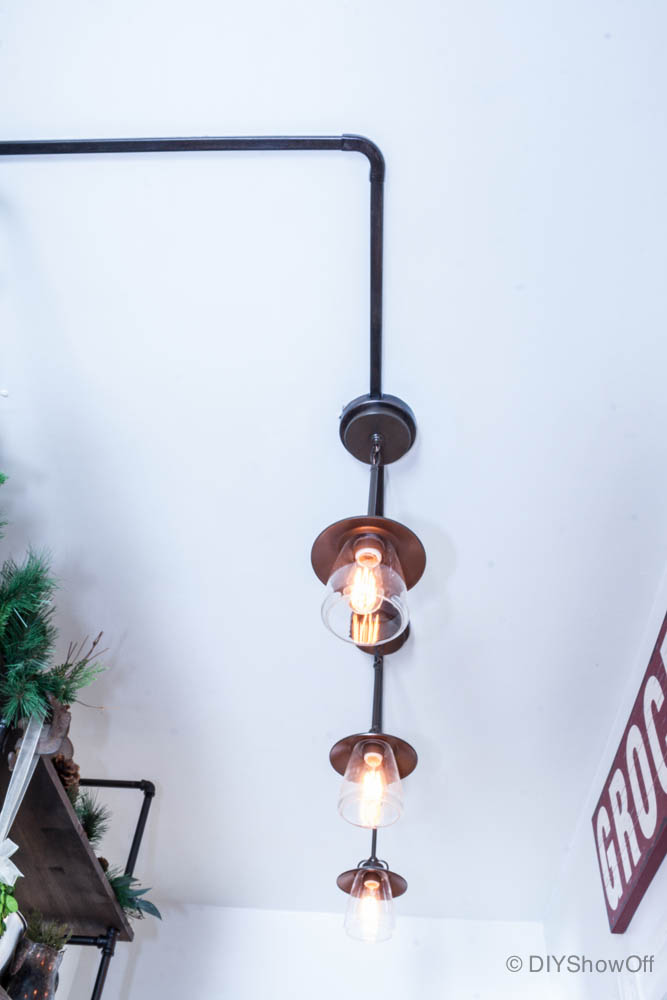
Then after some thought and to keep labor costs down, I let the electrician know that I wanted the wiring to run on the outside of the wall. He changed the old outlet near the floor (the old type that meant I needed an adapter anytime my plug had three prongs), added another outlet a little higher up to accommodate the microwave sitting on the pantry shelf (so I wouldn’t have to drill holes into the wood shelves for the cord to reach down to the lower outlet) and ran the lighting wiring up the wall, to the ceiling with a 90 degree turn to place the lighting. He also made the switch work for the lighting only, disconnecting the switch from the outlets. In hind site, I think this was something we could have done, but when in doubt, seek professional advice! 

connecting light fixtures

pantry lighting

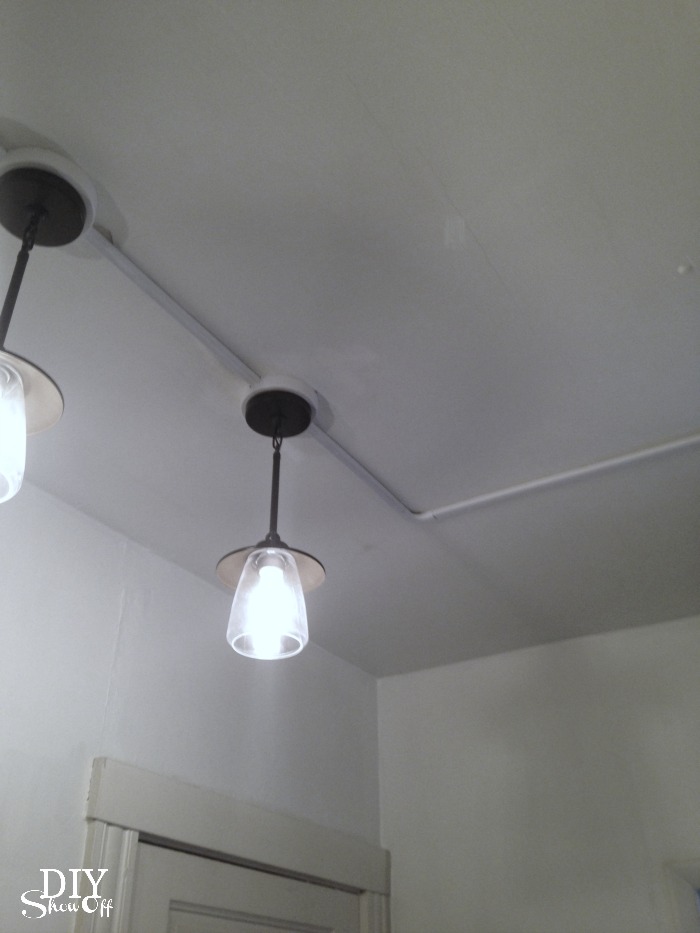
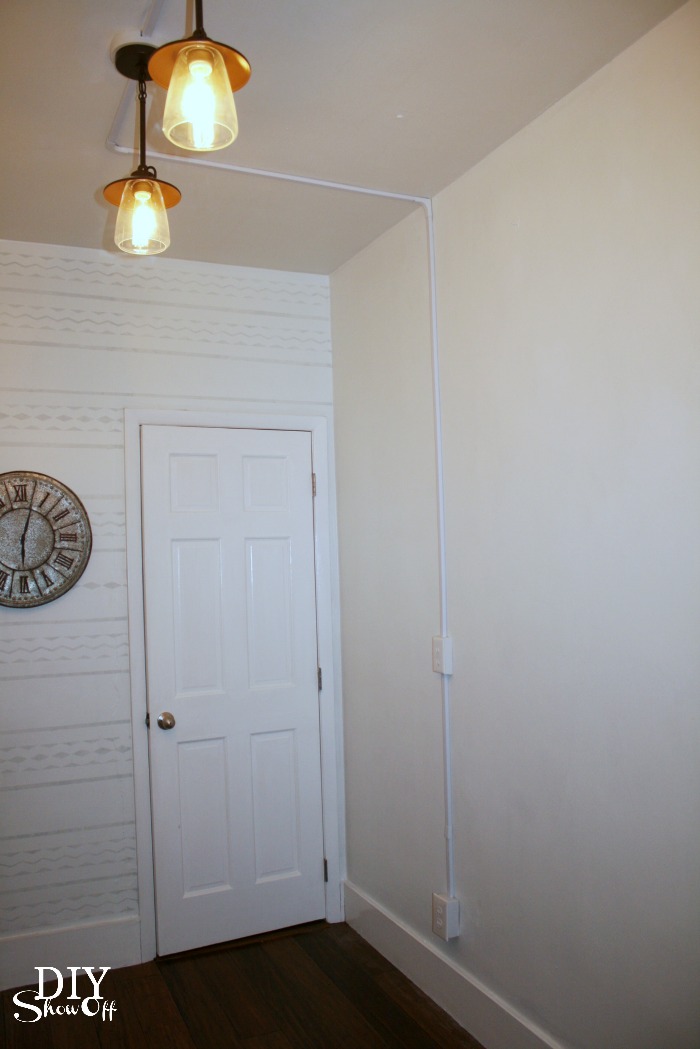
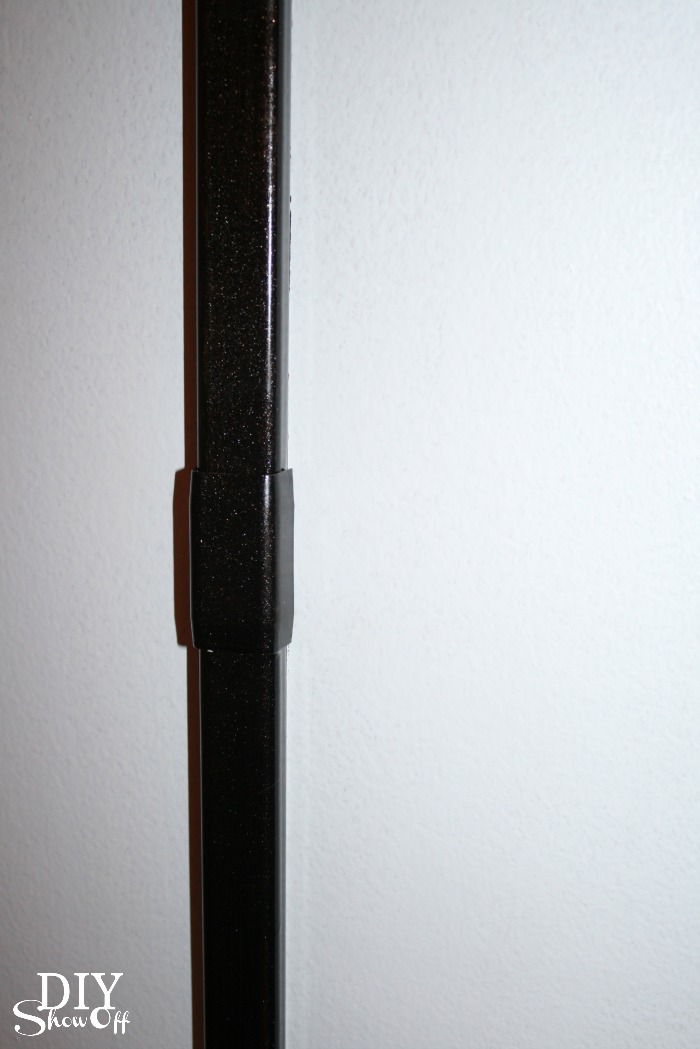
Cord covers for the wiring from outlets, along the outside of the plaster wall, along the ceiling and connecting each individual light fixture.

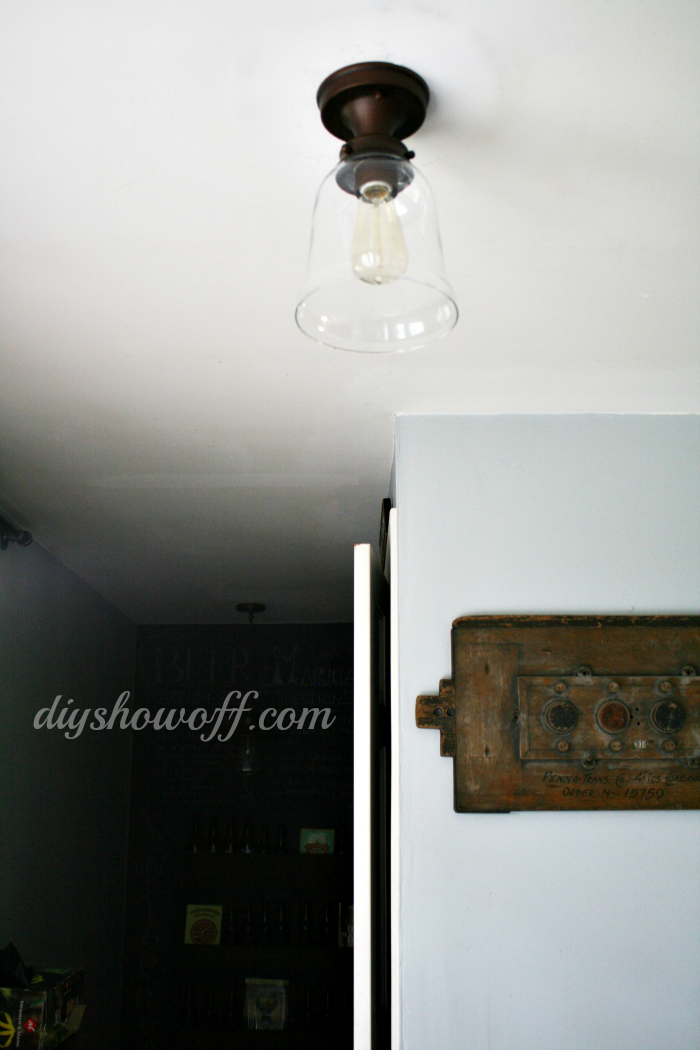
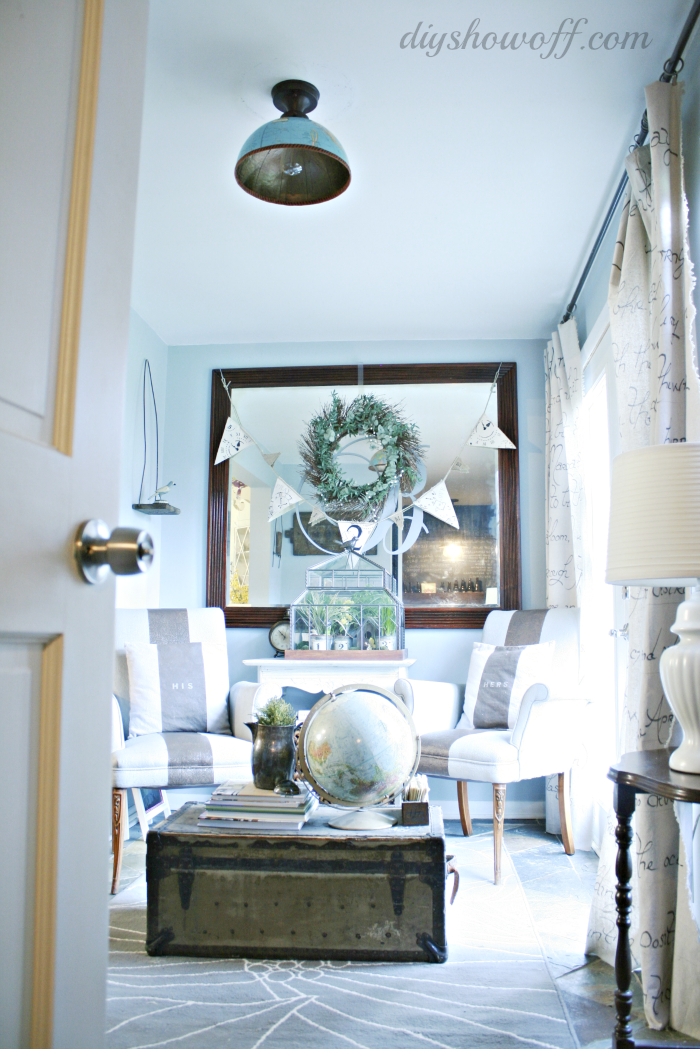
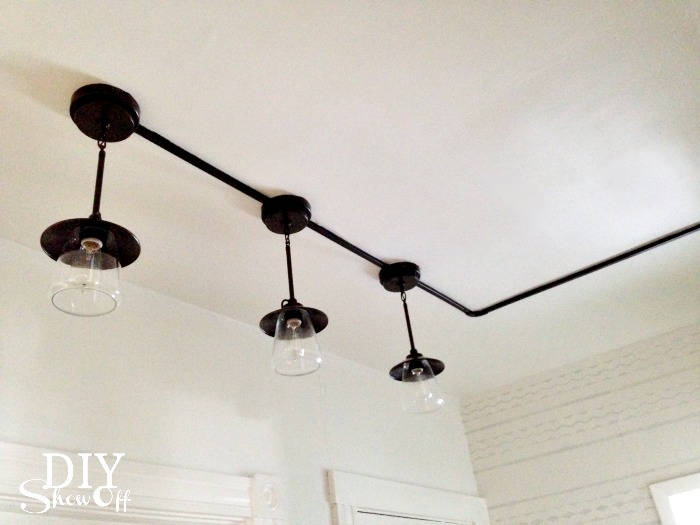
I centered the lighting from the front edge of the shelving to the other wall and since I chose pendant lights, I made sure they were out of the way of an opening door. 

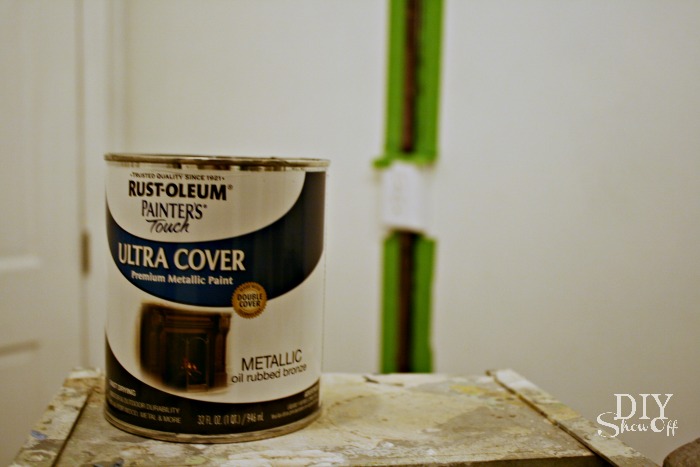
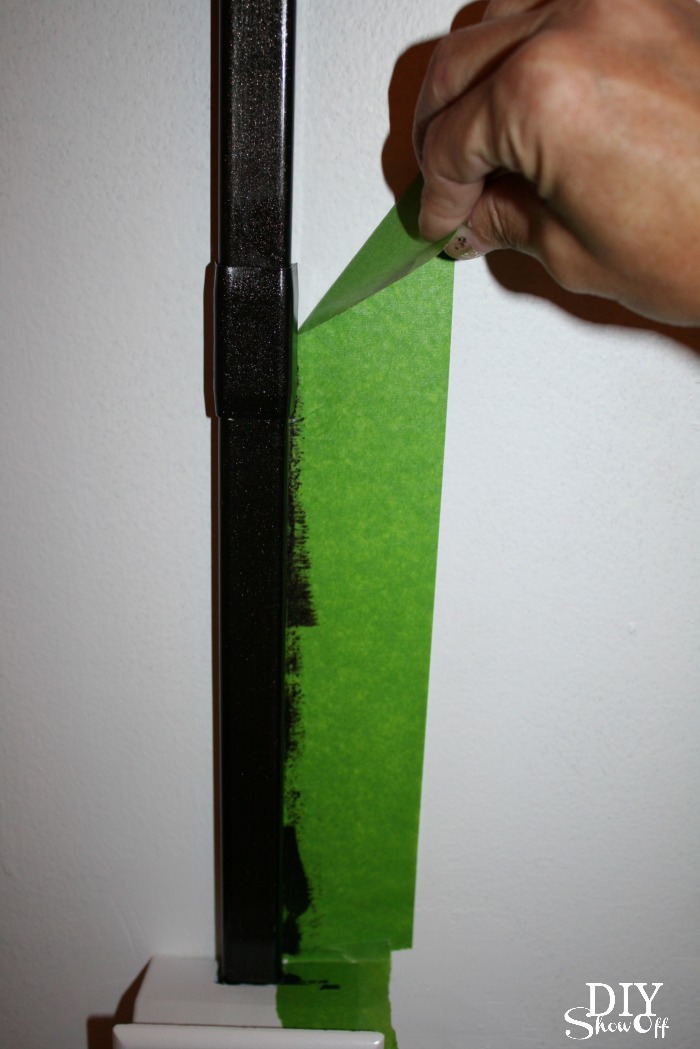
Then with the help of FrogTape® Multi-surface, I painted the track oil rubbed bronze.cord cover

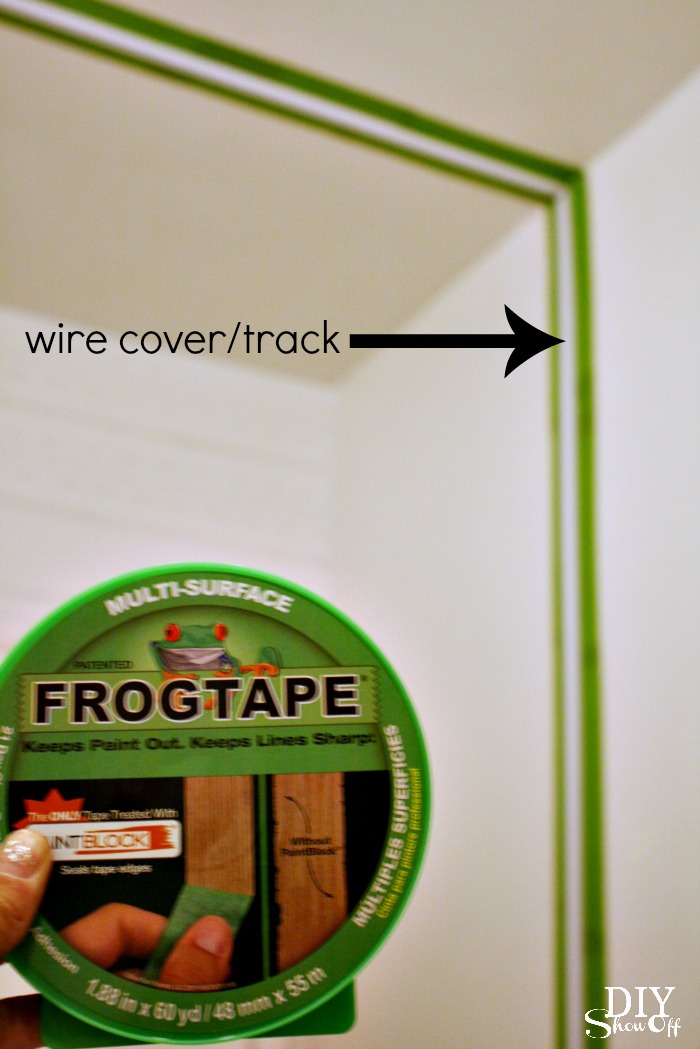
I simply taped off either side of the conduit track along the wall and ceiling with my FrogTape and used my thumbnail to activate the PaintBlock® Technology. Then just painted the track. The oil rubbed bronze paint is sticky since it’s oil based so drying time is longer but still worth the work. It took two coats. 

oil rubbed bronze paint

As soon as I finished applying the second coat, I removed the FrogTape. Nice and clean! Note: paint will take a long time to cure!

removing FrogTape

Painting the conduit the same color as the walls and ceiling would help disguise it more but I think the oil rubbed bronze against the white ceiling adds to the industrial charm, don’t you? Especially with the pipe shelving.

RustOleum Oil Rubbed Bronze

I love it!

industrial pantry lights with wall track

Project Supplies:

farmhouse industrial pantry lighting

 We also added a dimmer…

farmhouse pantry


{open pantry reveal}

FrogTape Blog Squad

Disclaimer: I received compensation to complete this project for using FrogTape® products. All opinions, projects and ideas are based on my own experience. See the  FrogTape® Blog Squad for more inspiration!

DIY {half} globe light fixture cover

DIY Globe Light Fixture Cover

After I completed the wall mounted-pallet shelf, I updated some of the light fixtures including the one in the sitting room…

allen-roth-edison-orb

Allen + Roth Edison Oil Rubbed Bronze

However, the glass on this specific light is very thin and it cracked during the final stages of assembly, just by screwing in the light bulb. The crack was located in such a way that it wasn’t safe. I feared the entire glass piece was going to come crashing down.

cracked-glass

So, one rainy day, I gathered some supplies from around the house and created a new cover? fixture? globe? well, northern hemisphere at least.

DIY-globe-light-fixture-cover-tutorial

Here is what I did:

Materials: 

  • LOW WATTAGE light bulb
  • old globe (I have an addiction. I can’t pass up a globe at the thrift store, thus a collection on hand.)
  • craft paint (I had DecoArt’s Patio Paint/rich espresso on hand.) A high heat/temperature paint is a better, safer option.
  • double fold bias tape (Again…I had brown left over from a patio cushion project.)
  • hot glue
  • Sharpie
  • Edited to add: Flameproof coating

Tools:

  • Utility knife
  • Needle-nose pliers
  • Scissors
  • Glue gun
  • Craft paint brush

I started by disassembling the globe by gently pulling the frame from the north/south pole. My globe popped right out.

globe

I also chose a globe that wasn’t in the best shape, so the north and south hemispheres just pulled apart. (Cut seam along the equator with a utility knife if needed.)

split-globe

Next, using a Sharpie, I traced the fitting (or draw a circle the size of where the globe will be held into place on the light fixture).

globe-light-tutorial

I used a utility knife to remove some of the map/cardboard and discovered a metal circle underneath. I was able to remove it with pliers. Then cut away the rest of the cardboard/paper with a pair of scissors.

globe-light-cover

I painted the inside of my globe and let it dry (well, sort of. I may have been too eager to move on to the next step)…

paint-inside-globe

Then attached the bias tape around the perimeter with hot glue.

gluing-bias-tape

Since I was impatient with waiting for paint to dry and had a little “oopsy”…paint on the bias tape, I used a Sharpie to create a design to distract from the accidental smudge. Imperfection adds character.

globe-light-border

Ready to install.

globe-ceiling-light-cover

Heading to the basement: This is also the path to the basement and I can breathe a sigh of relief that the cracked glass isn’t going to hurt someone when it comes crashing down or that it’s no big deal if my 6’2″ husband carrying a ladder accidentally hits the globe. I kept worrying he’d ‘ding’ that thin glass on his way through…now, it’s okay.

sitting-room-ceiling

It fits with the style of our sitting room too…

sitting-room

Easy enough.  (Would also work as a lamp shade…decorative only.}

half-globe-light-cover

 Mystikit: Purchase the materials and tools needed to make this half globe light fixture cover.

sitting-room-diy

*more DIY projects in this space:

 *This light shade is mainly decorative. In our home, it is rarely turned on for more than a few minutes at a time. Please do your homework and consider safety in your own home before using a globe as a light fixture. 

Sharing here:

Home Stories A to Z Tips & Tutorials party

So You think You’re Crafty

Weekend Bloggy Reading

View Along the Way ~ Capiz Shell Chandelier Pendant Look for Less

DIY {do-it-yourself} is often the way we achieve a more expensive look or way to obtain a similar budget friendly version of a product we love. Kelly from View Along the Way has an amazing example. She loved this $549 capiz light fixture from Horchow {rightfully so!}…

horchow capiz shell light fixture

Kelly achieved a similar look for a much more budget-friendly price using…

1. capiz shell tea light pendant from TJ Maxx

capiz shell tea light pendant

2. IKEA Januari lamp

Januari IKEA lamp

3. two ceiling canopies

ceiling canopy

Here is her beautiful DIY version…

DIY capiz shell chandelier

See the tutorial from Kelly at View Along the Way {please remember to pin from the original tutorial too}.

How to Make a Capiz Shell Chandelier Pendant.

View Along the Way

Kelly! This is so creative, so pretty and so clever! Beautiful job! Thank you for sharing!