The bathroom before and after is the biggest transformation of the #helloredreno series. A lot of hard work, sweat, (thanks, Steve!), tears and love went into this space. Ready for the bathroom before and after makeover reveal? Check it out!
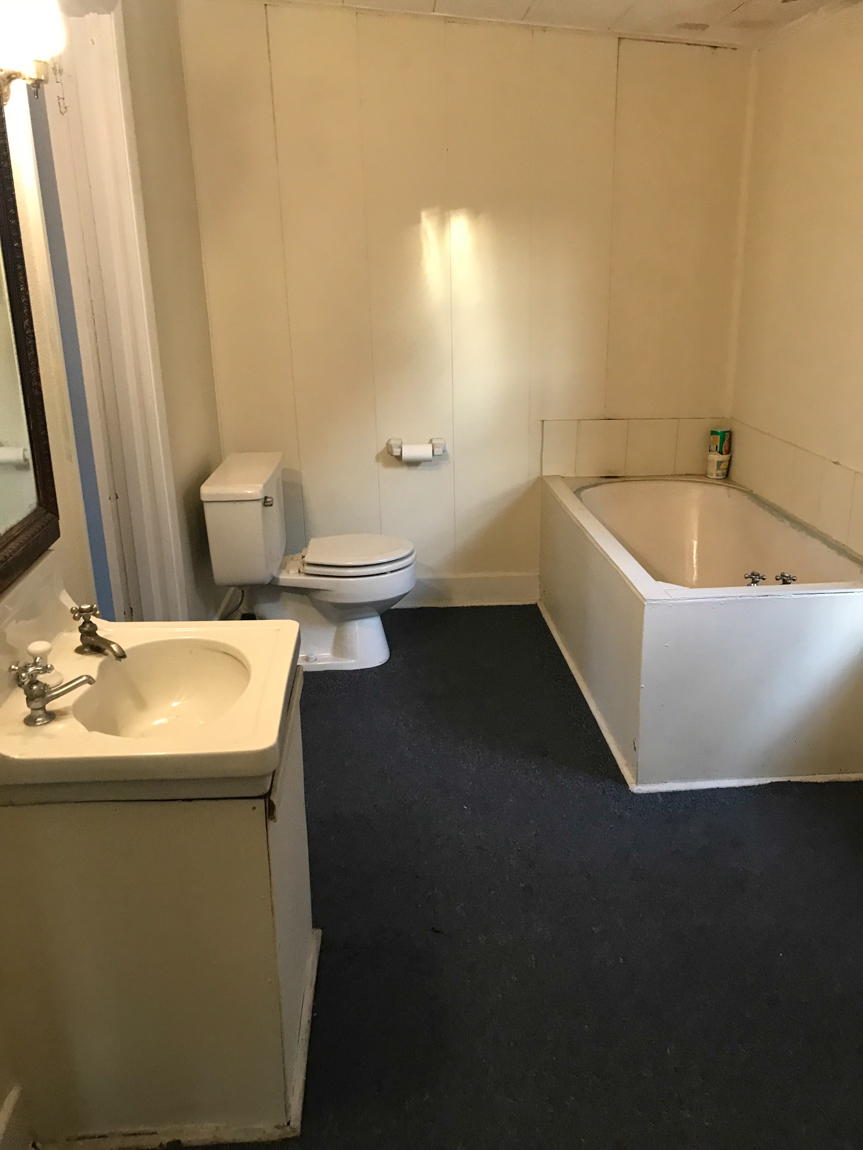
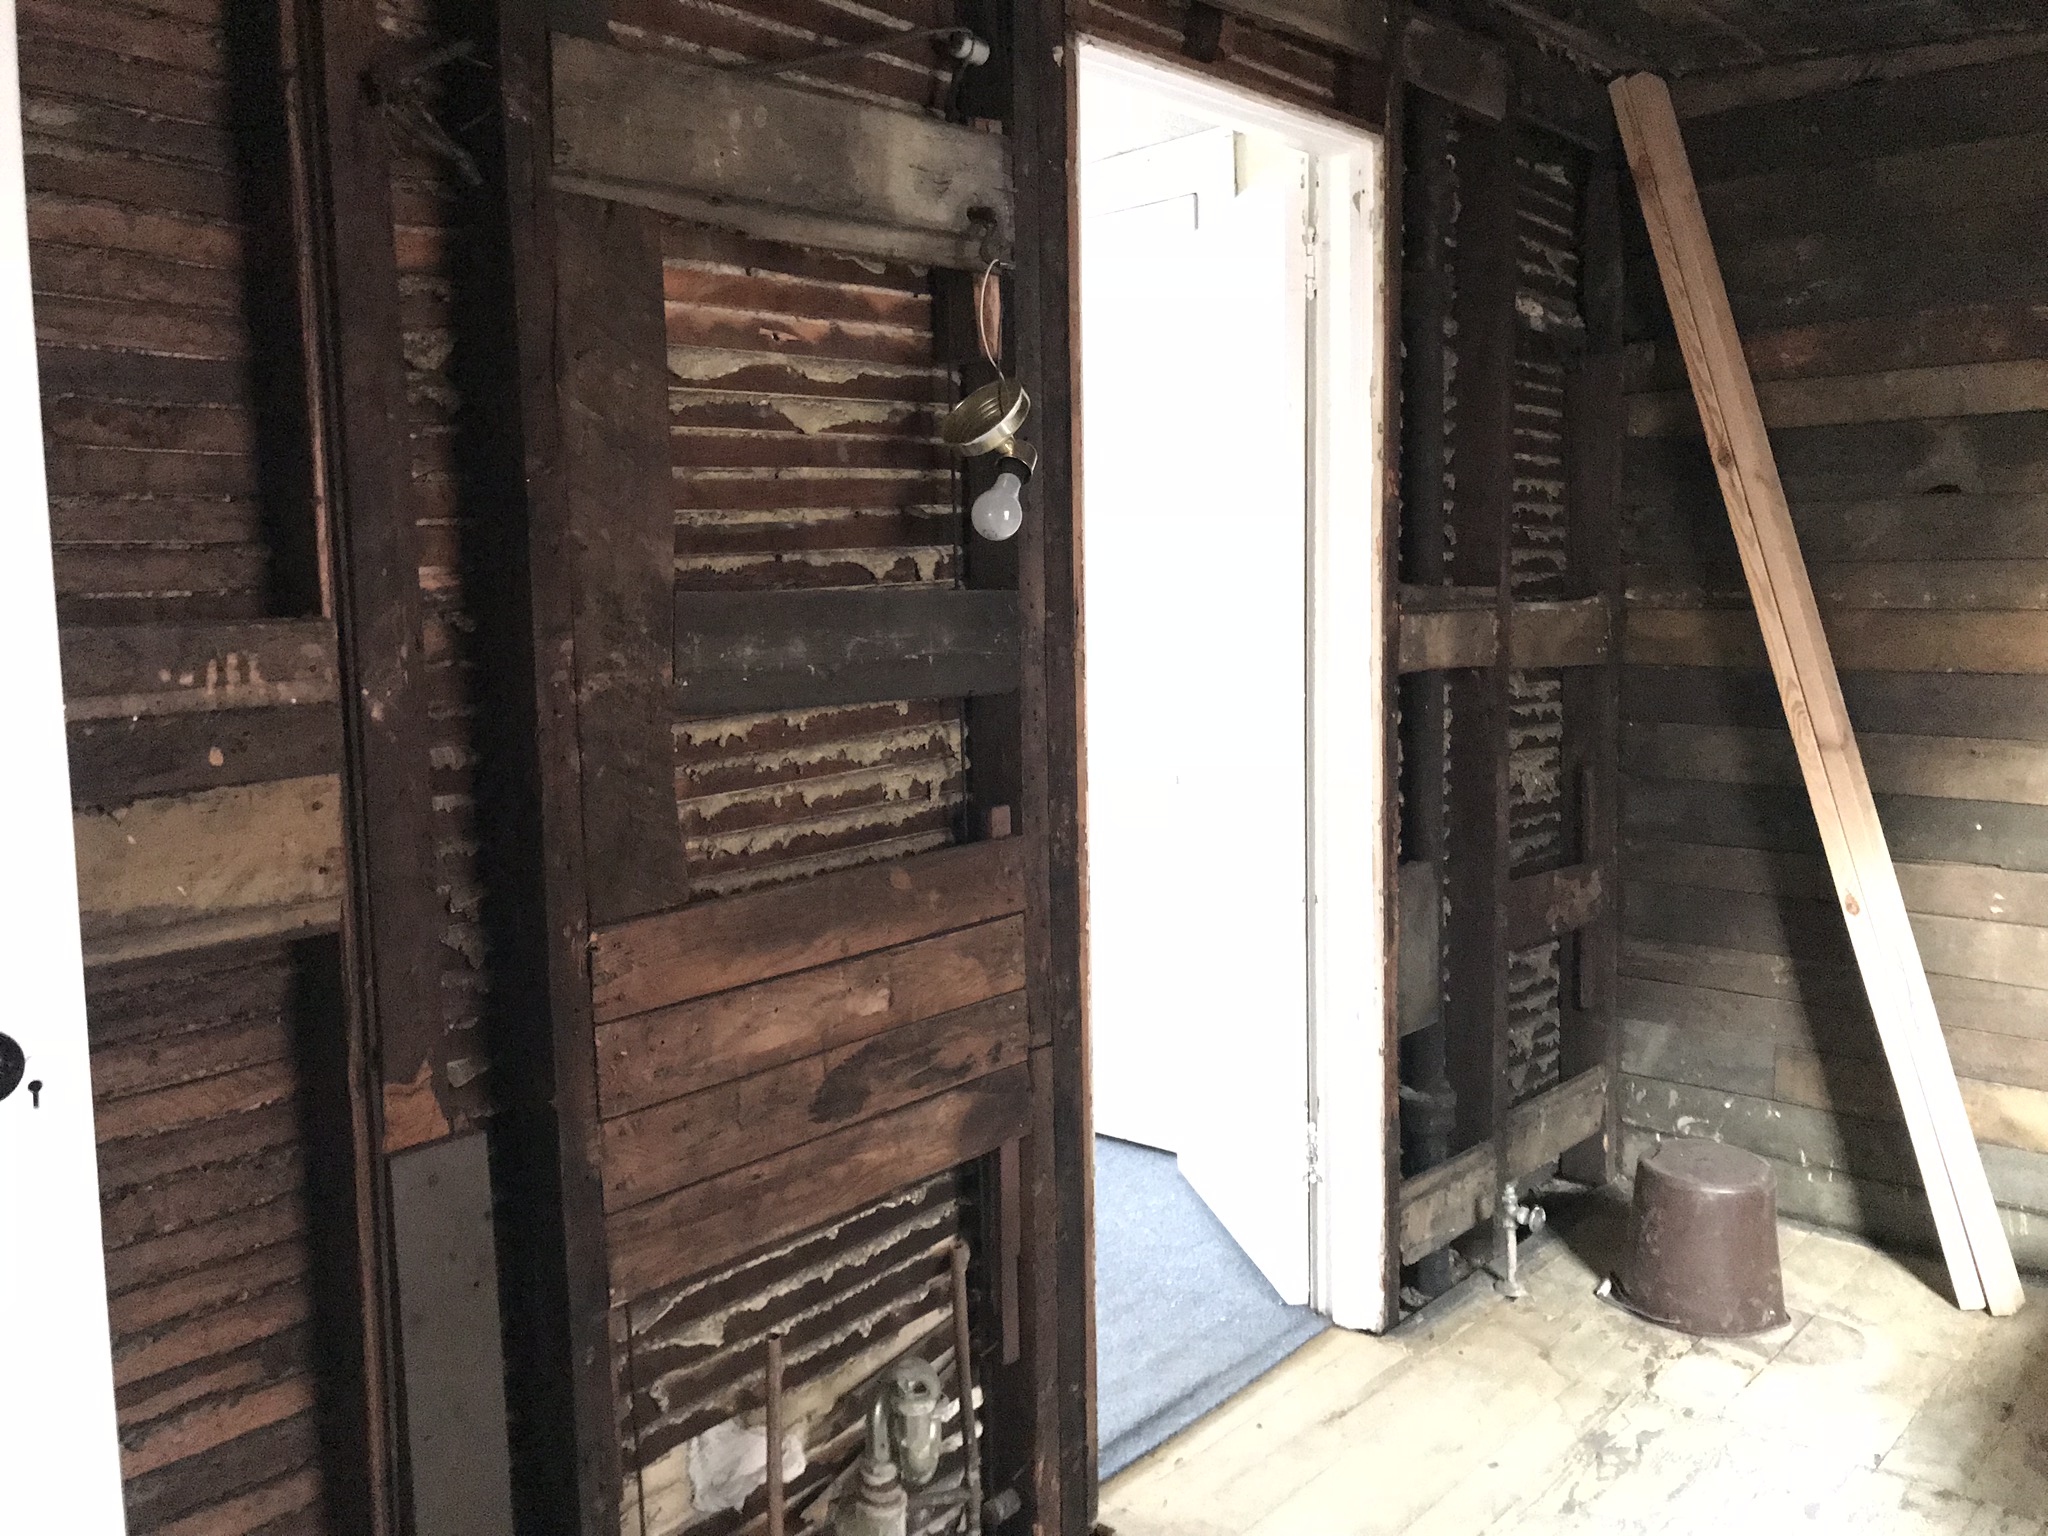
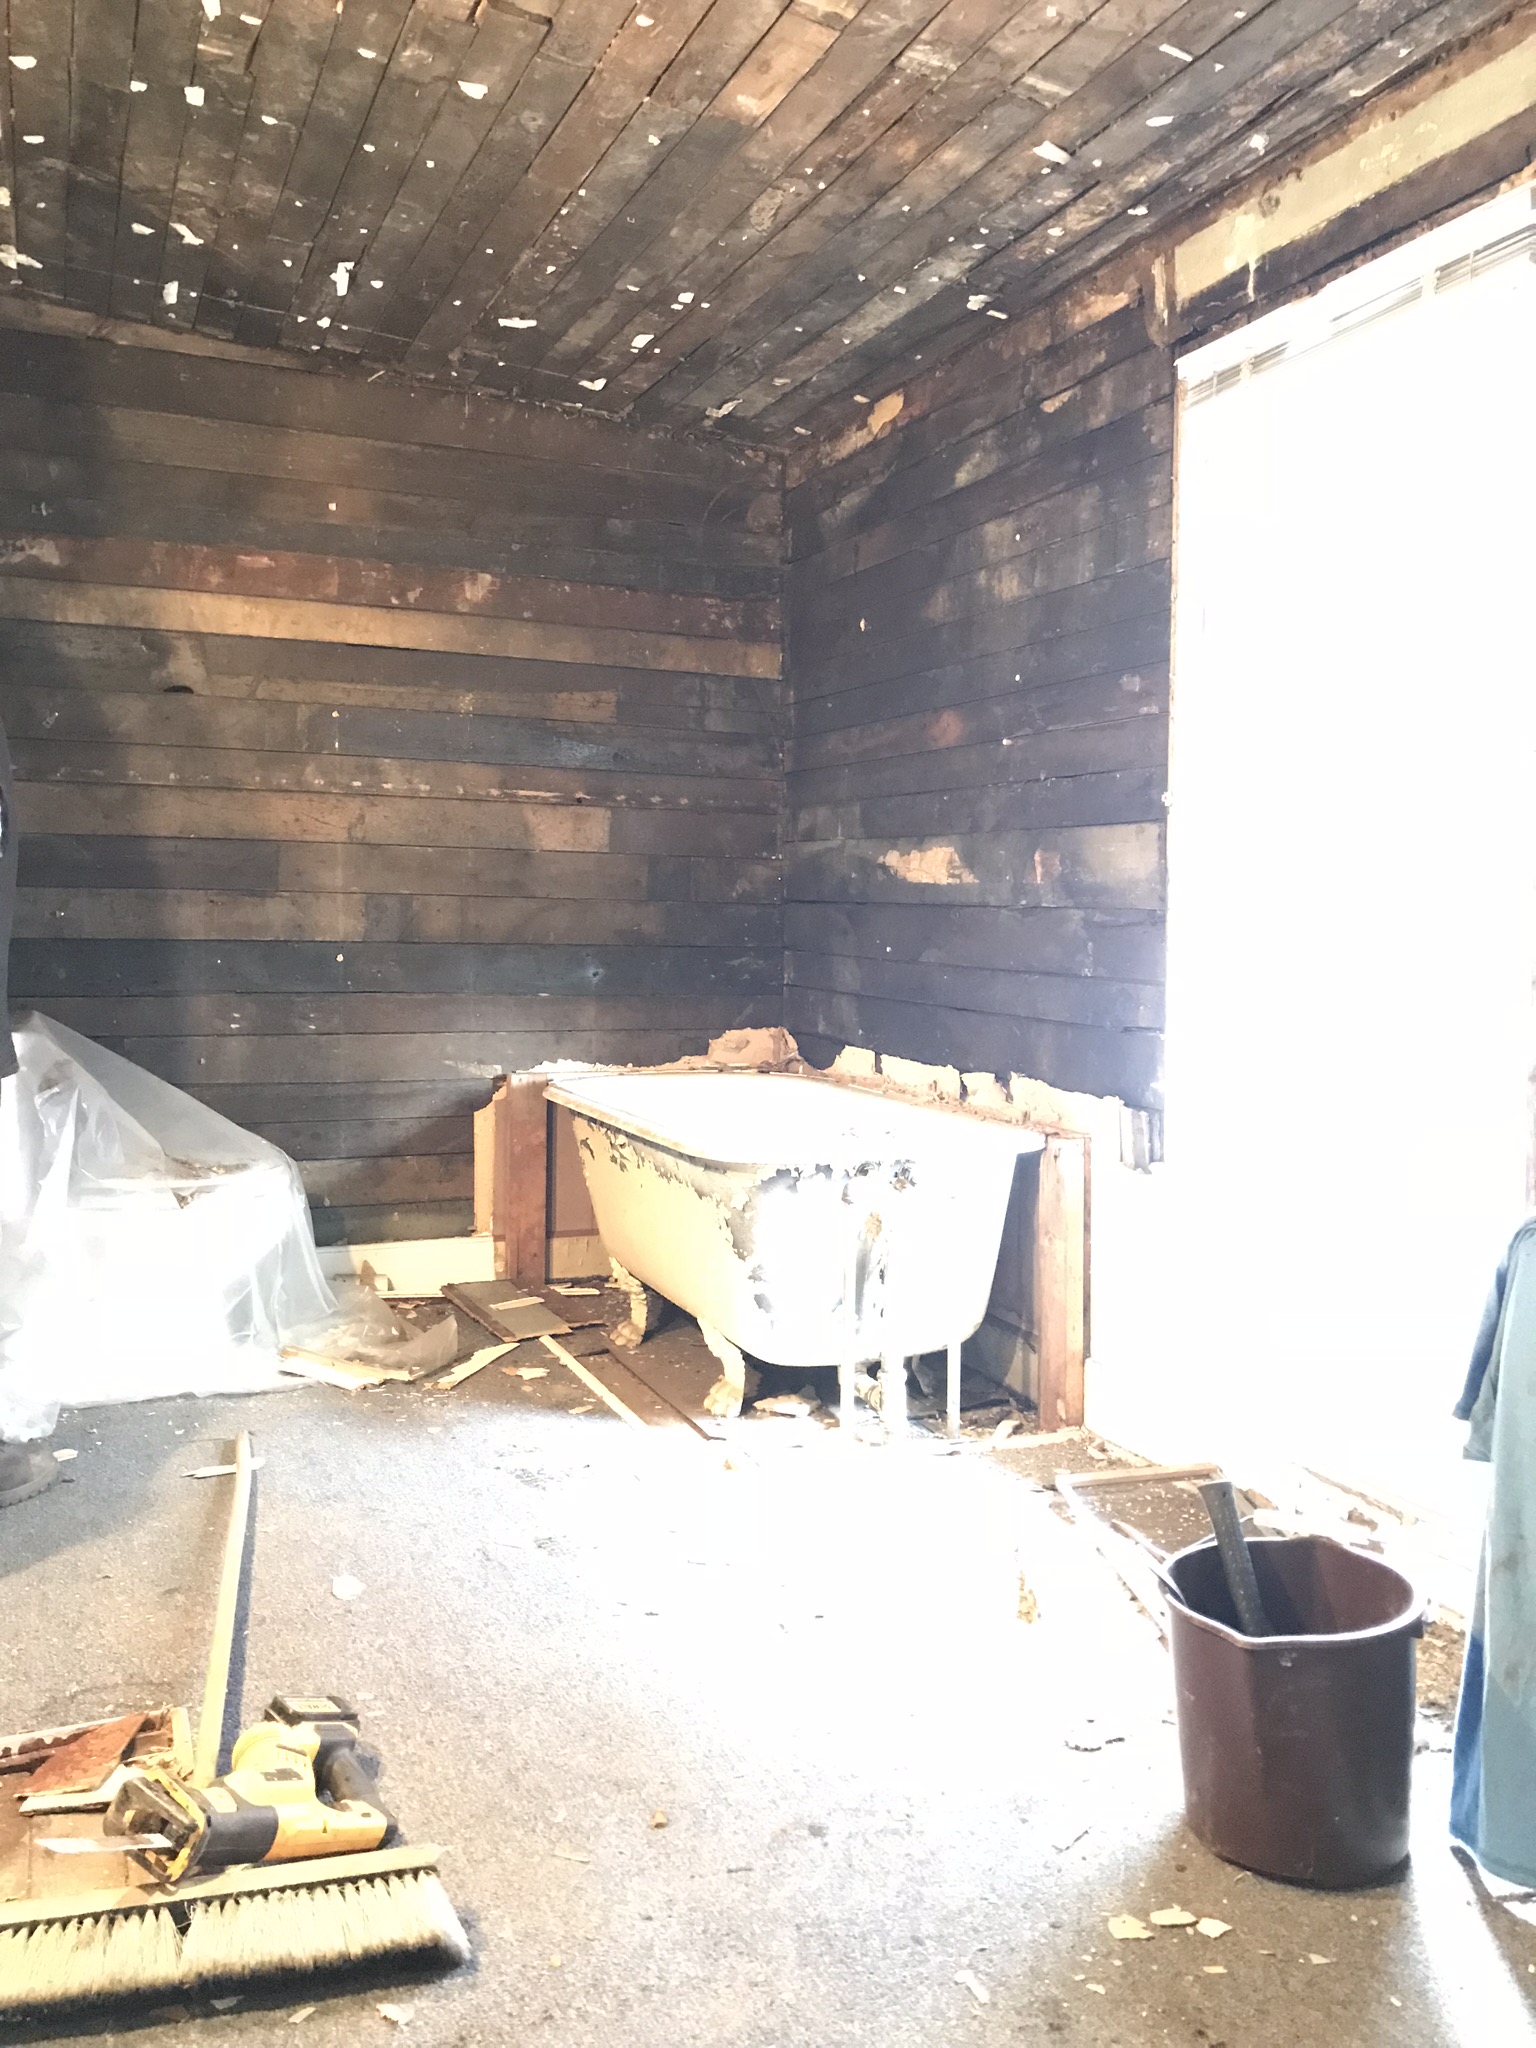
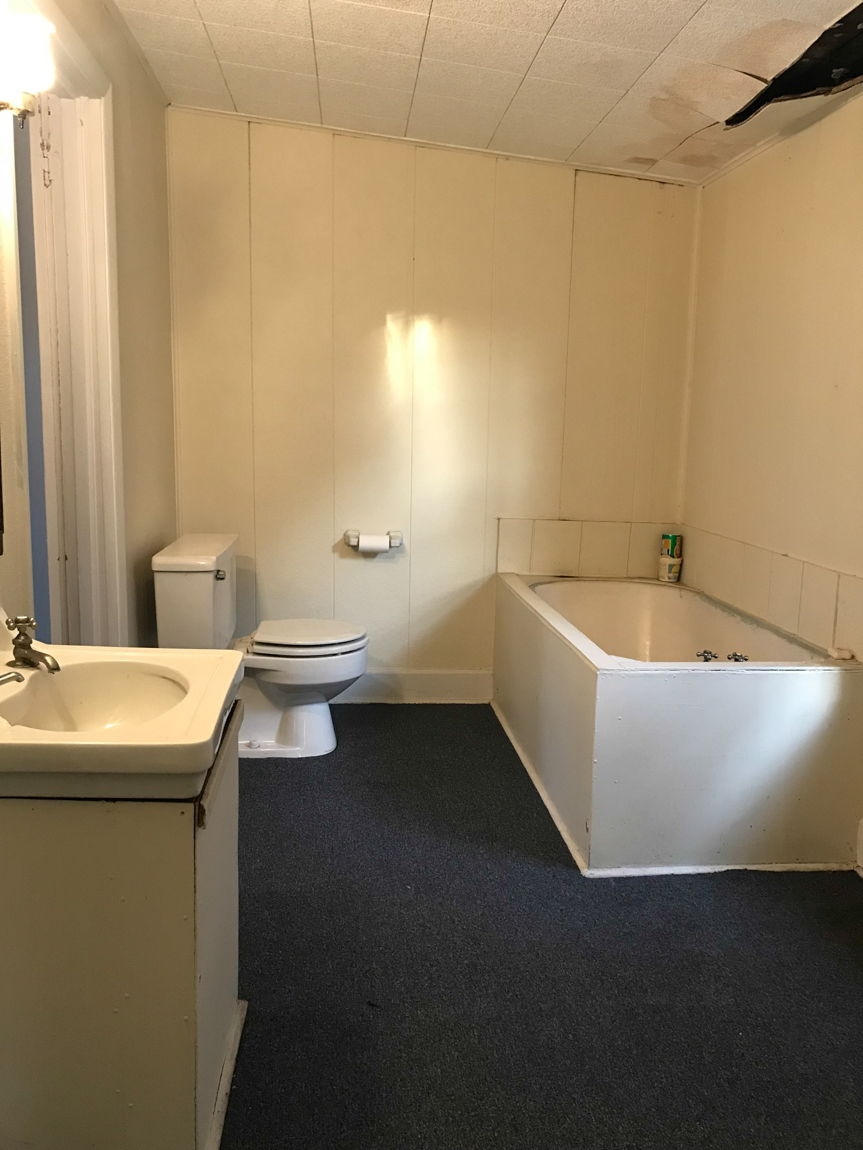
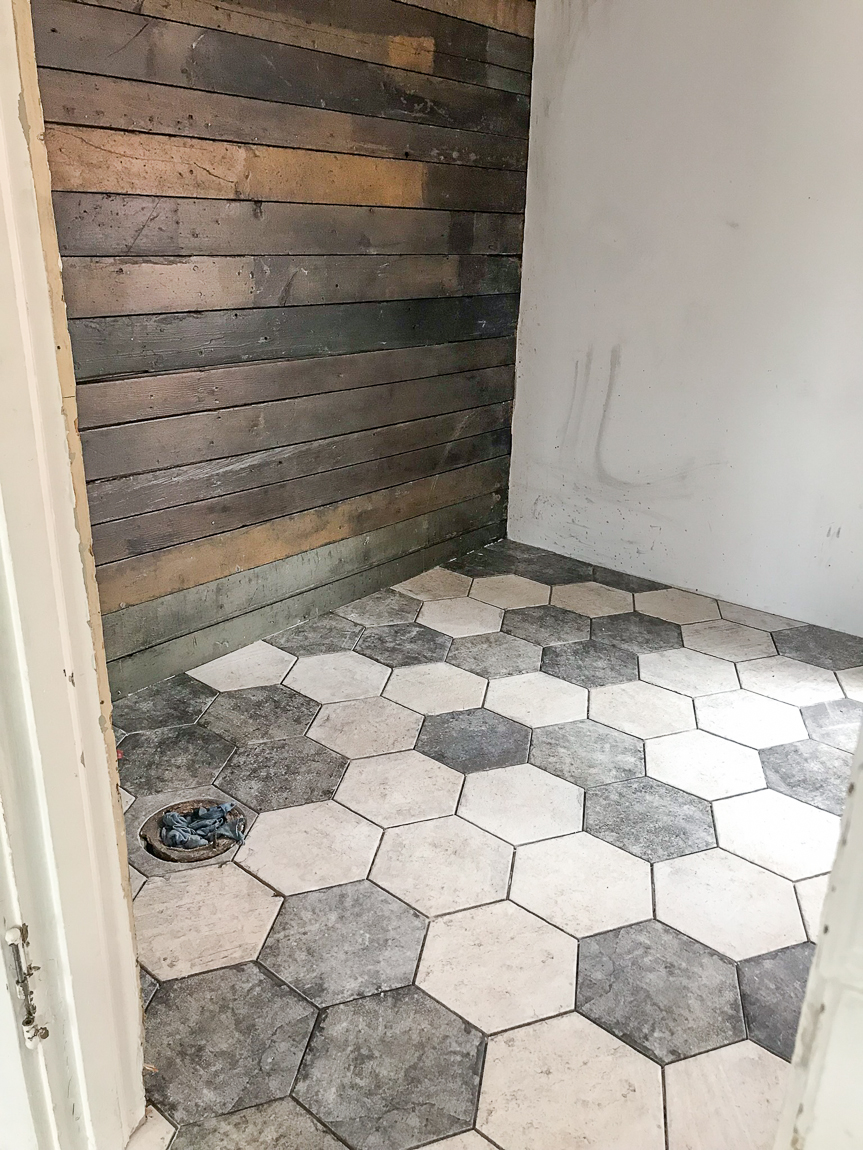
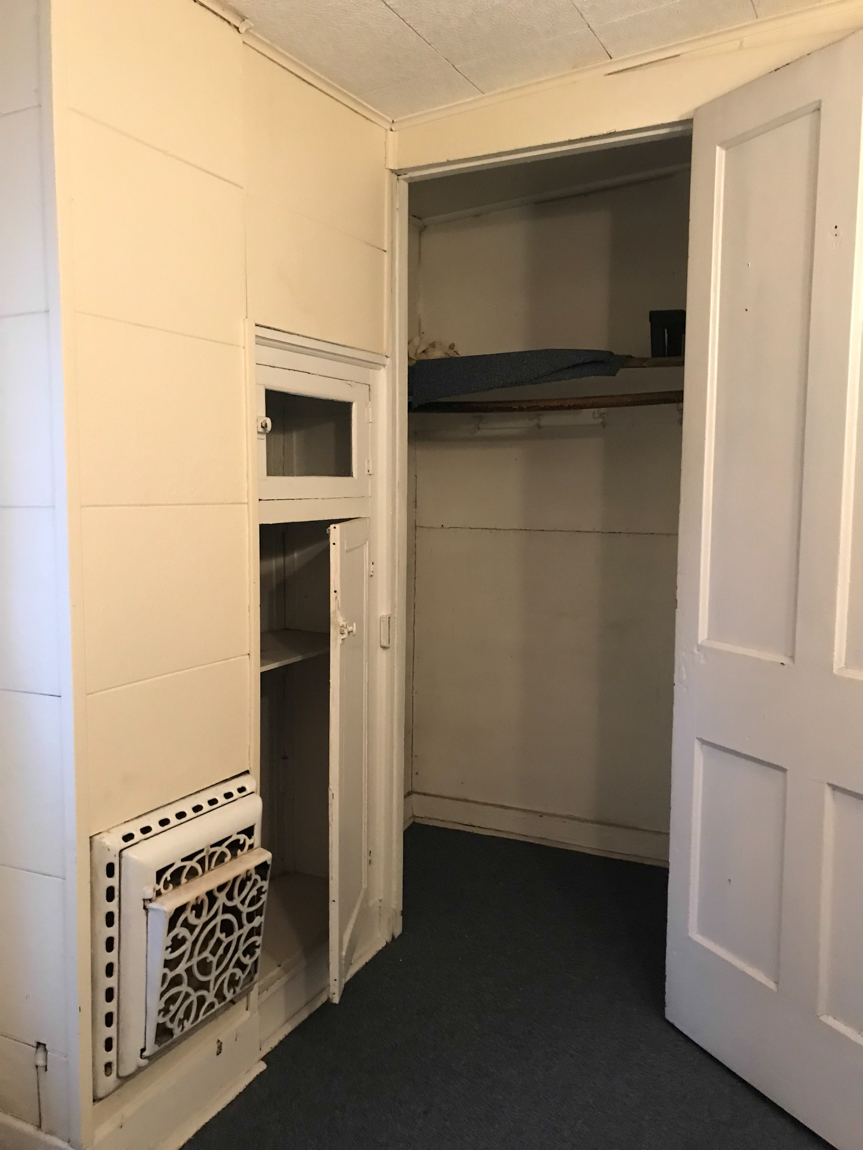
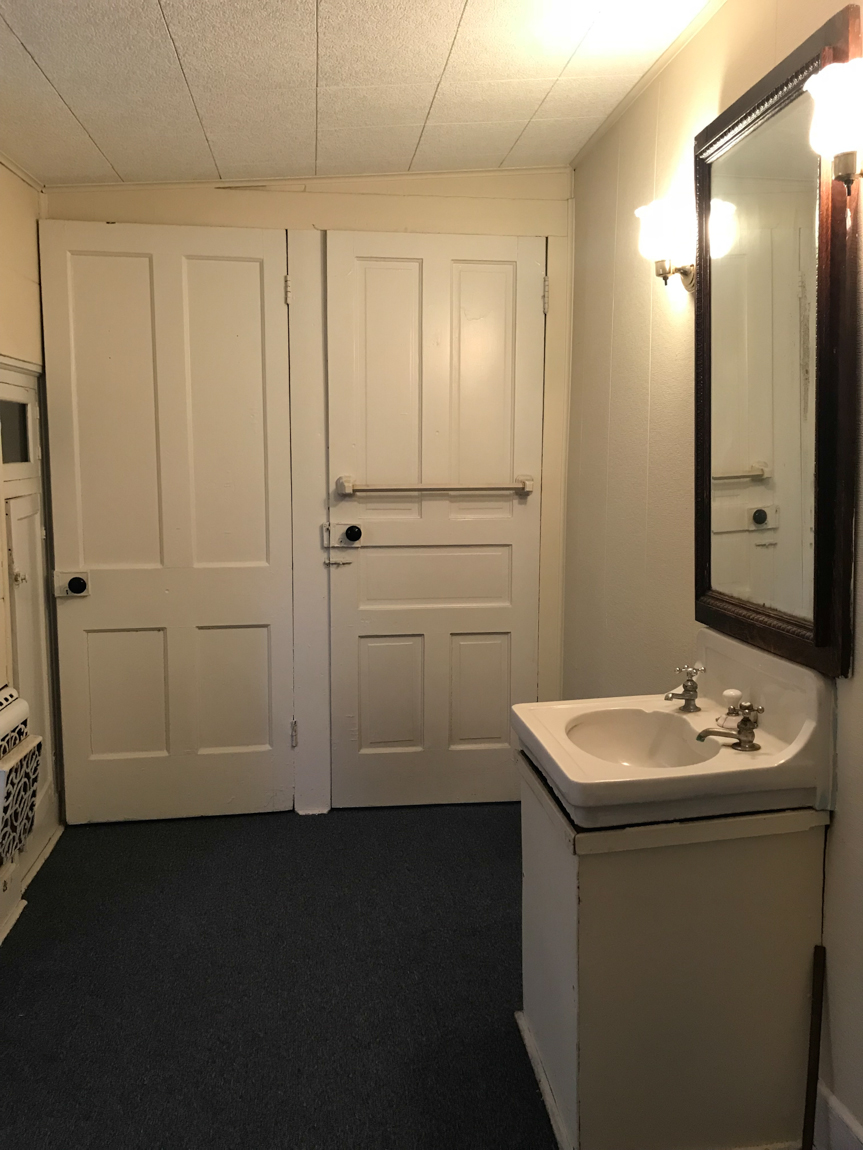
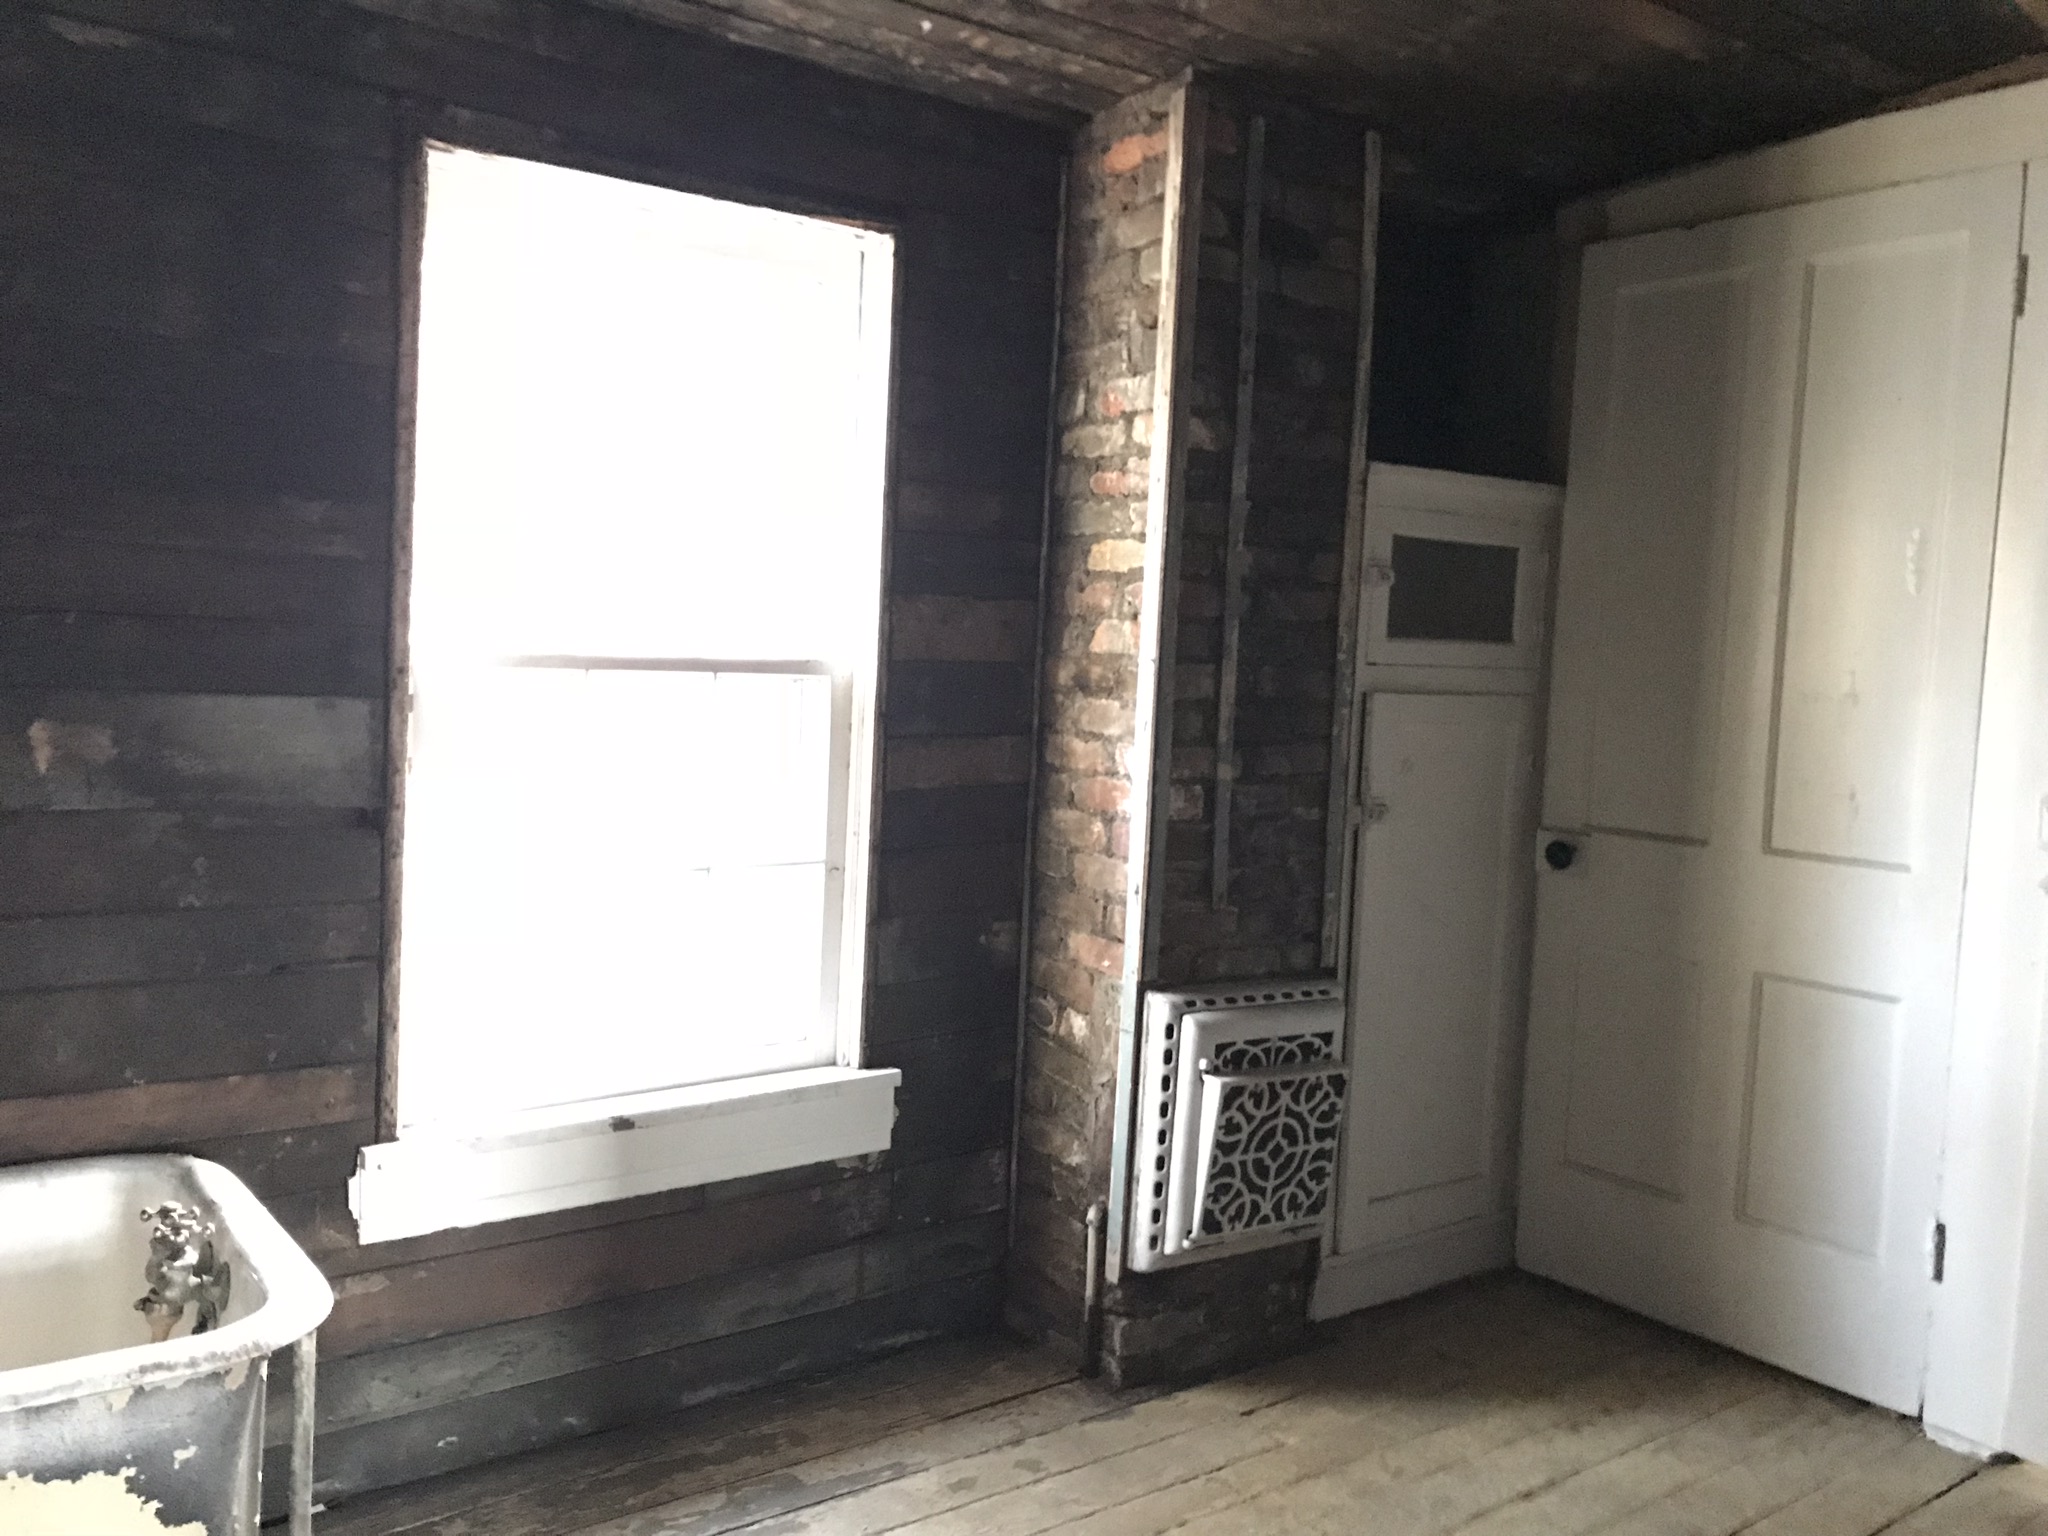
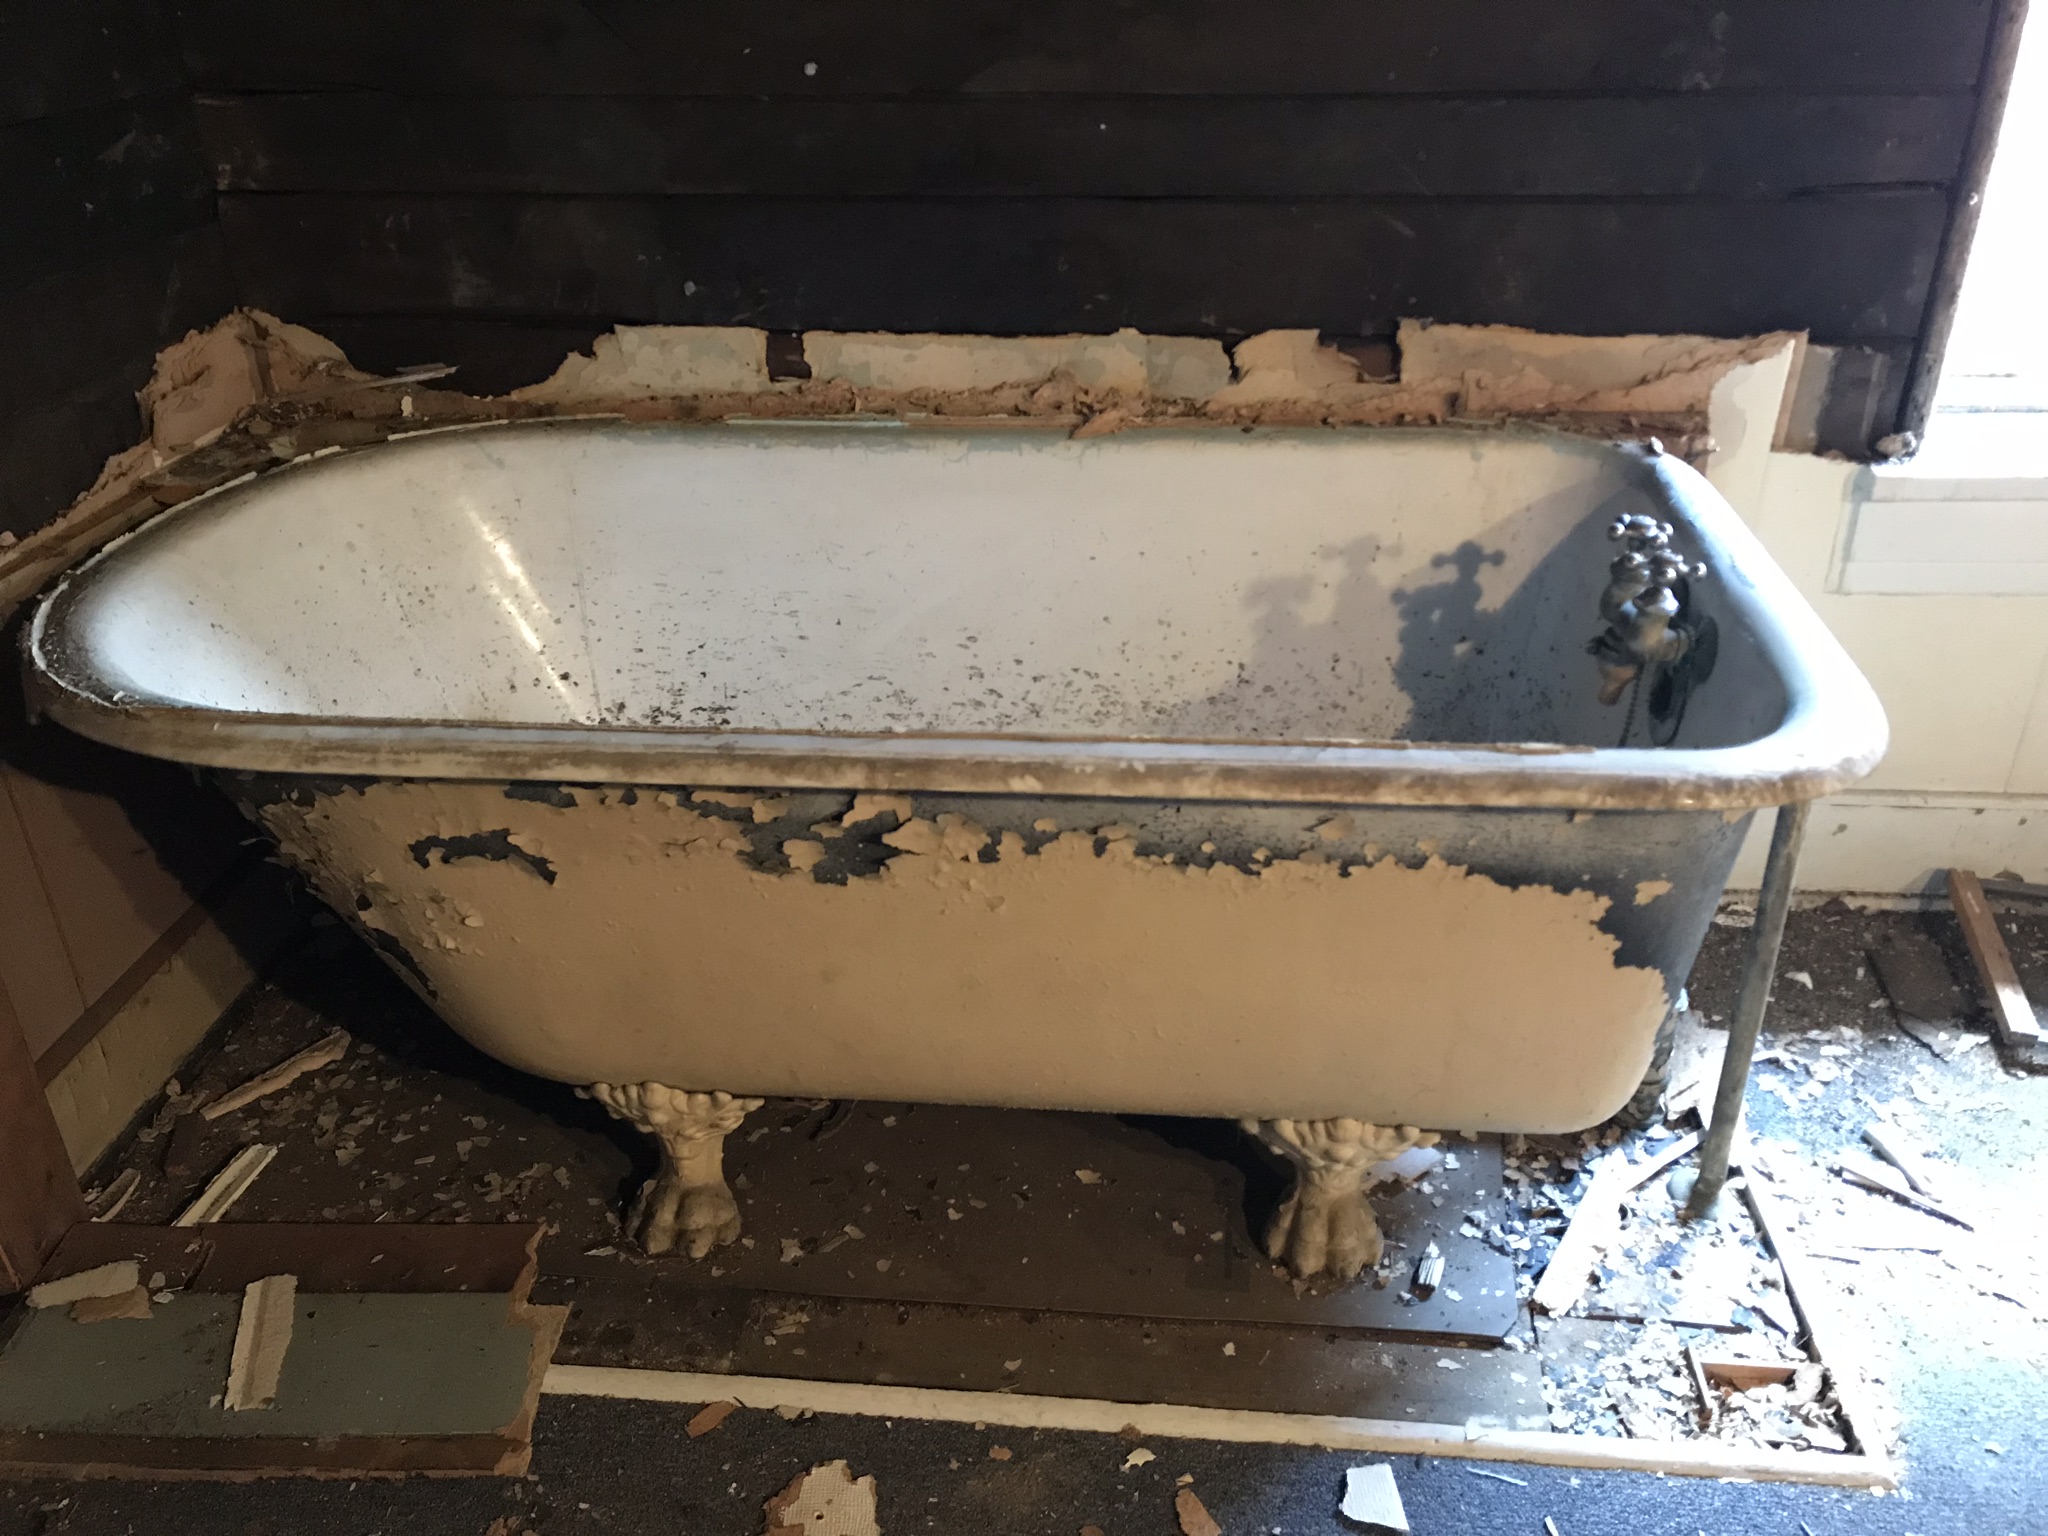
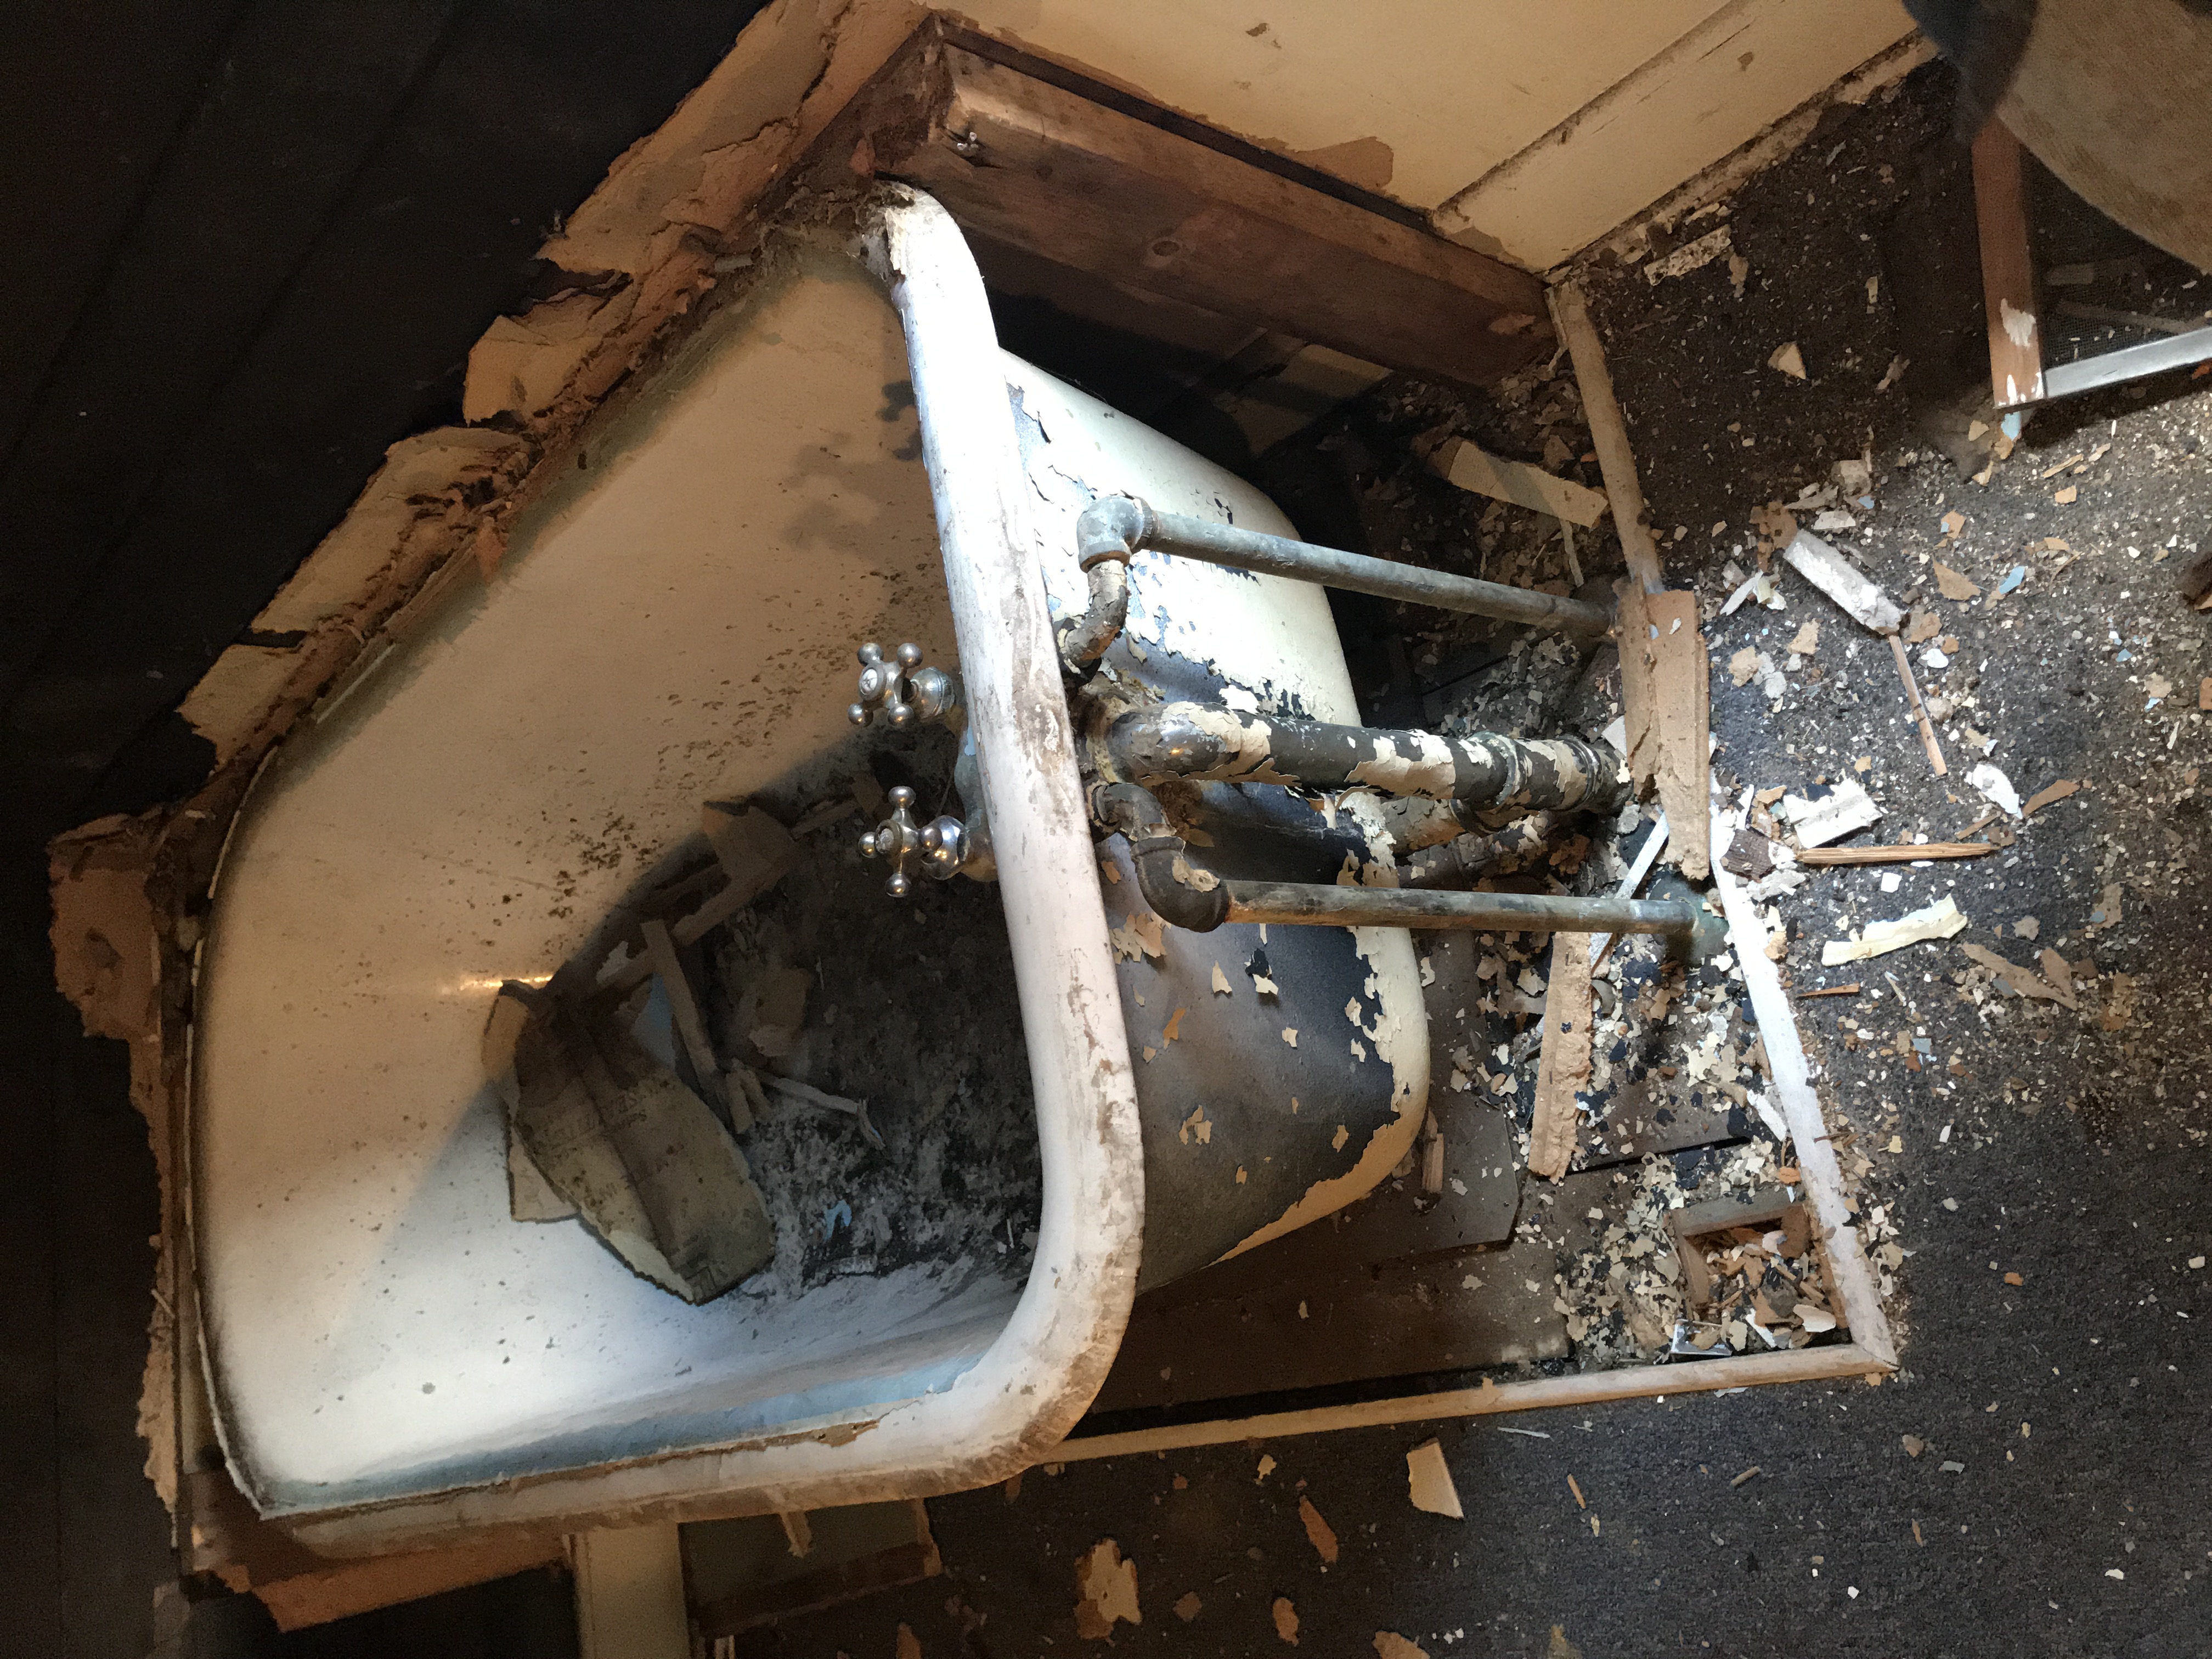
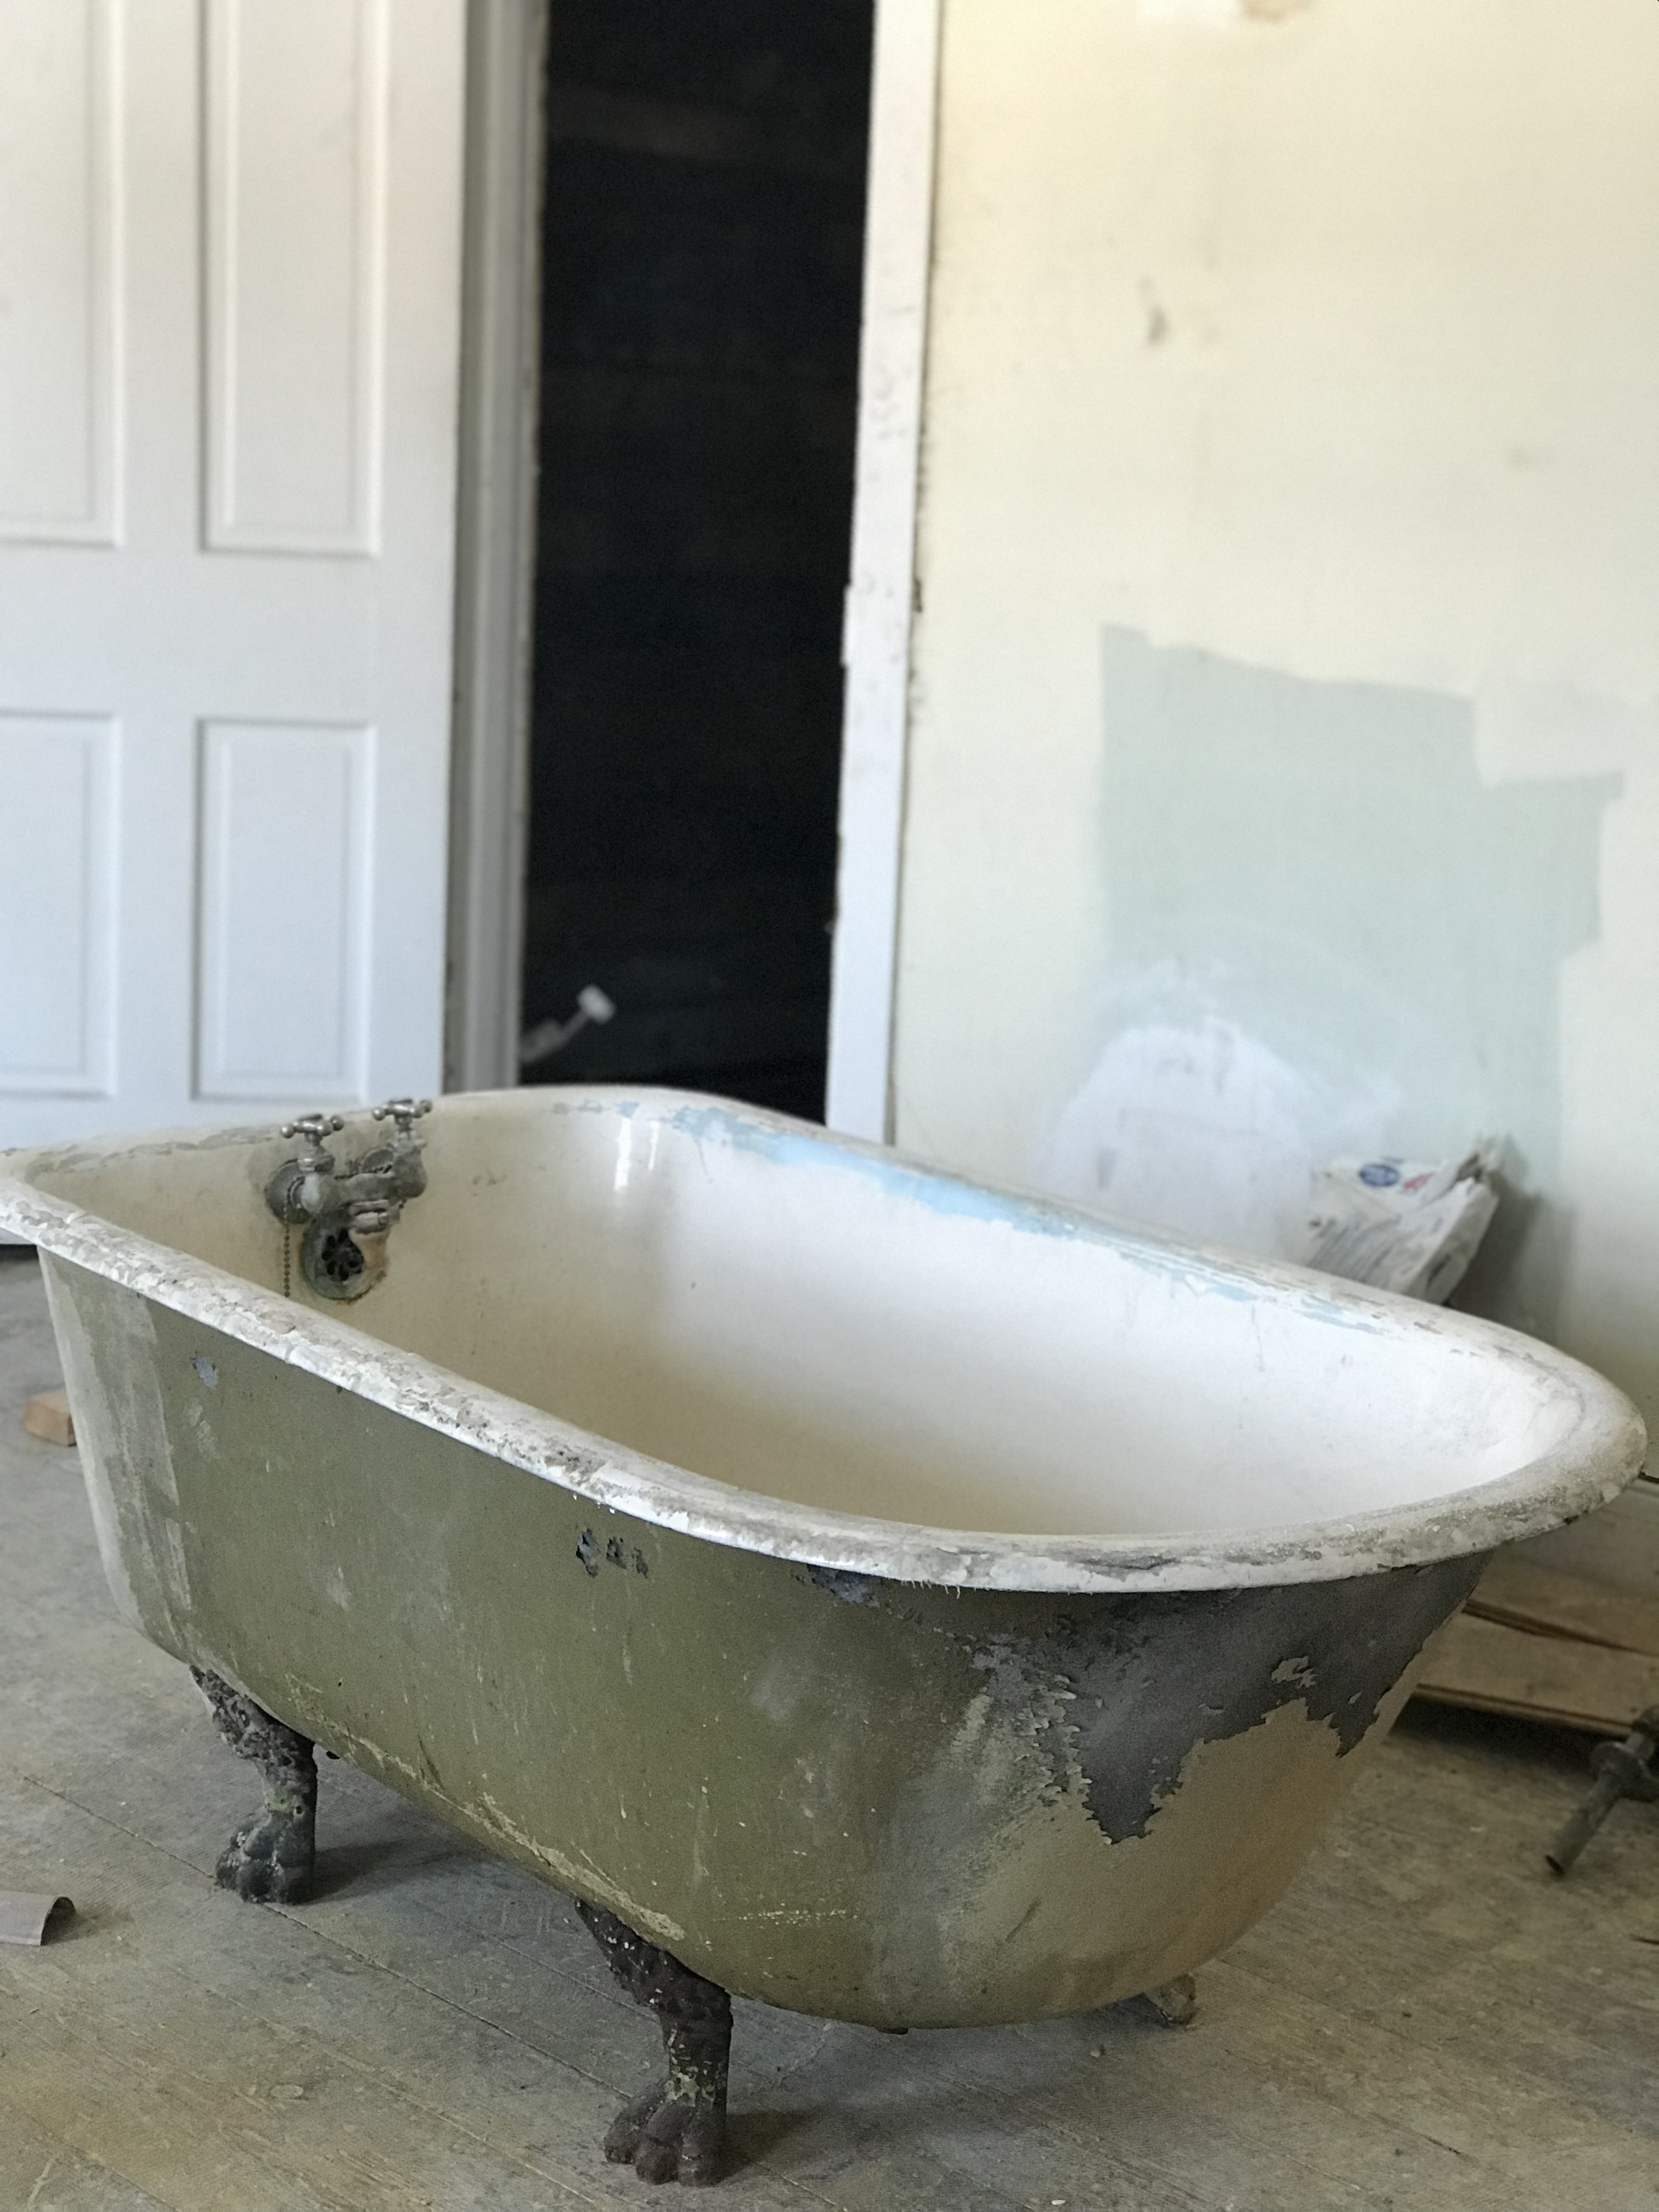
The before: A caving ceiling was the first project to receive some attention. There were paneled walls, boxed in pedestal sink and clawfoot tub (didn’t know that until we started the demo), blue industrial carpeting…the best plan of action was to gut it.
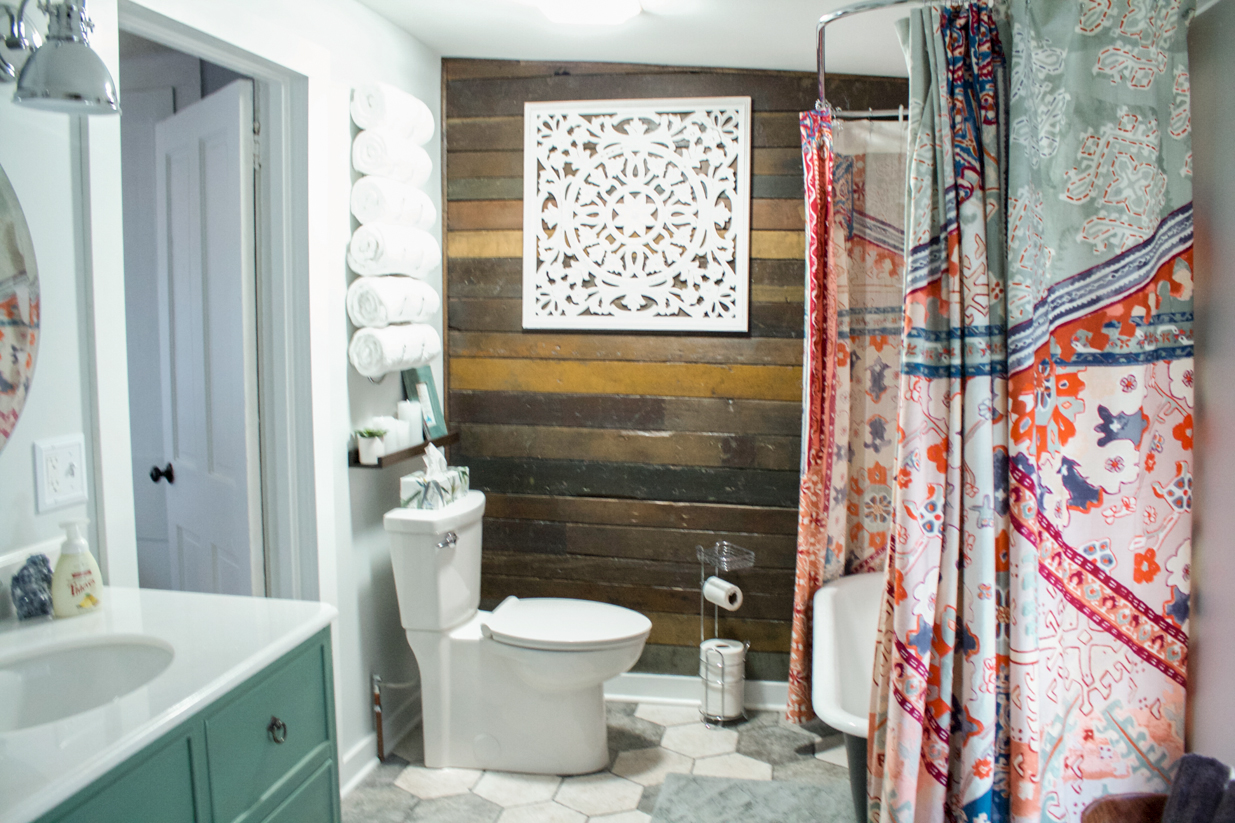
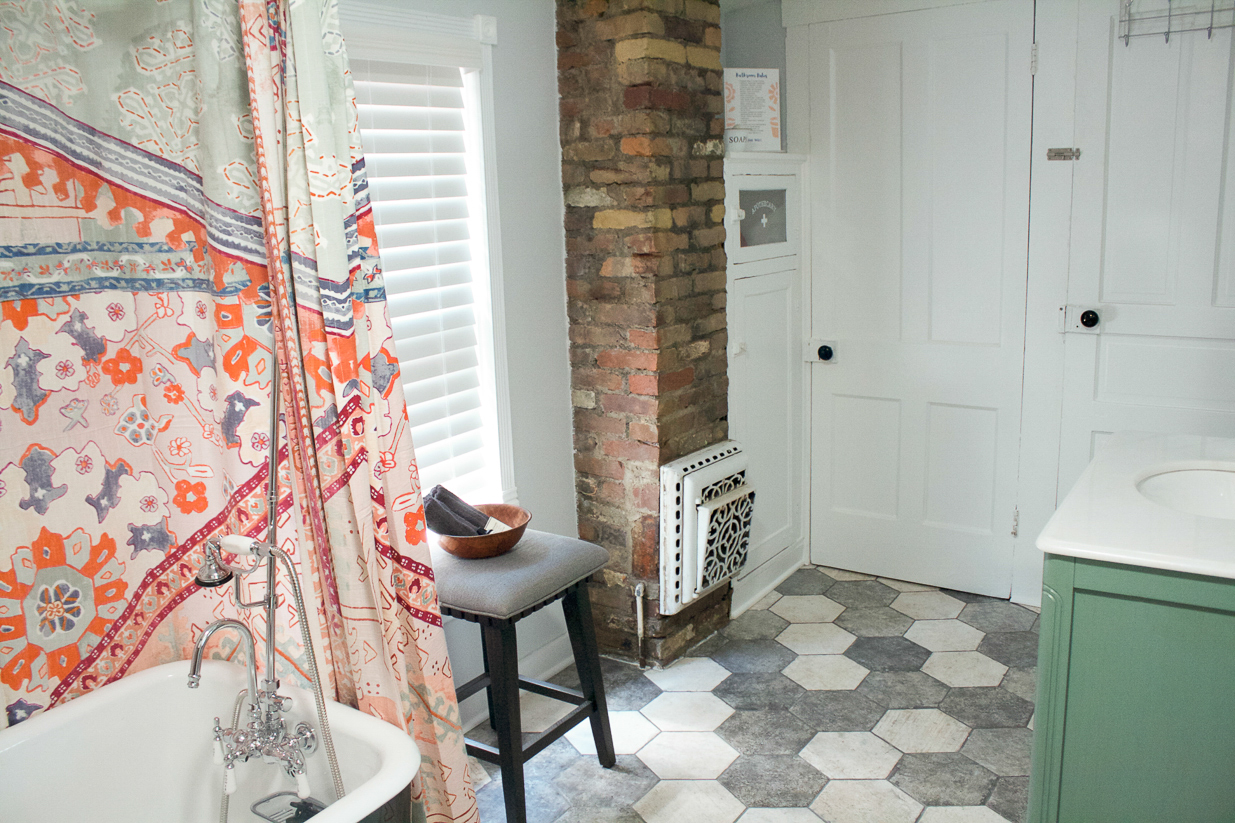
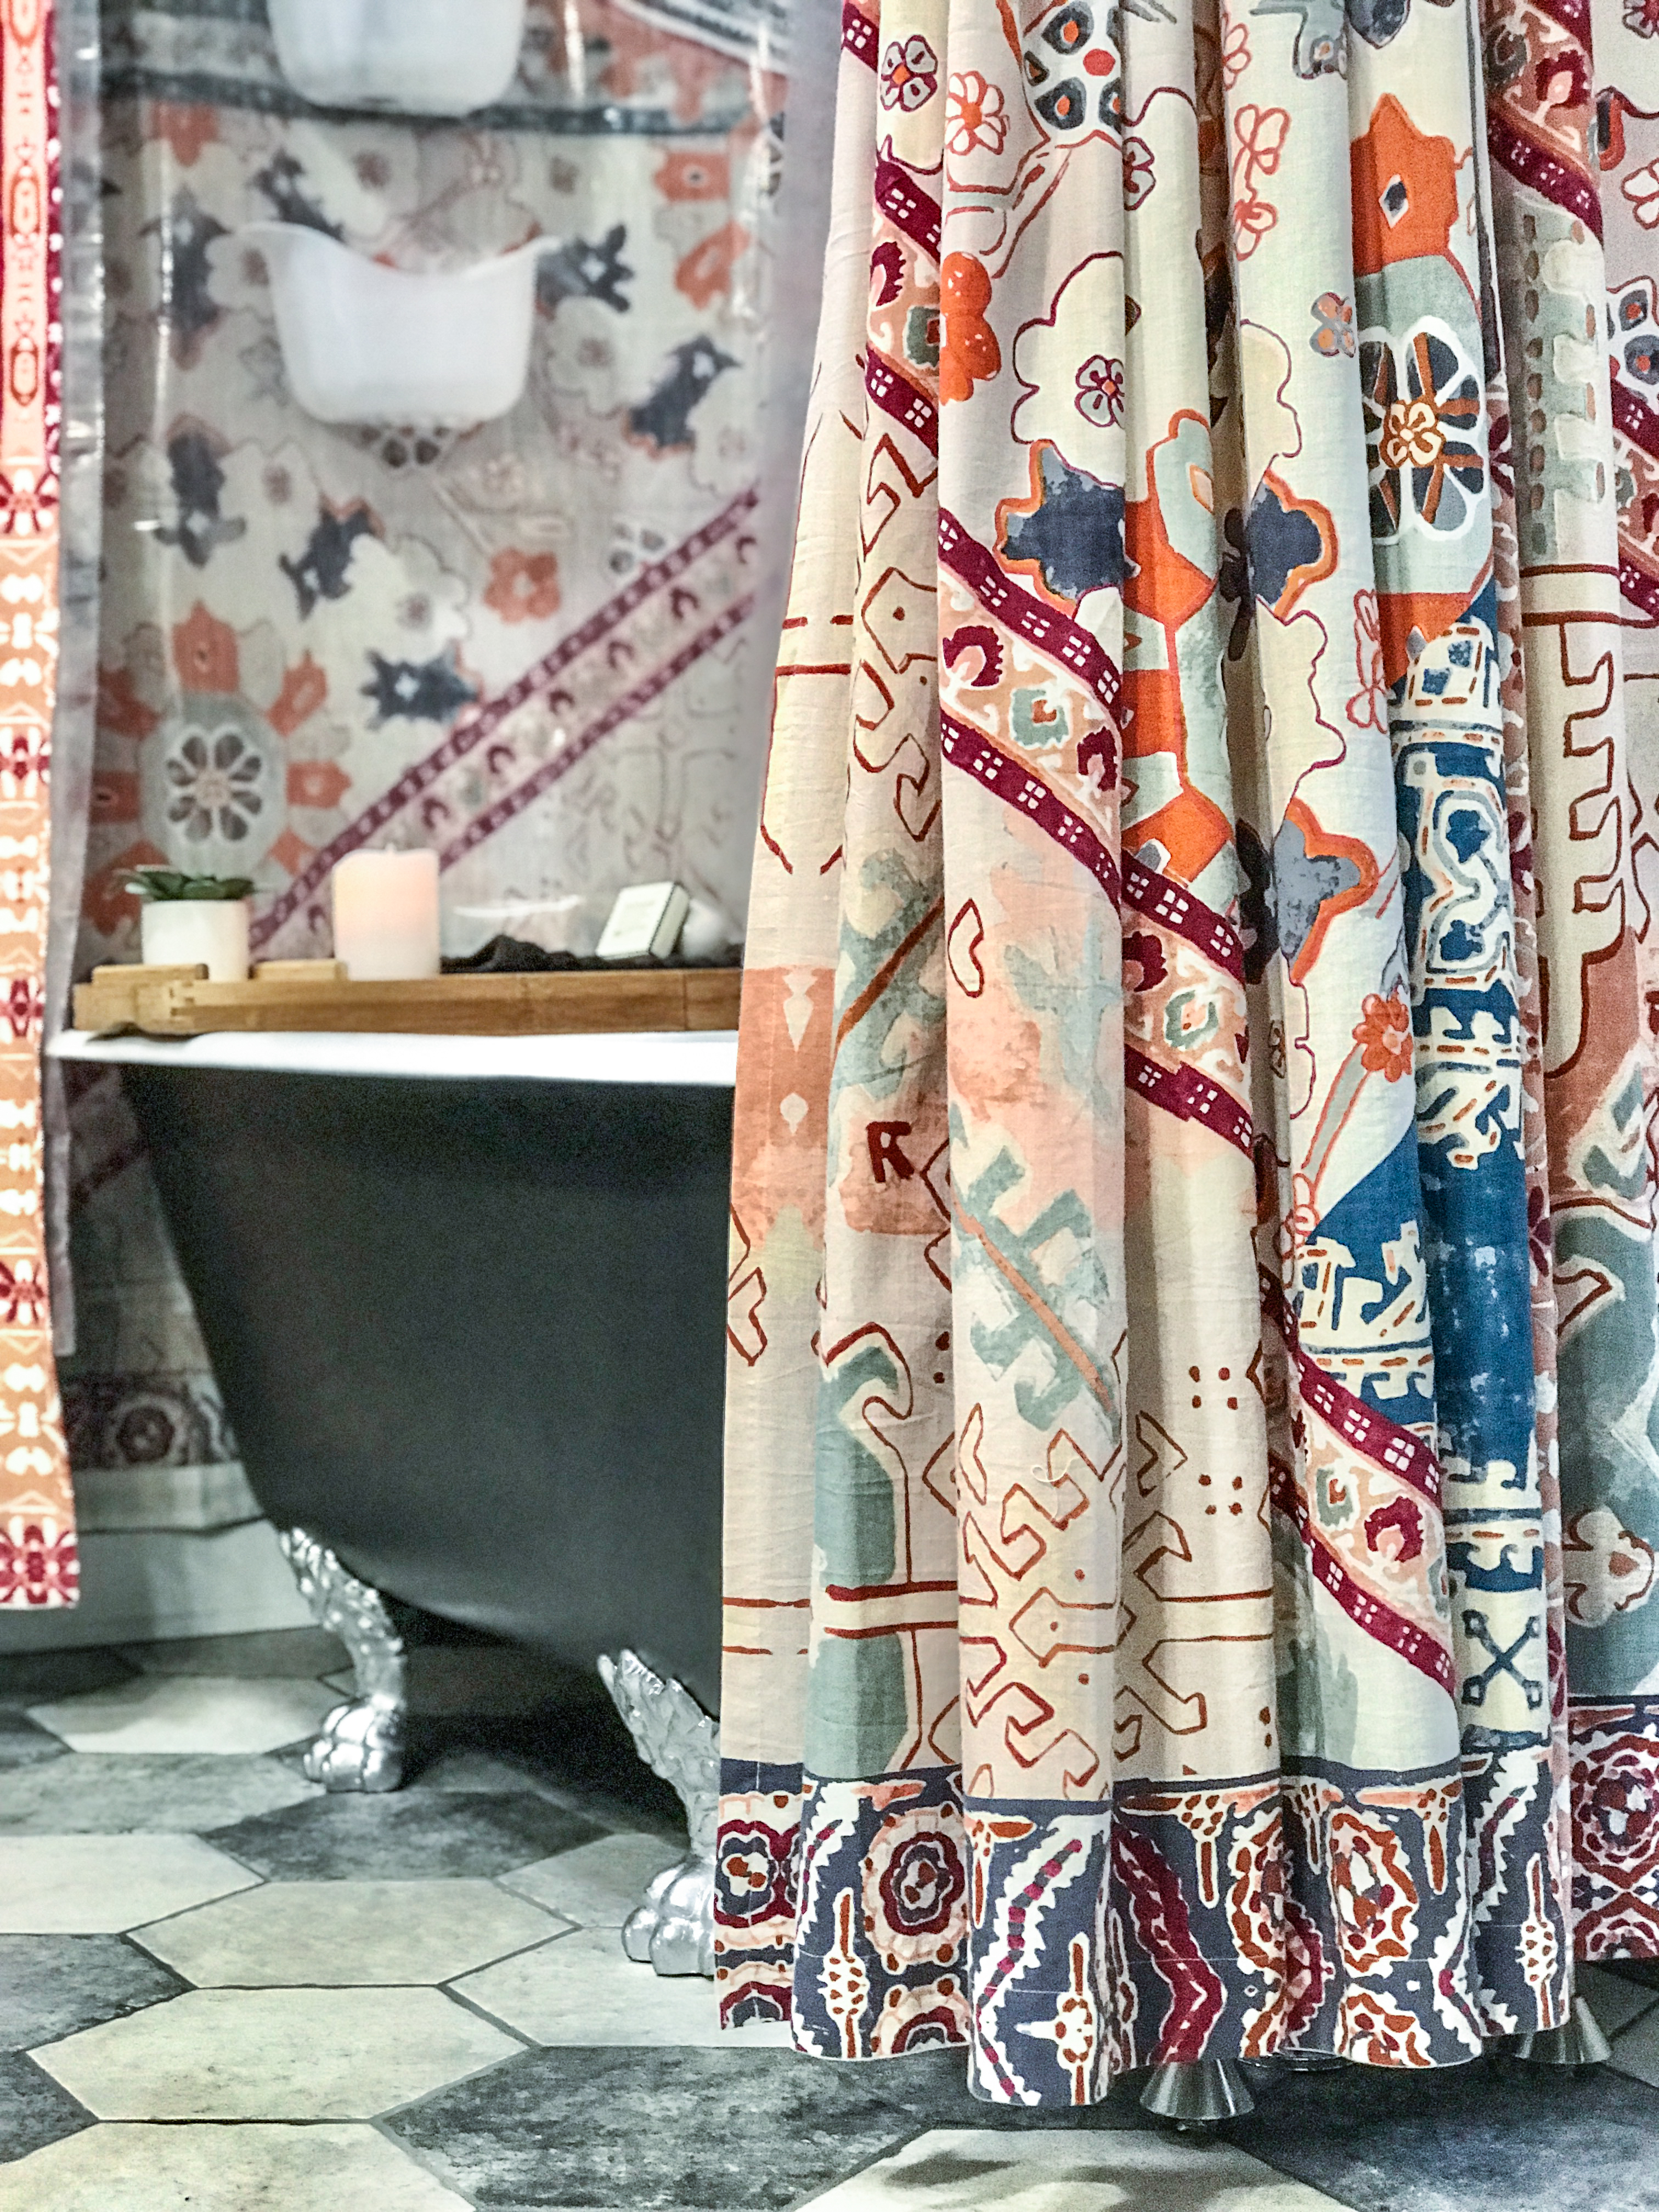
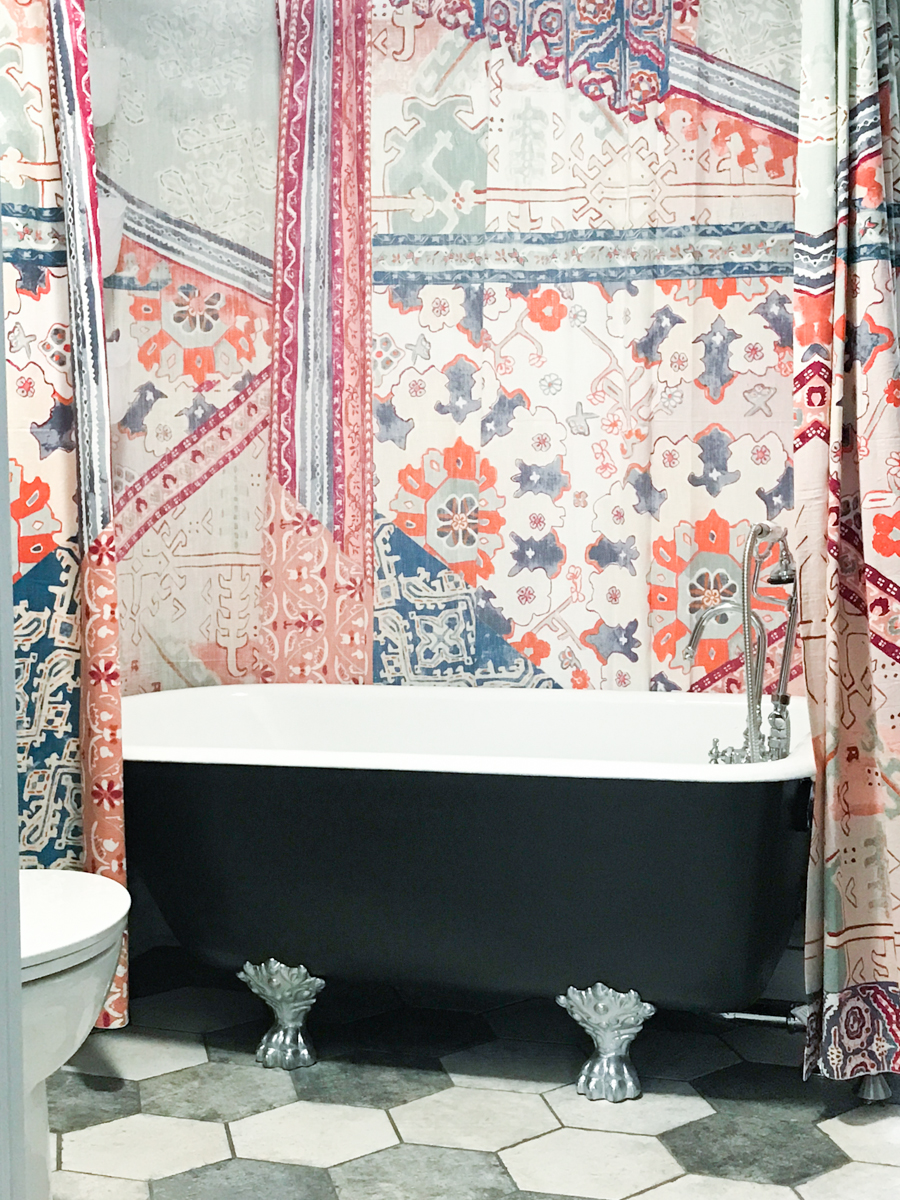
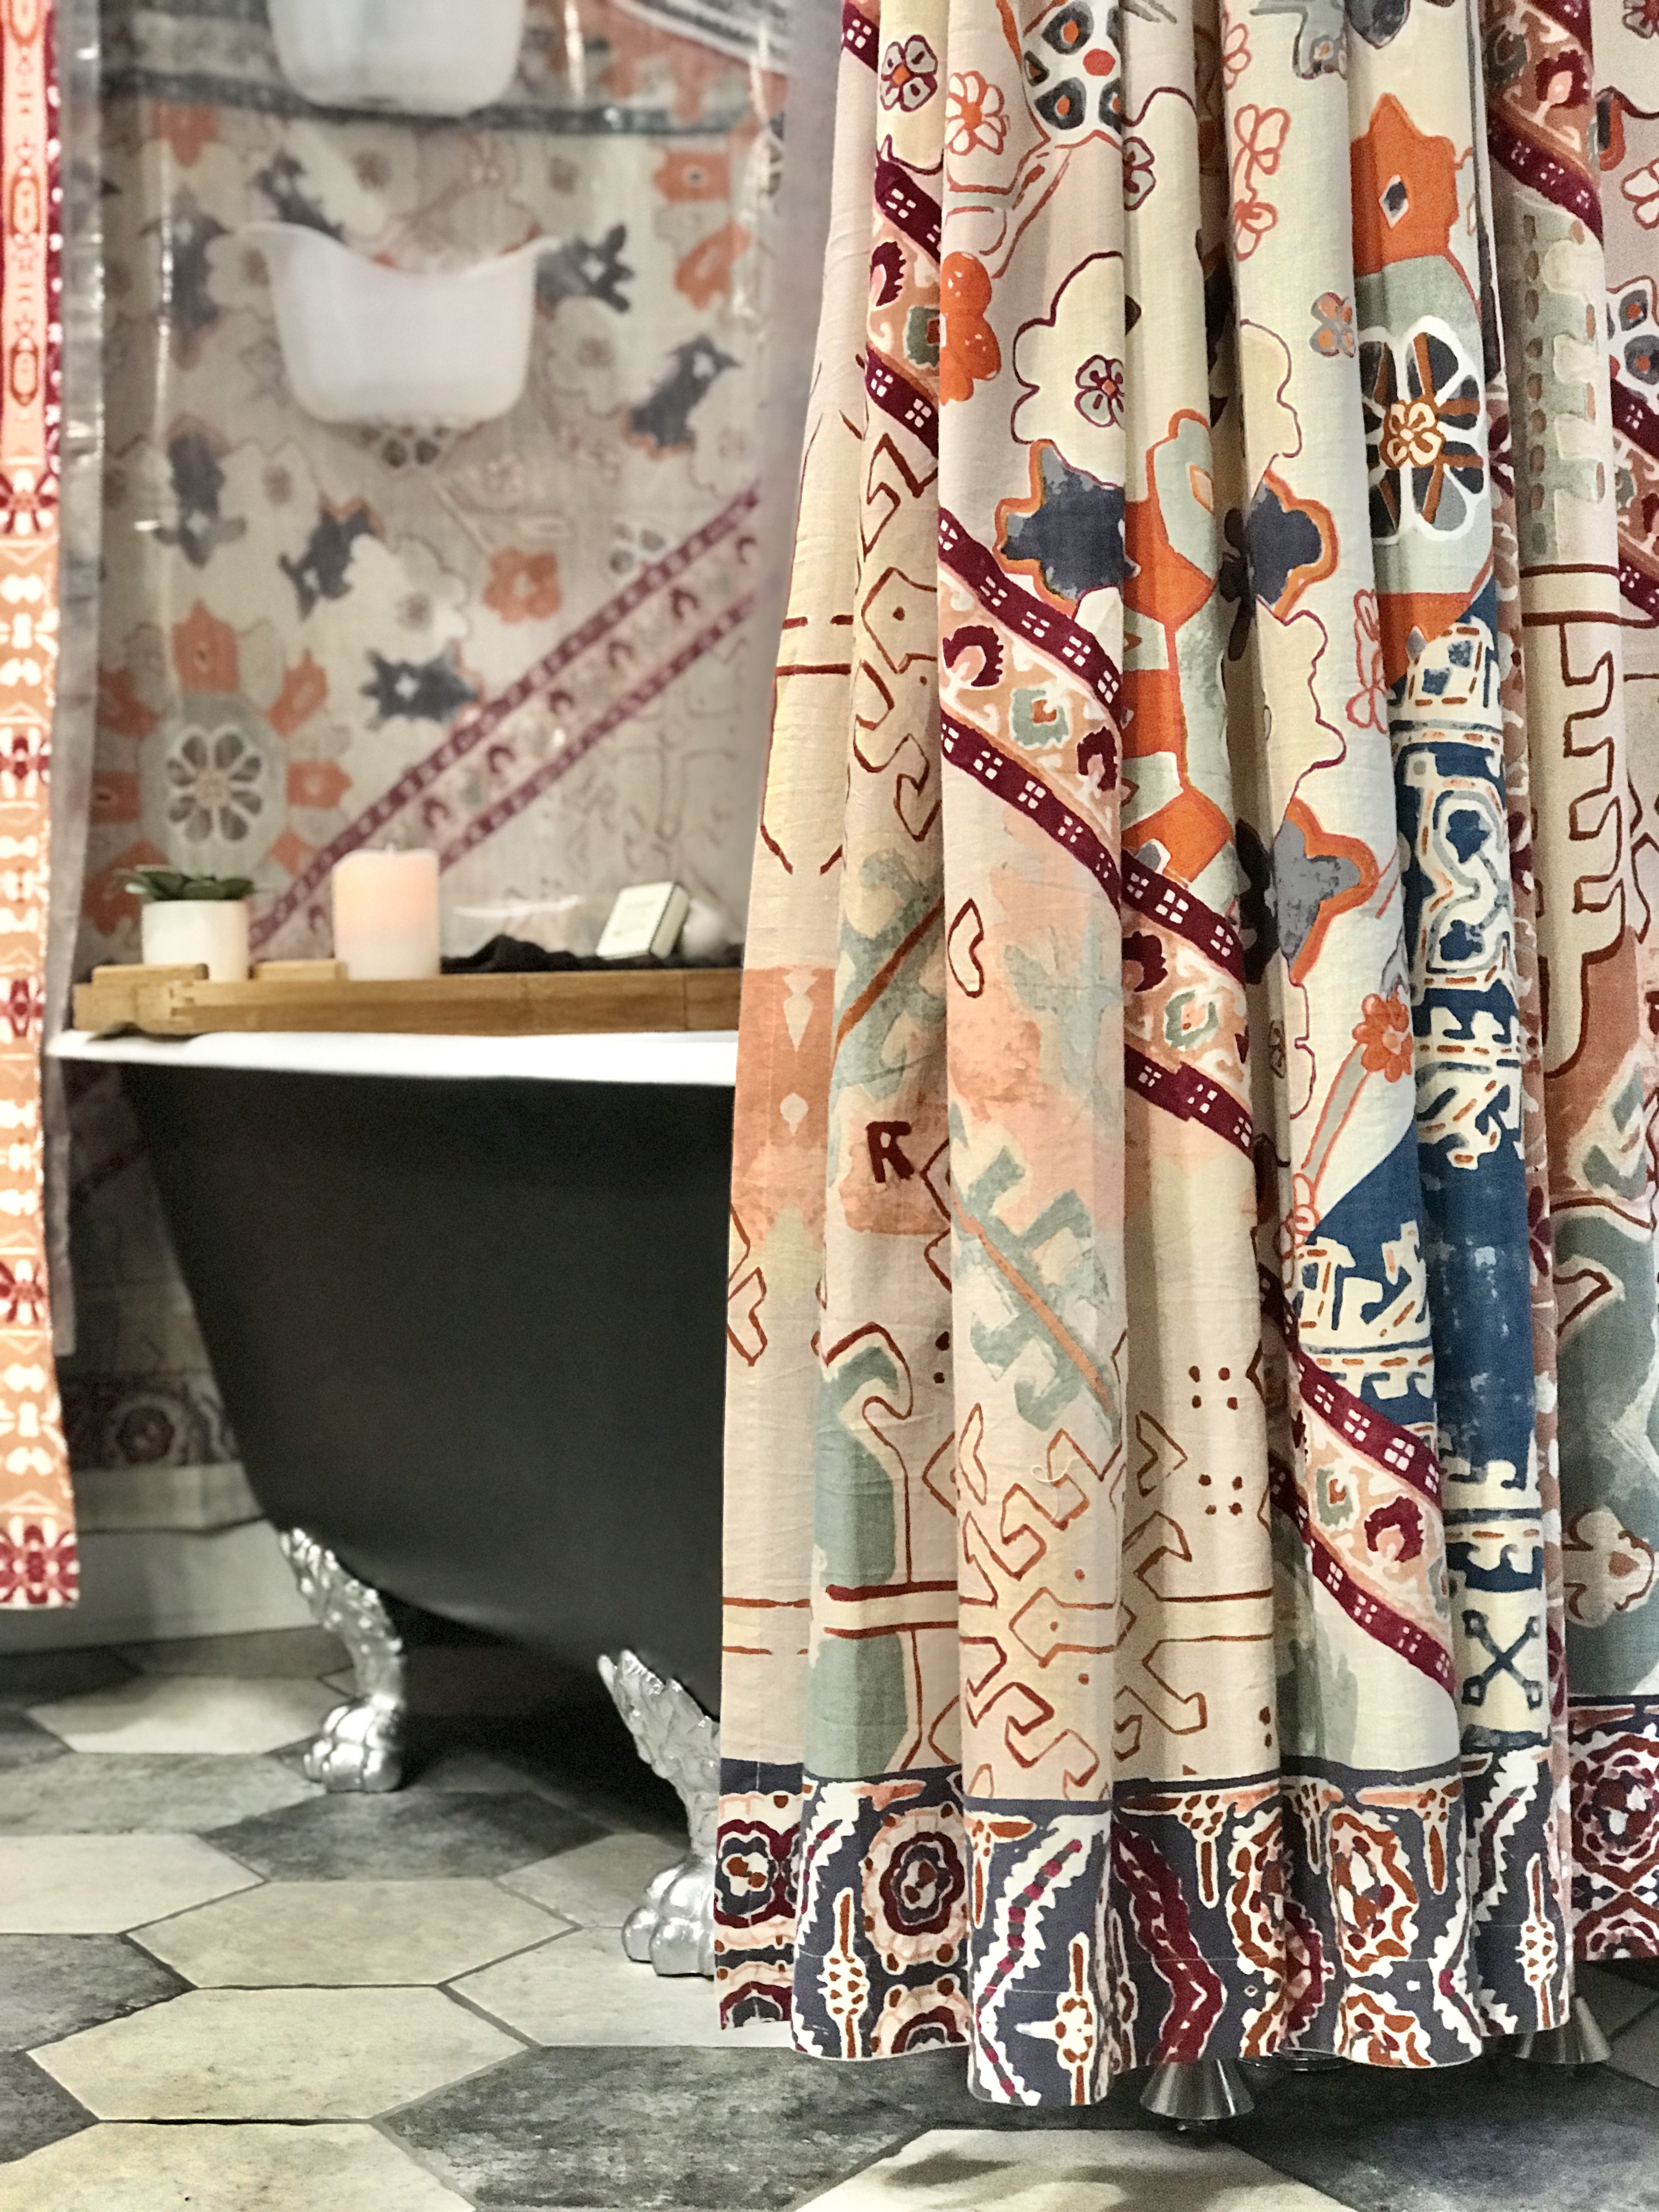
After: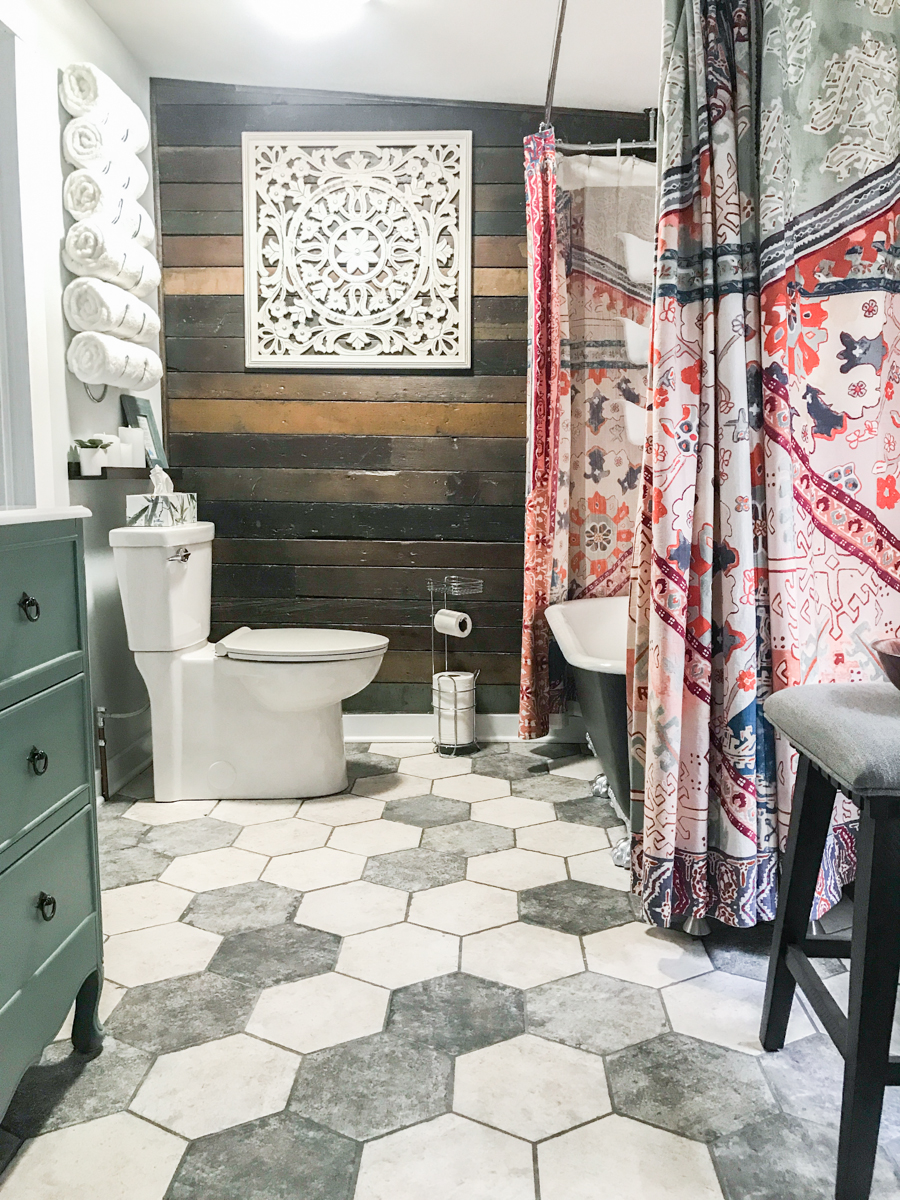
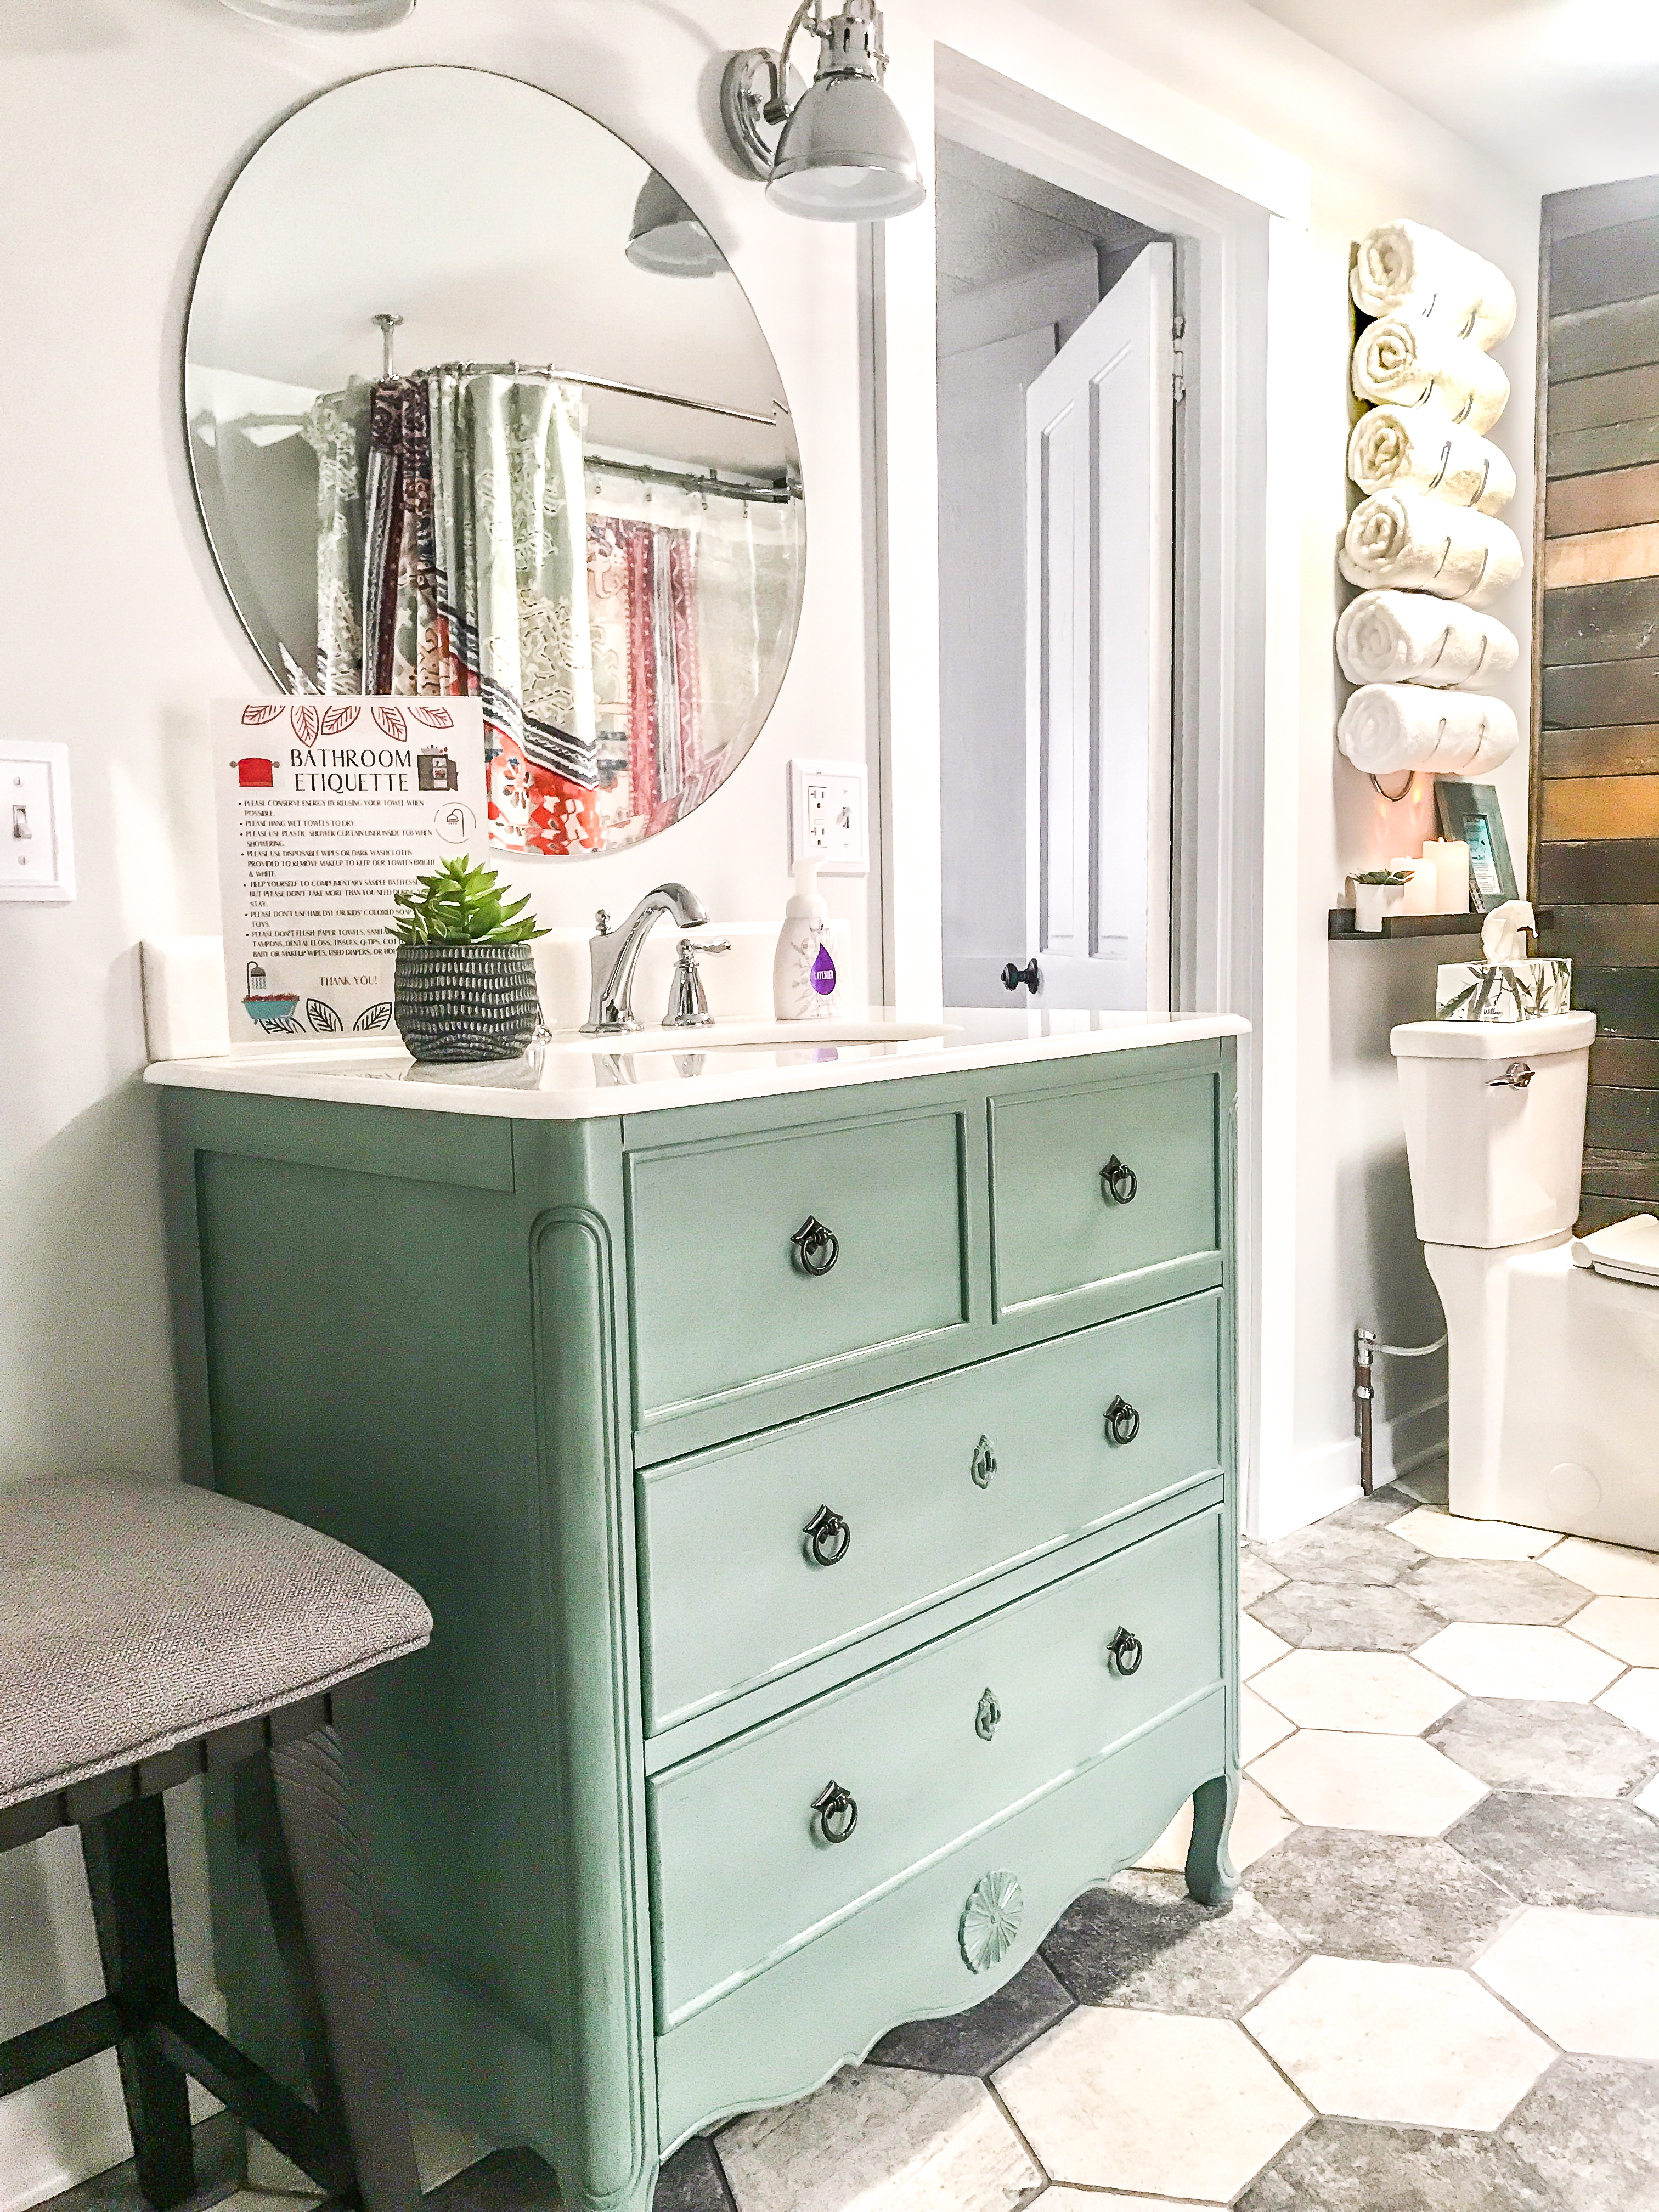
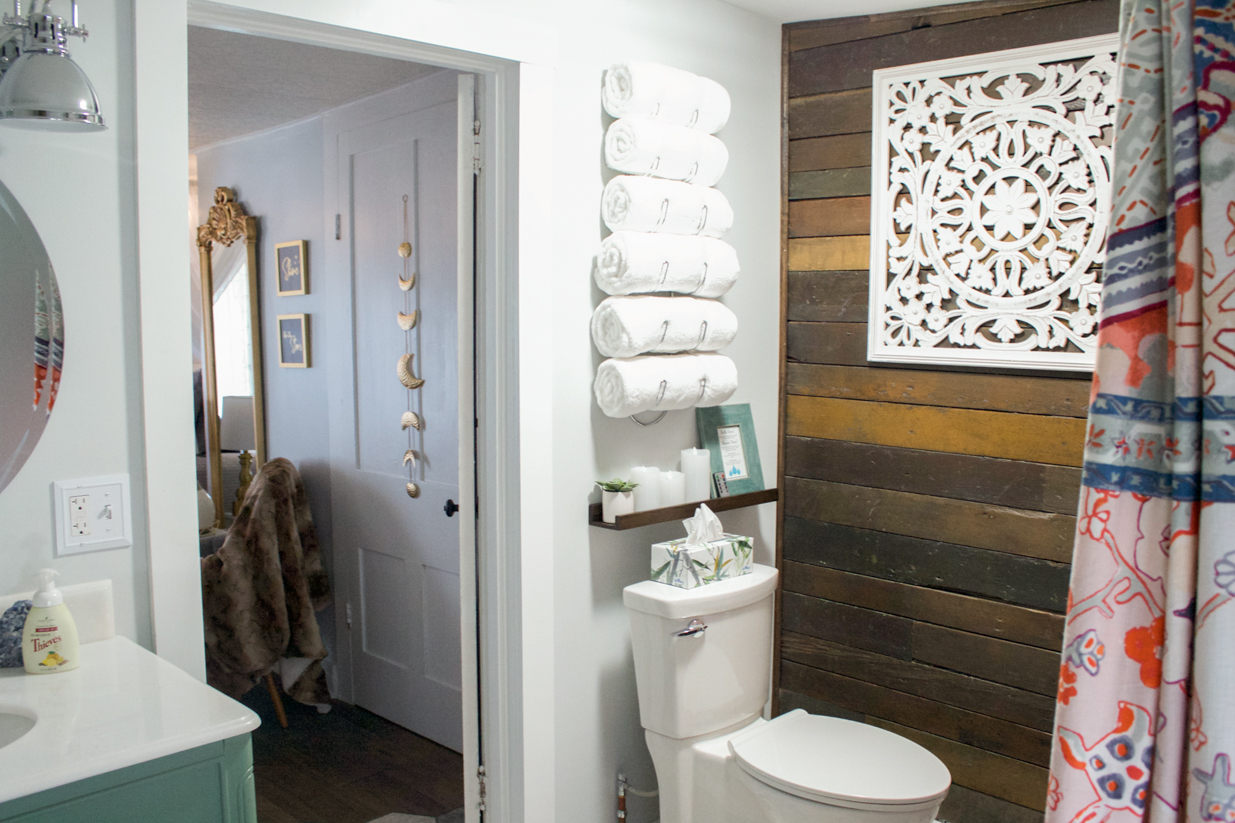
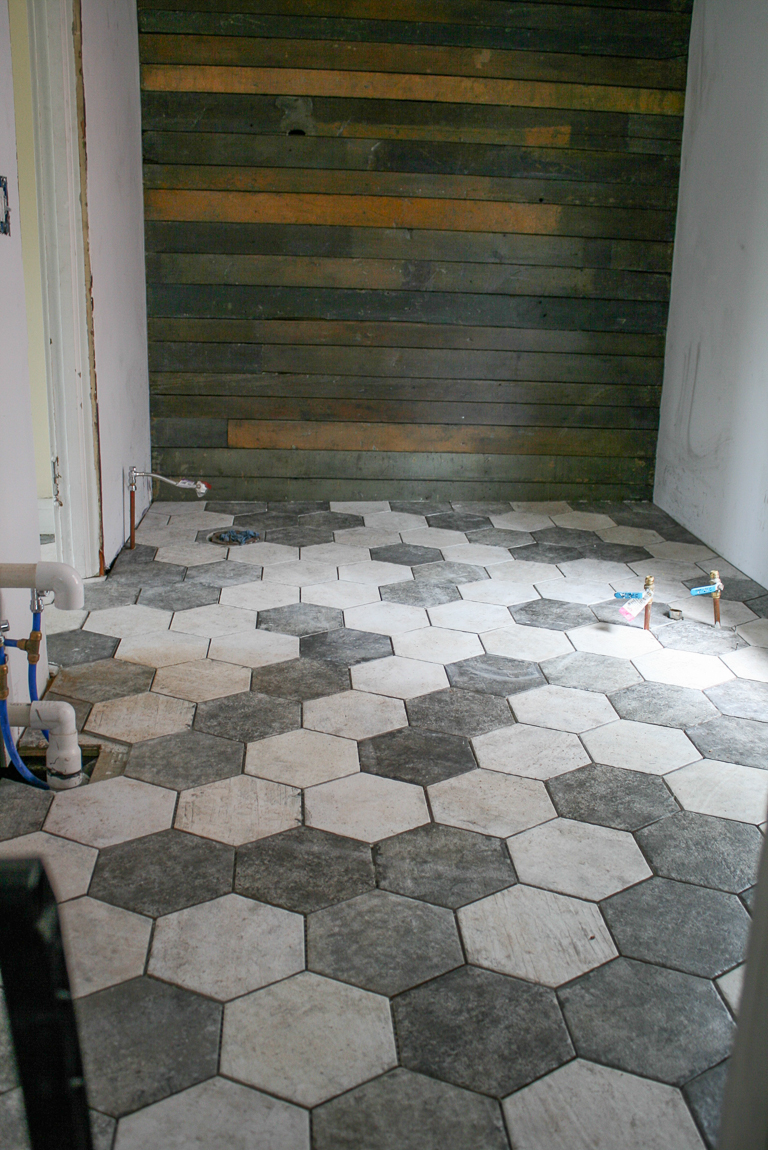
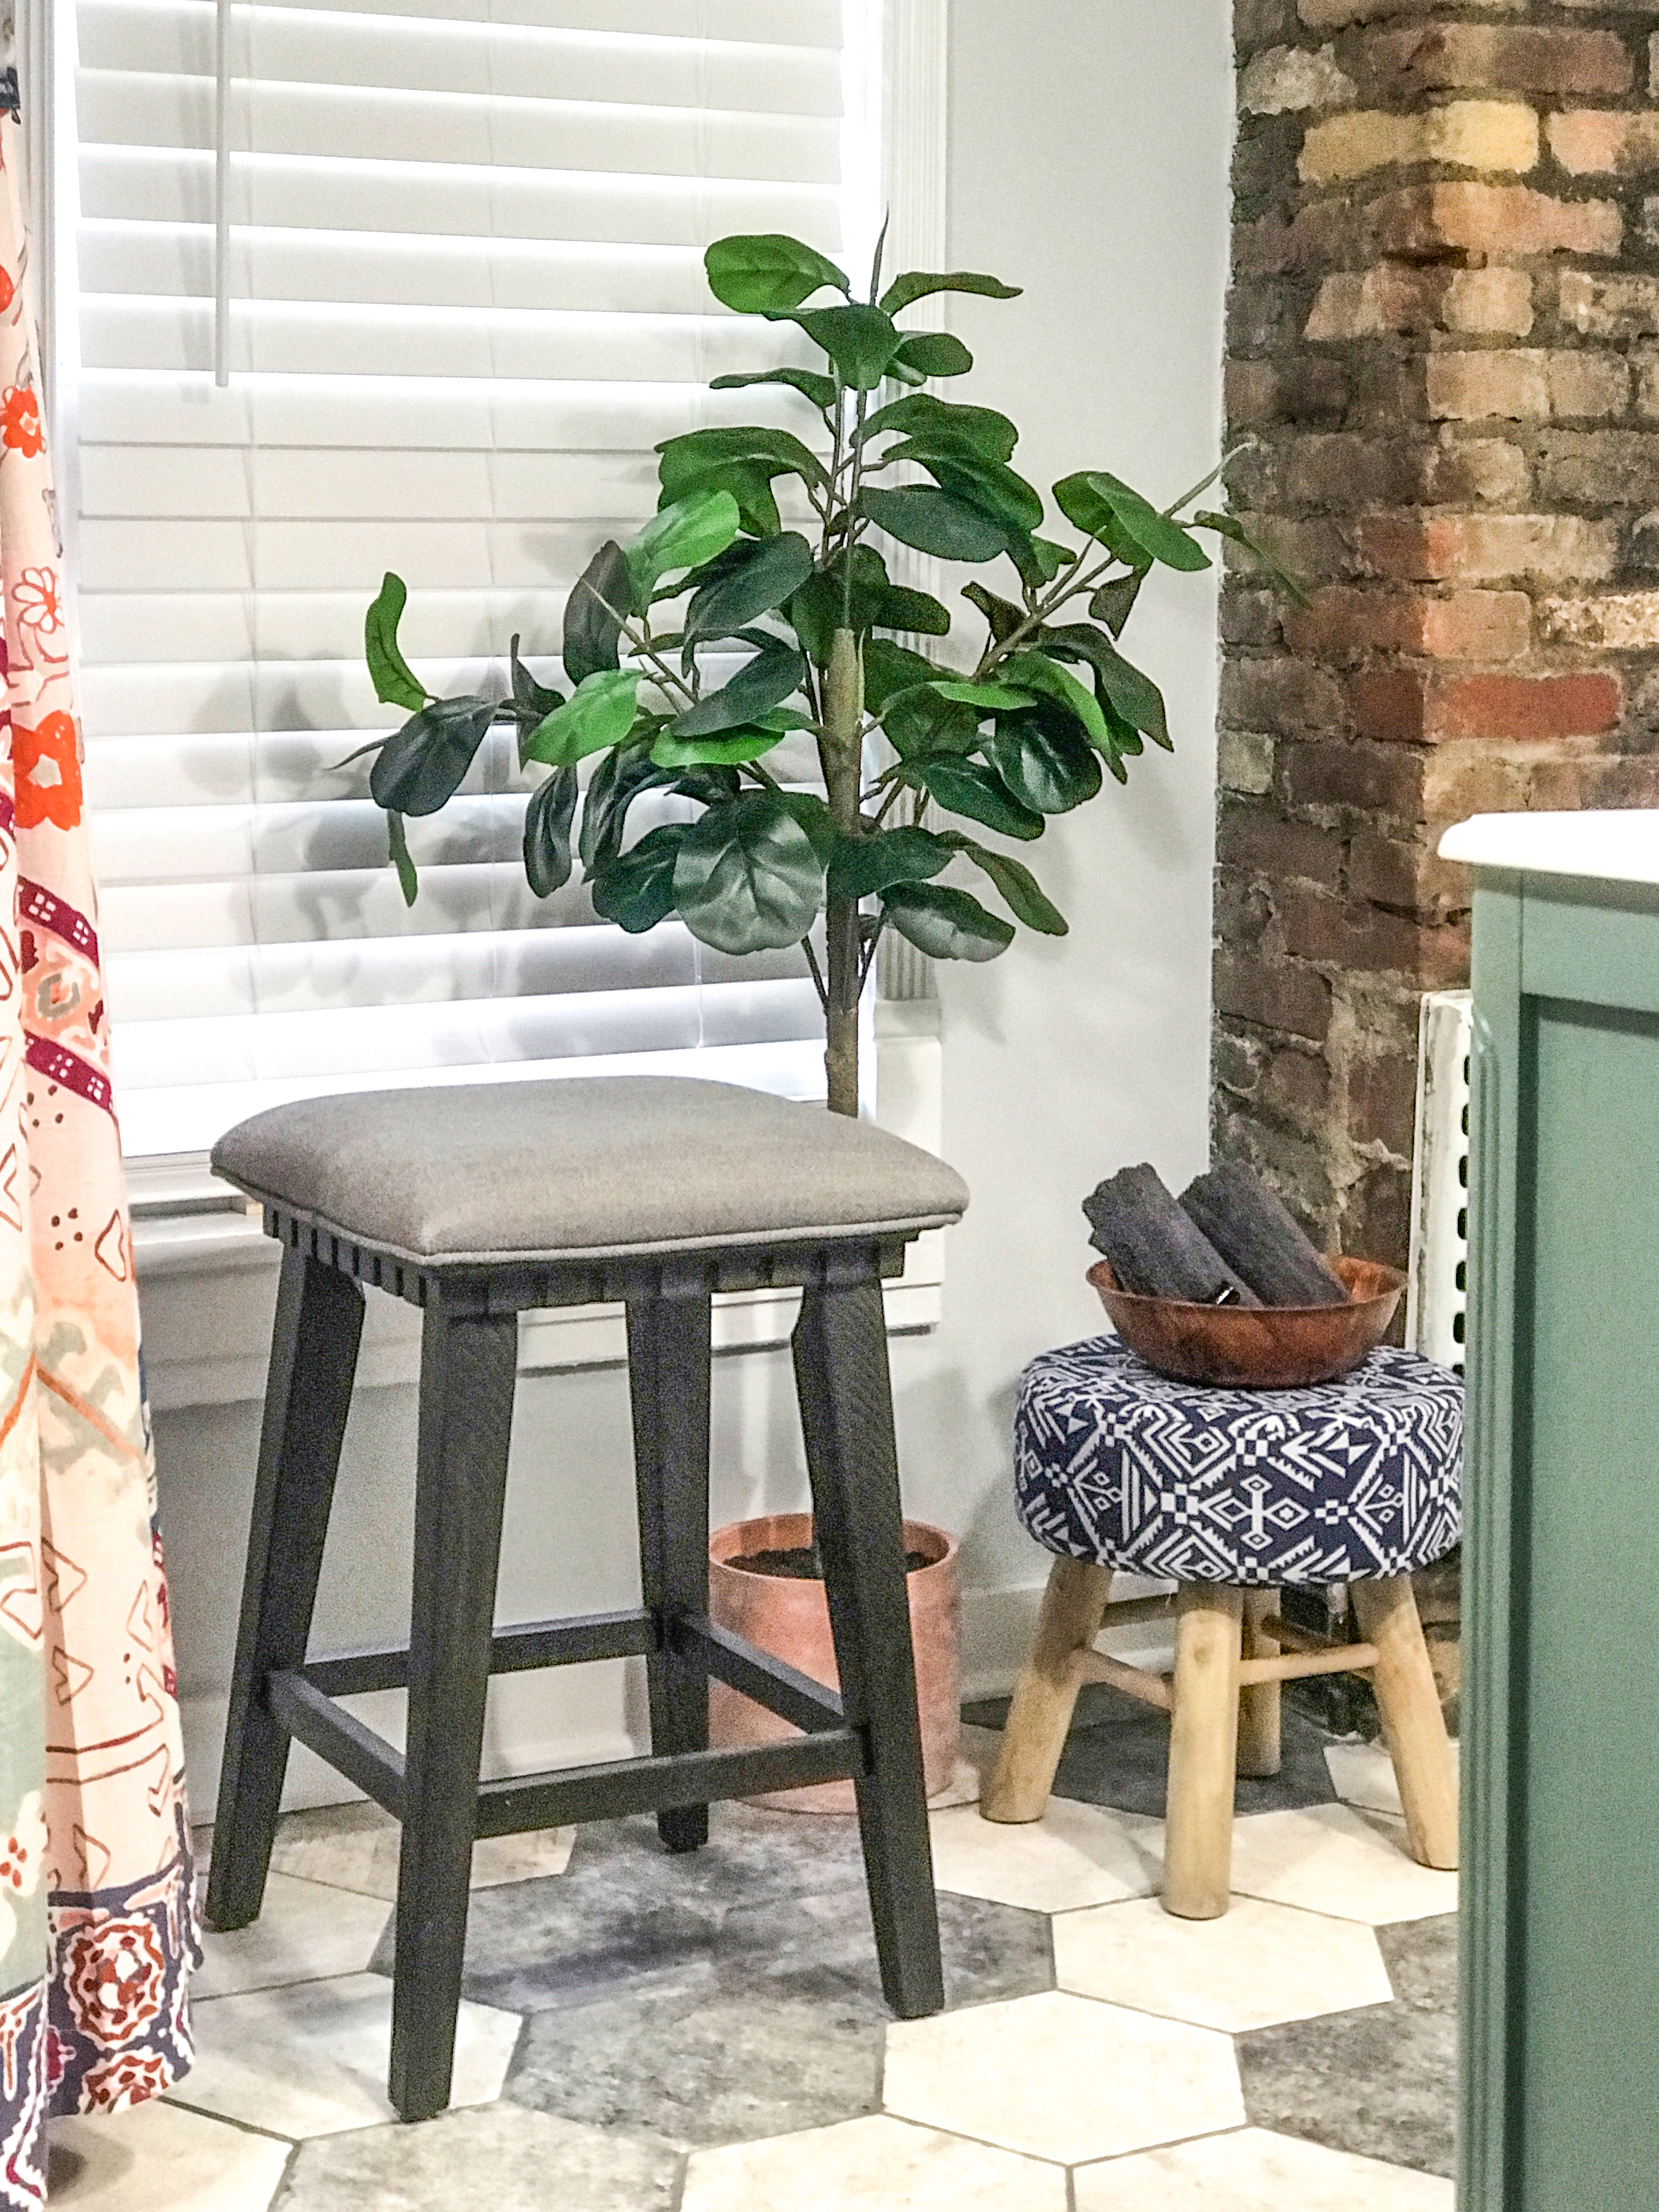
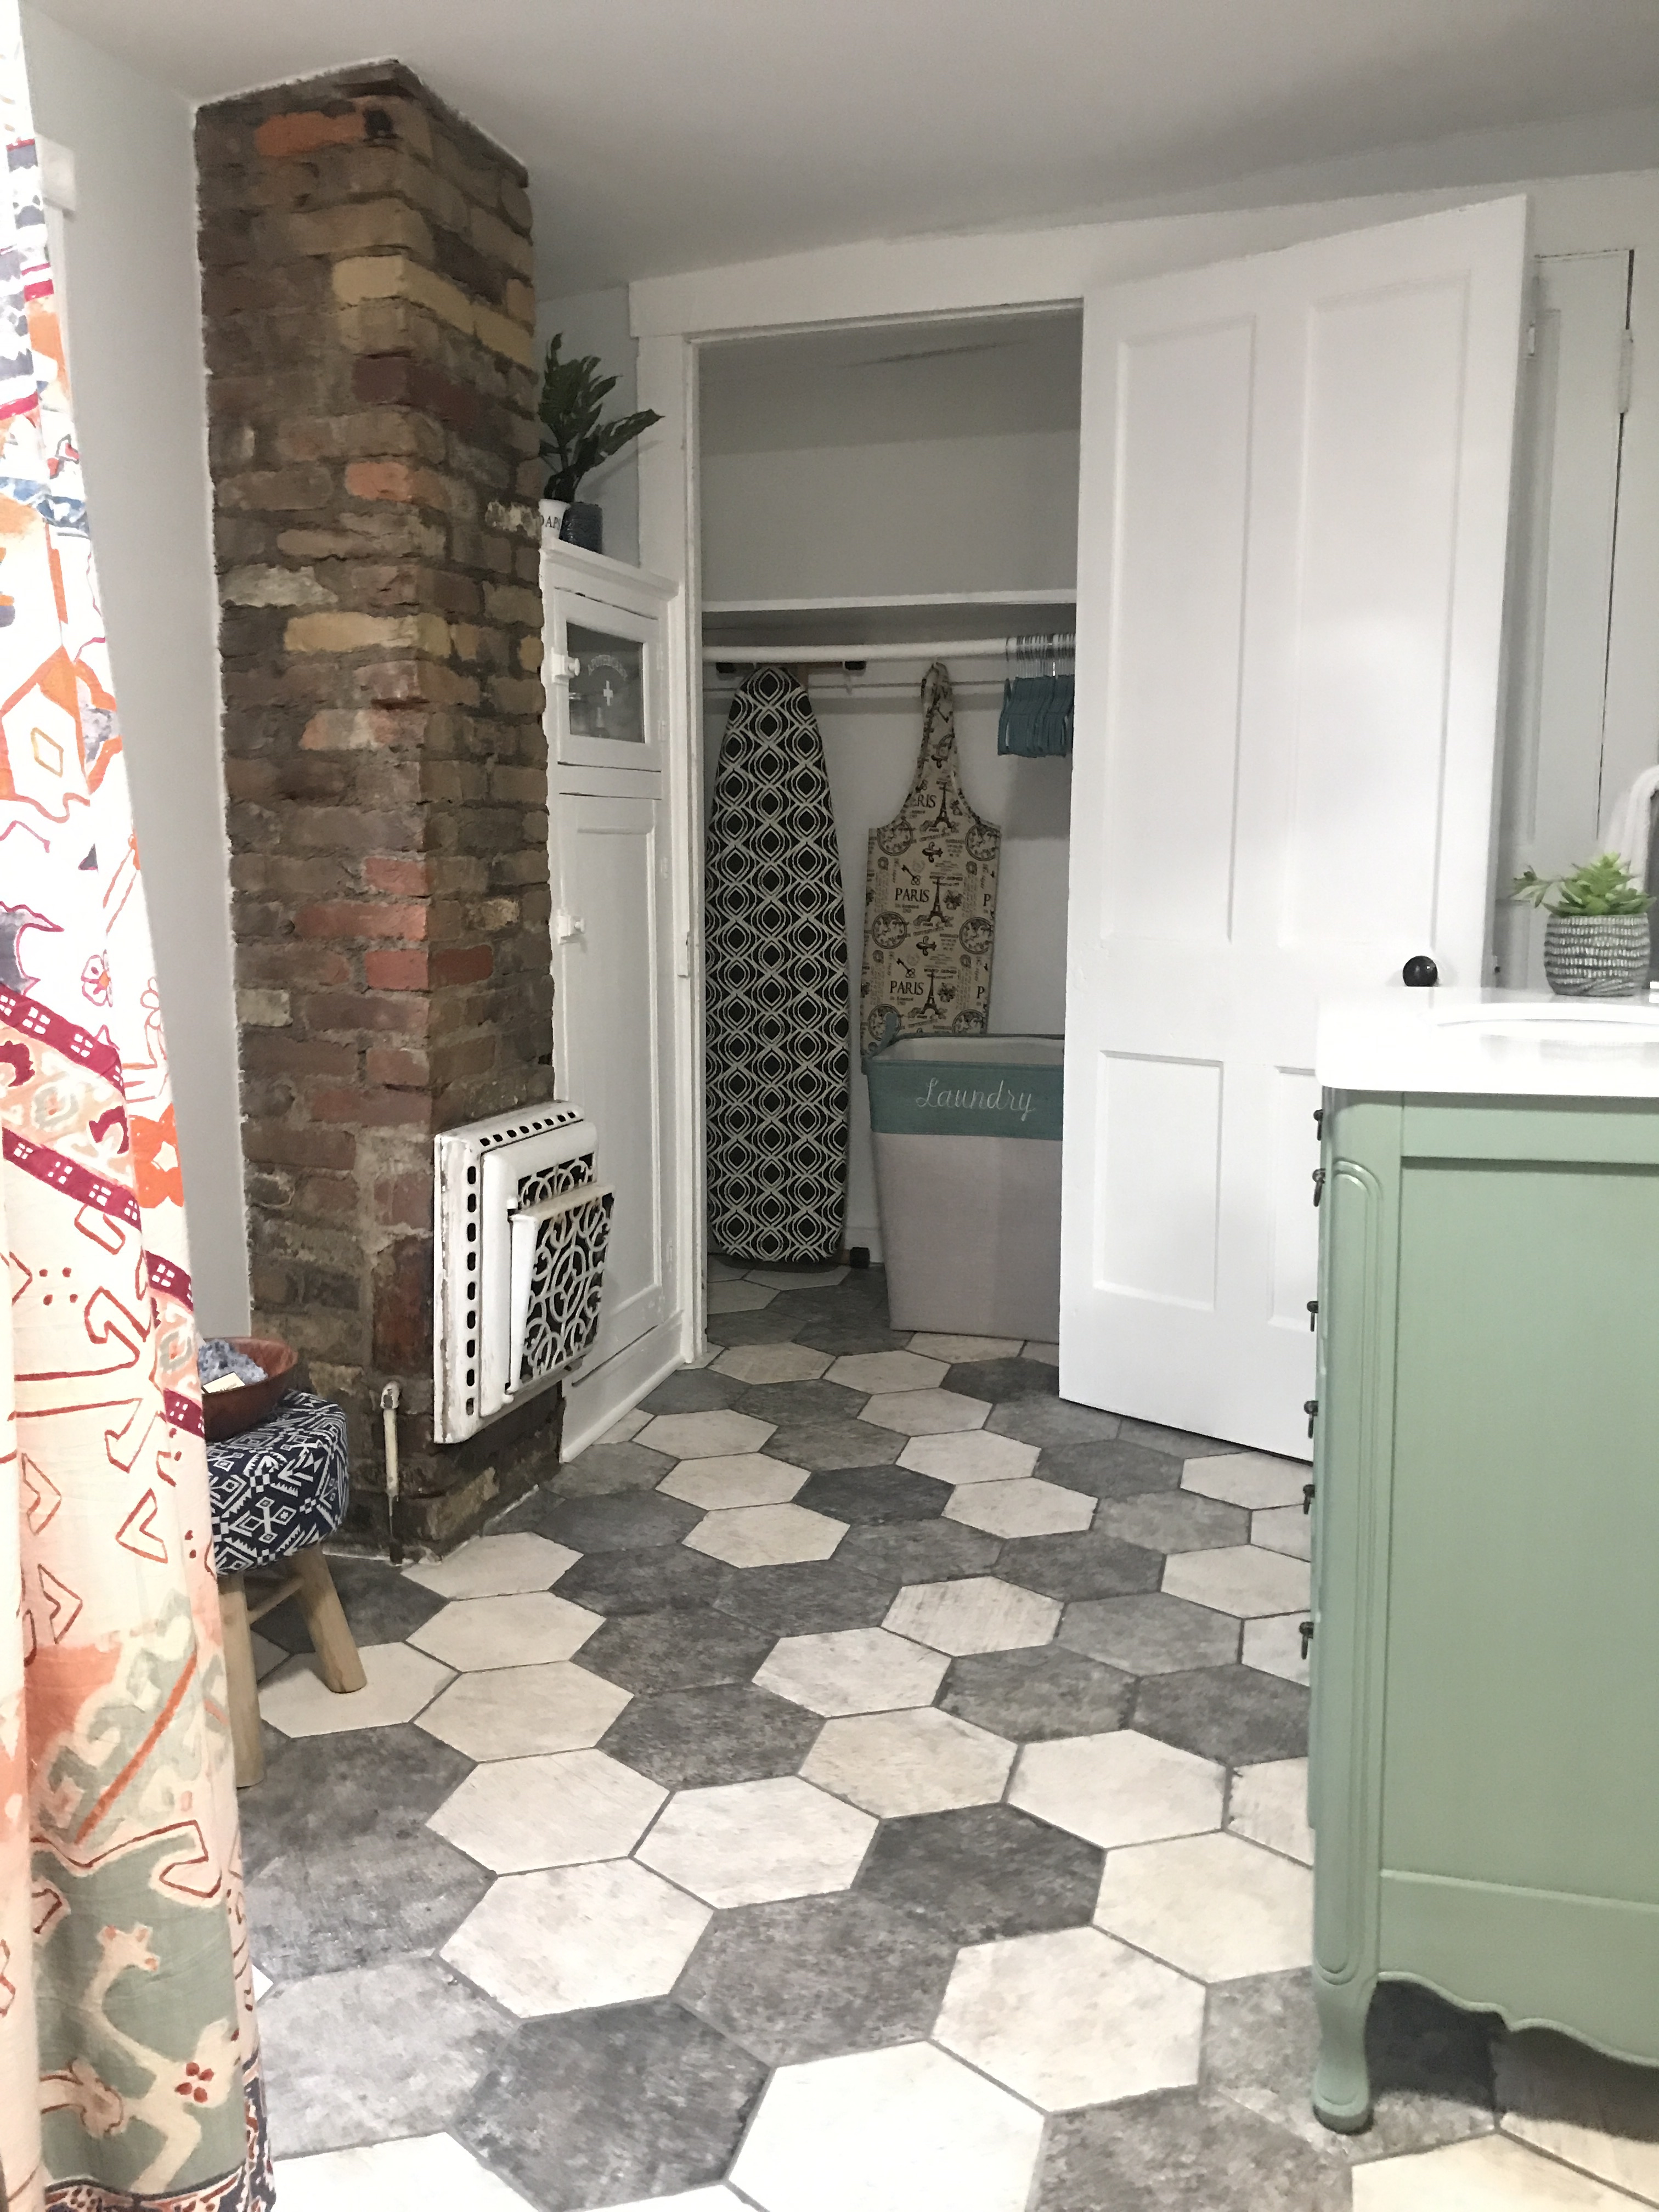
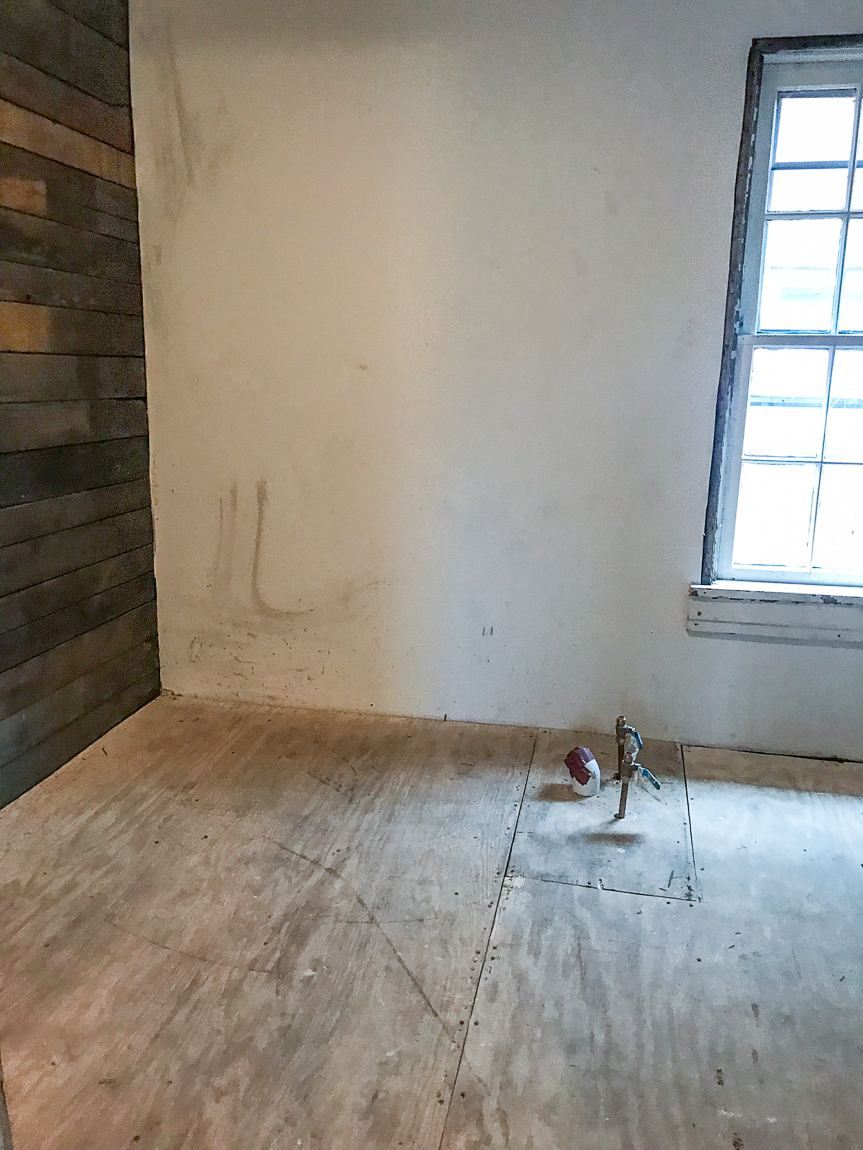
The floor – nothing is square or level but I insisted on installing tile. So, the floor was completely removed and a new level subfloor installed. You can see more about the gorgeous Shaw Floors tile I chose and installation here –> Bathroom Flooring
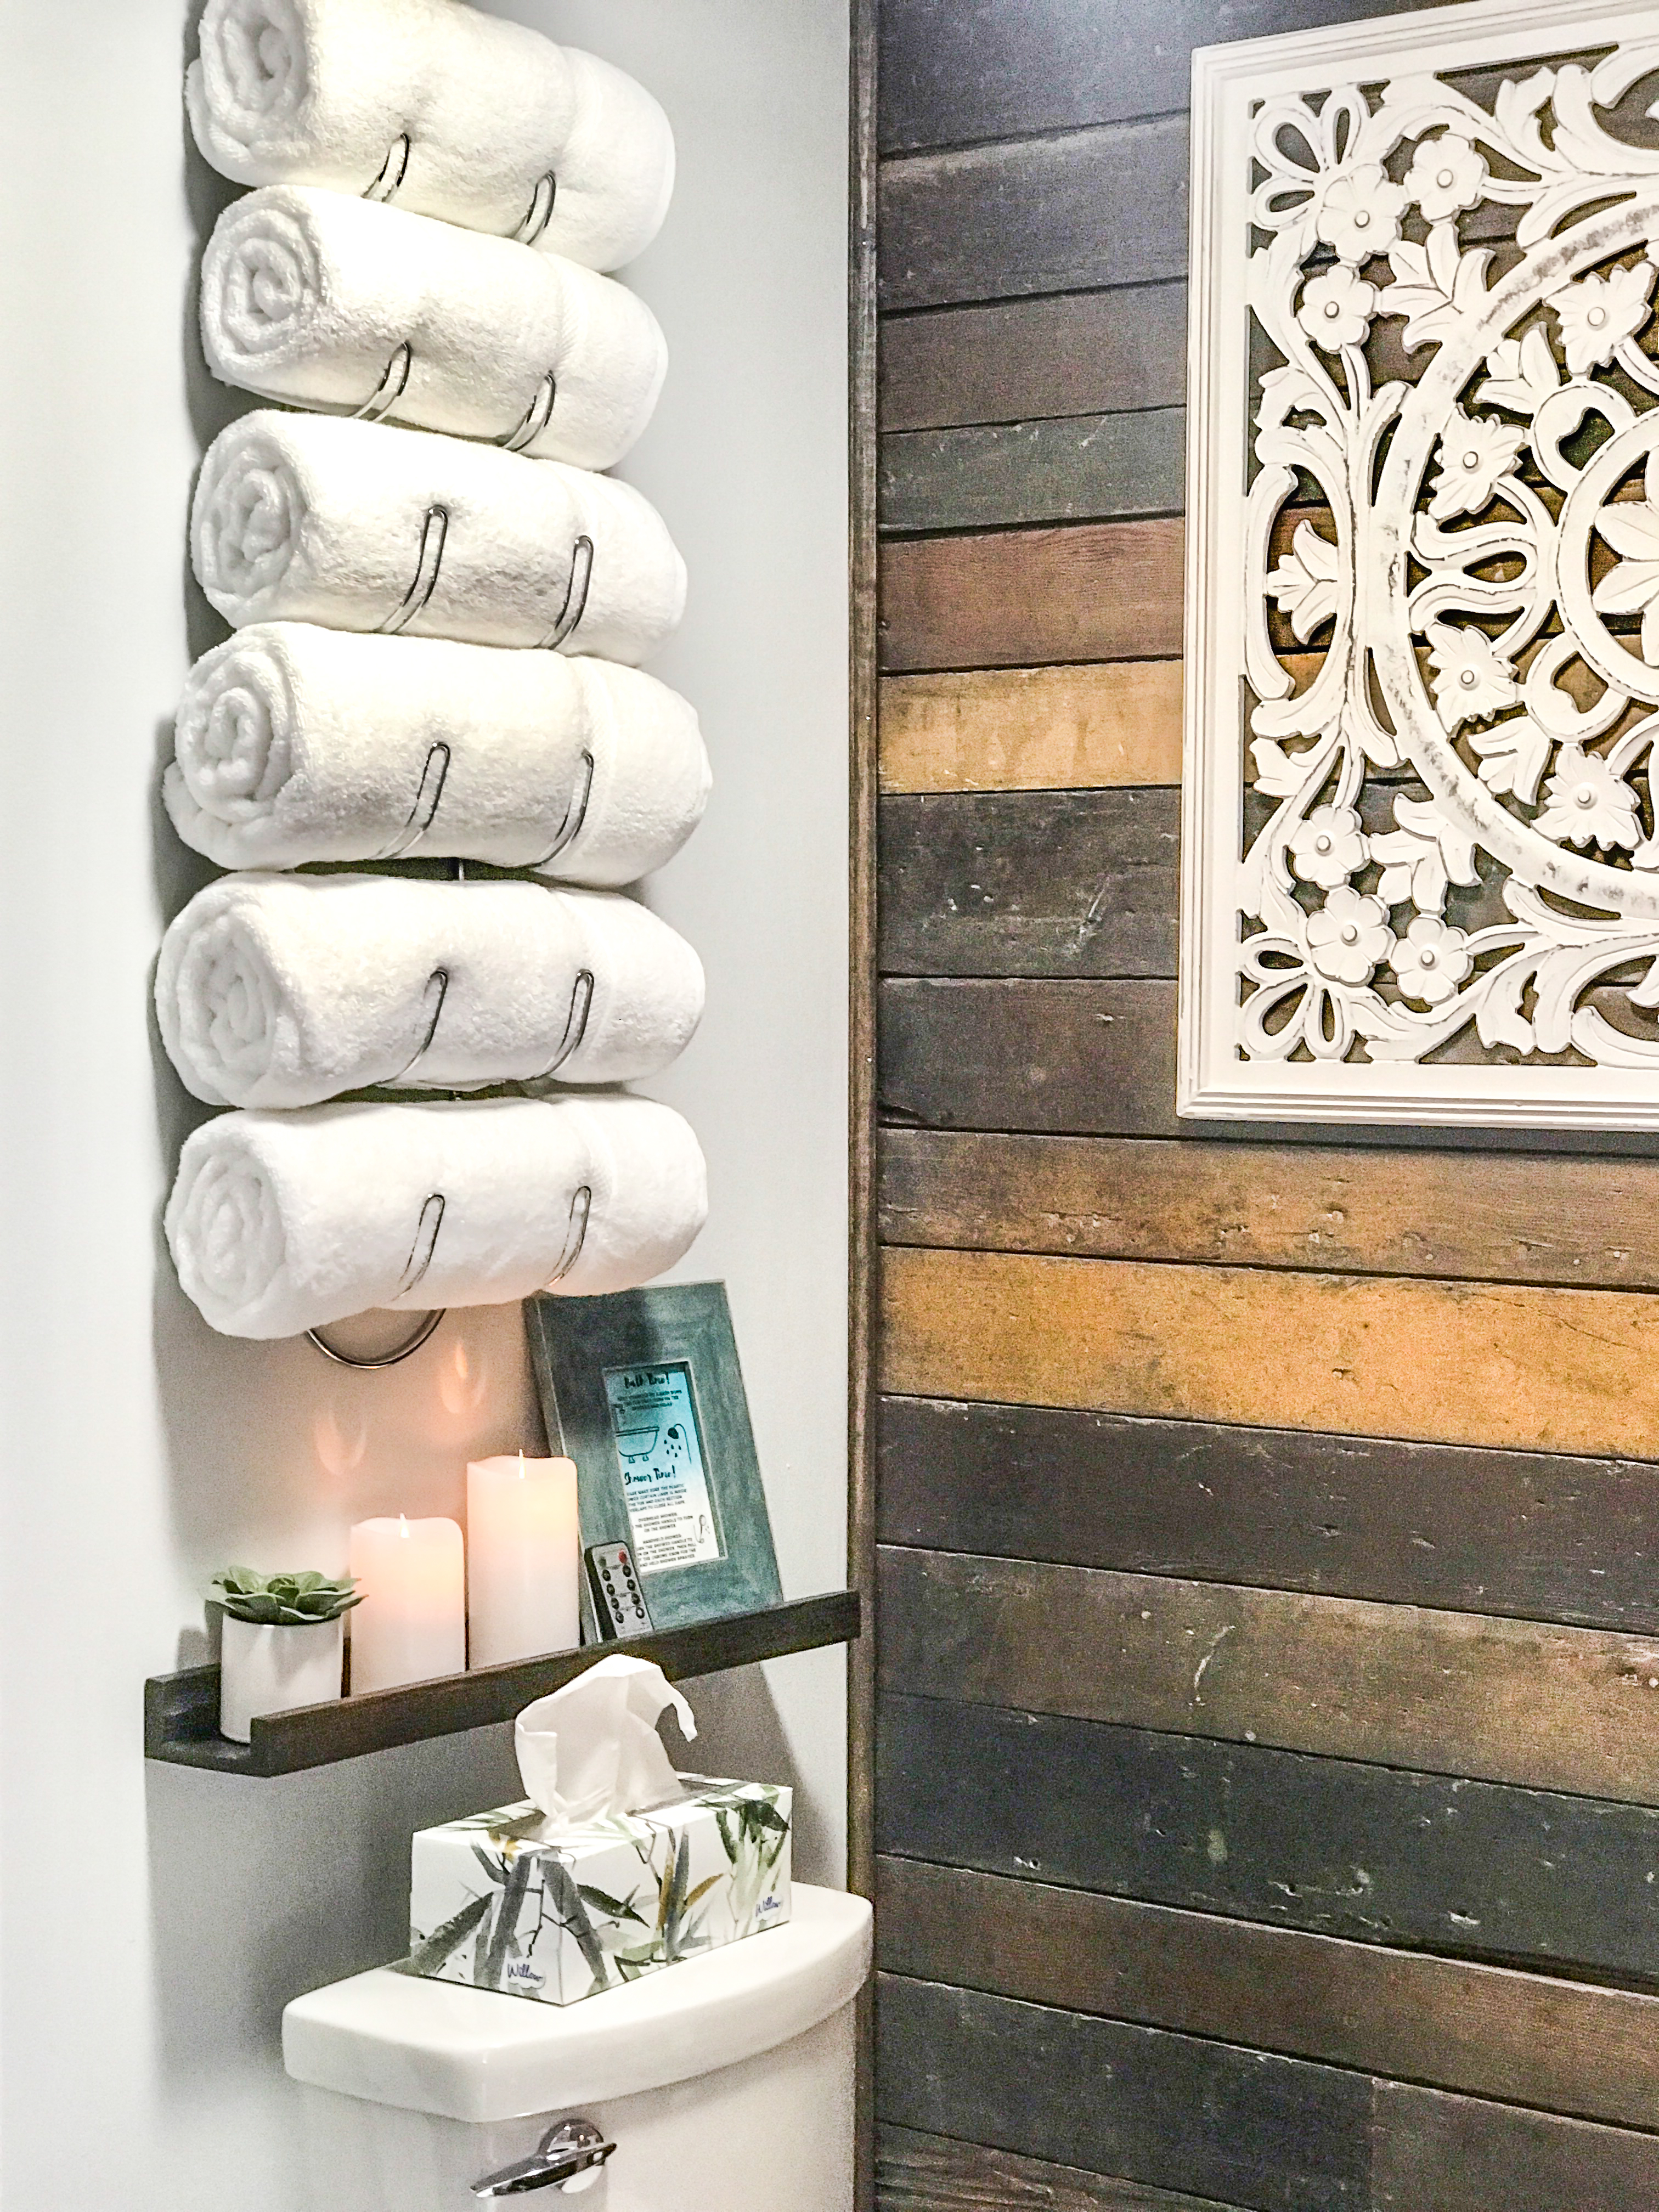
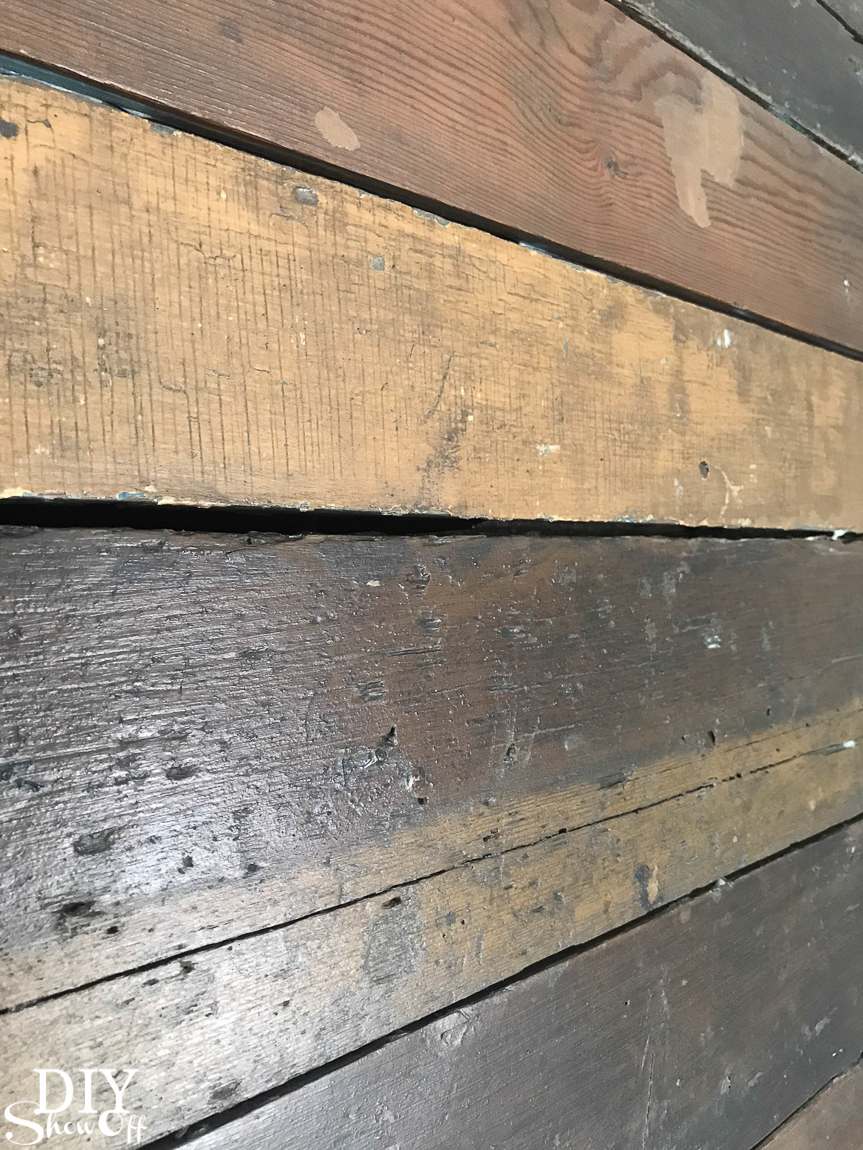
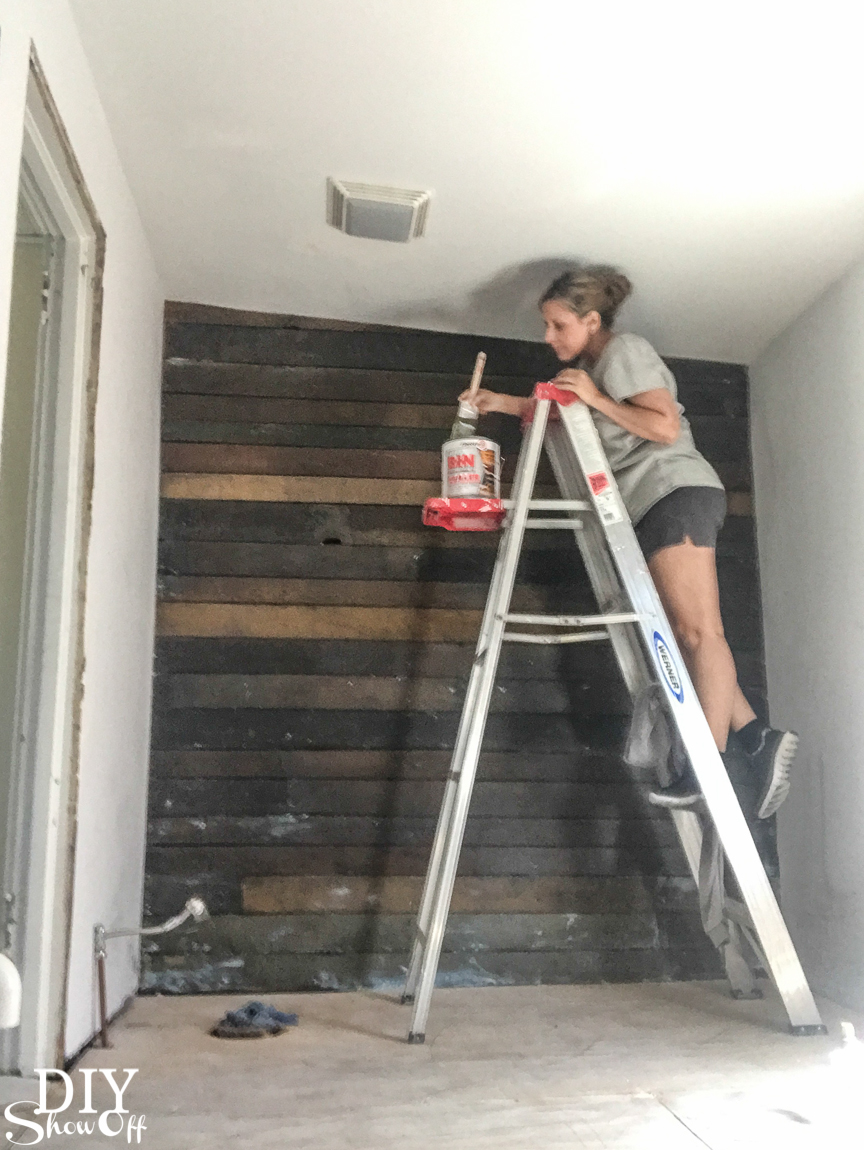
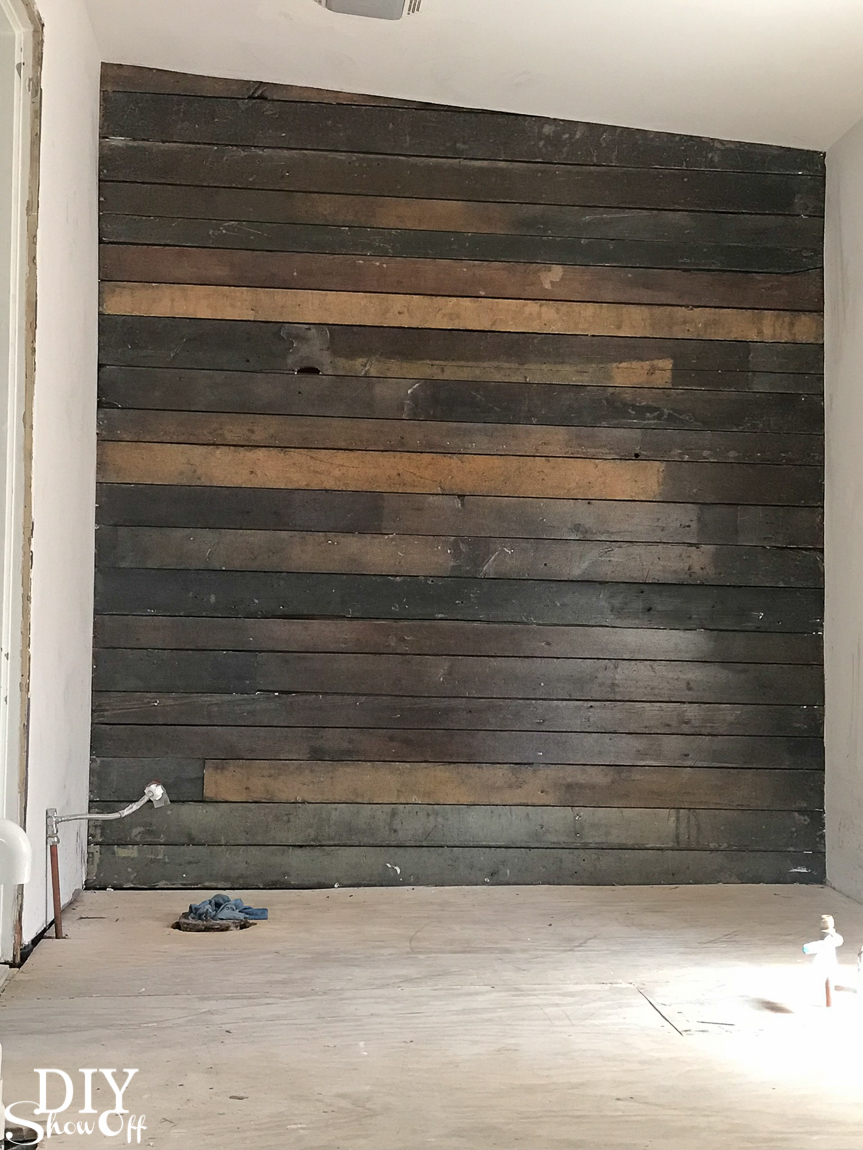
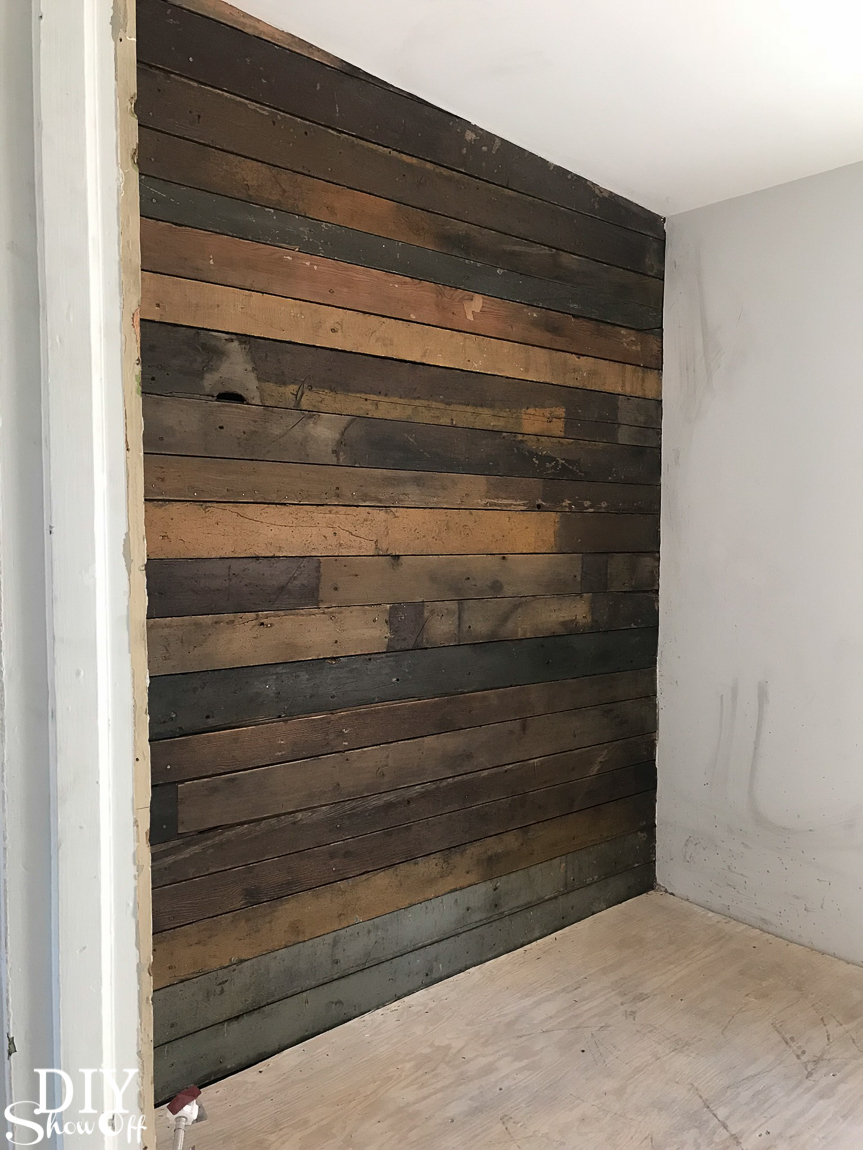
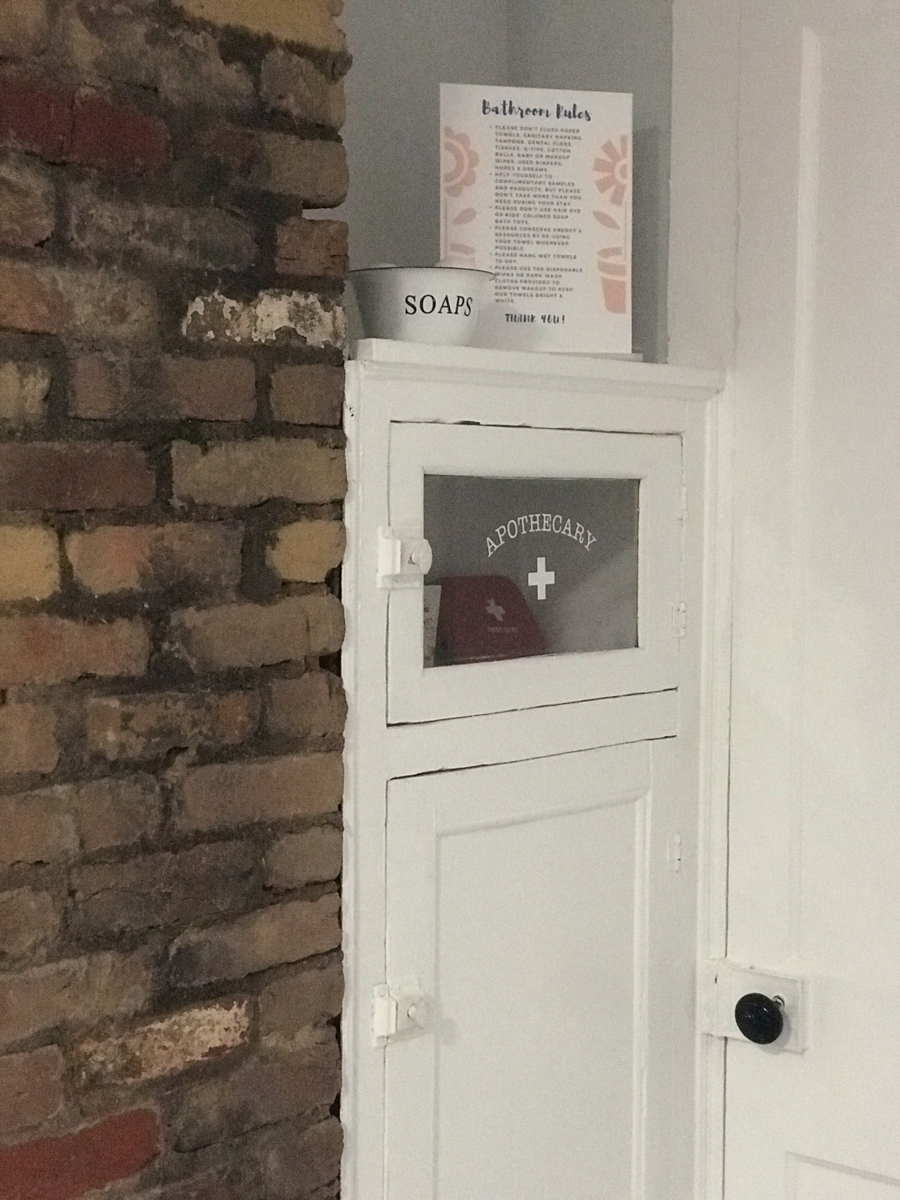
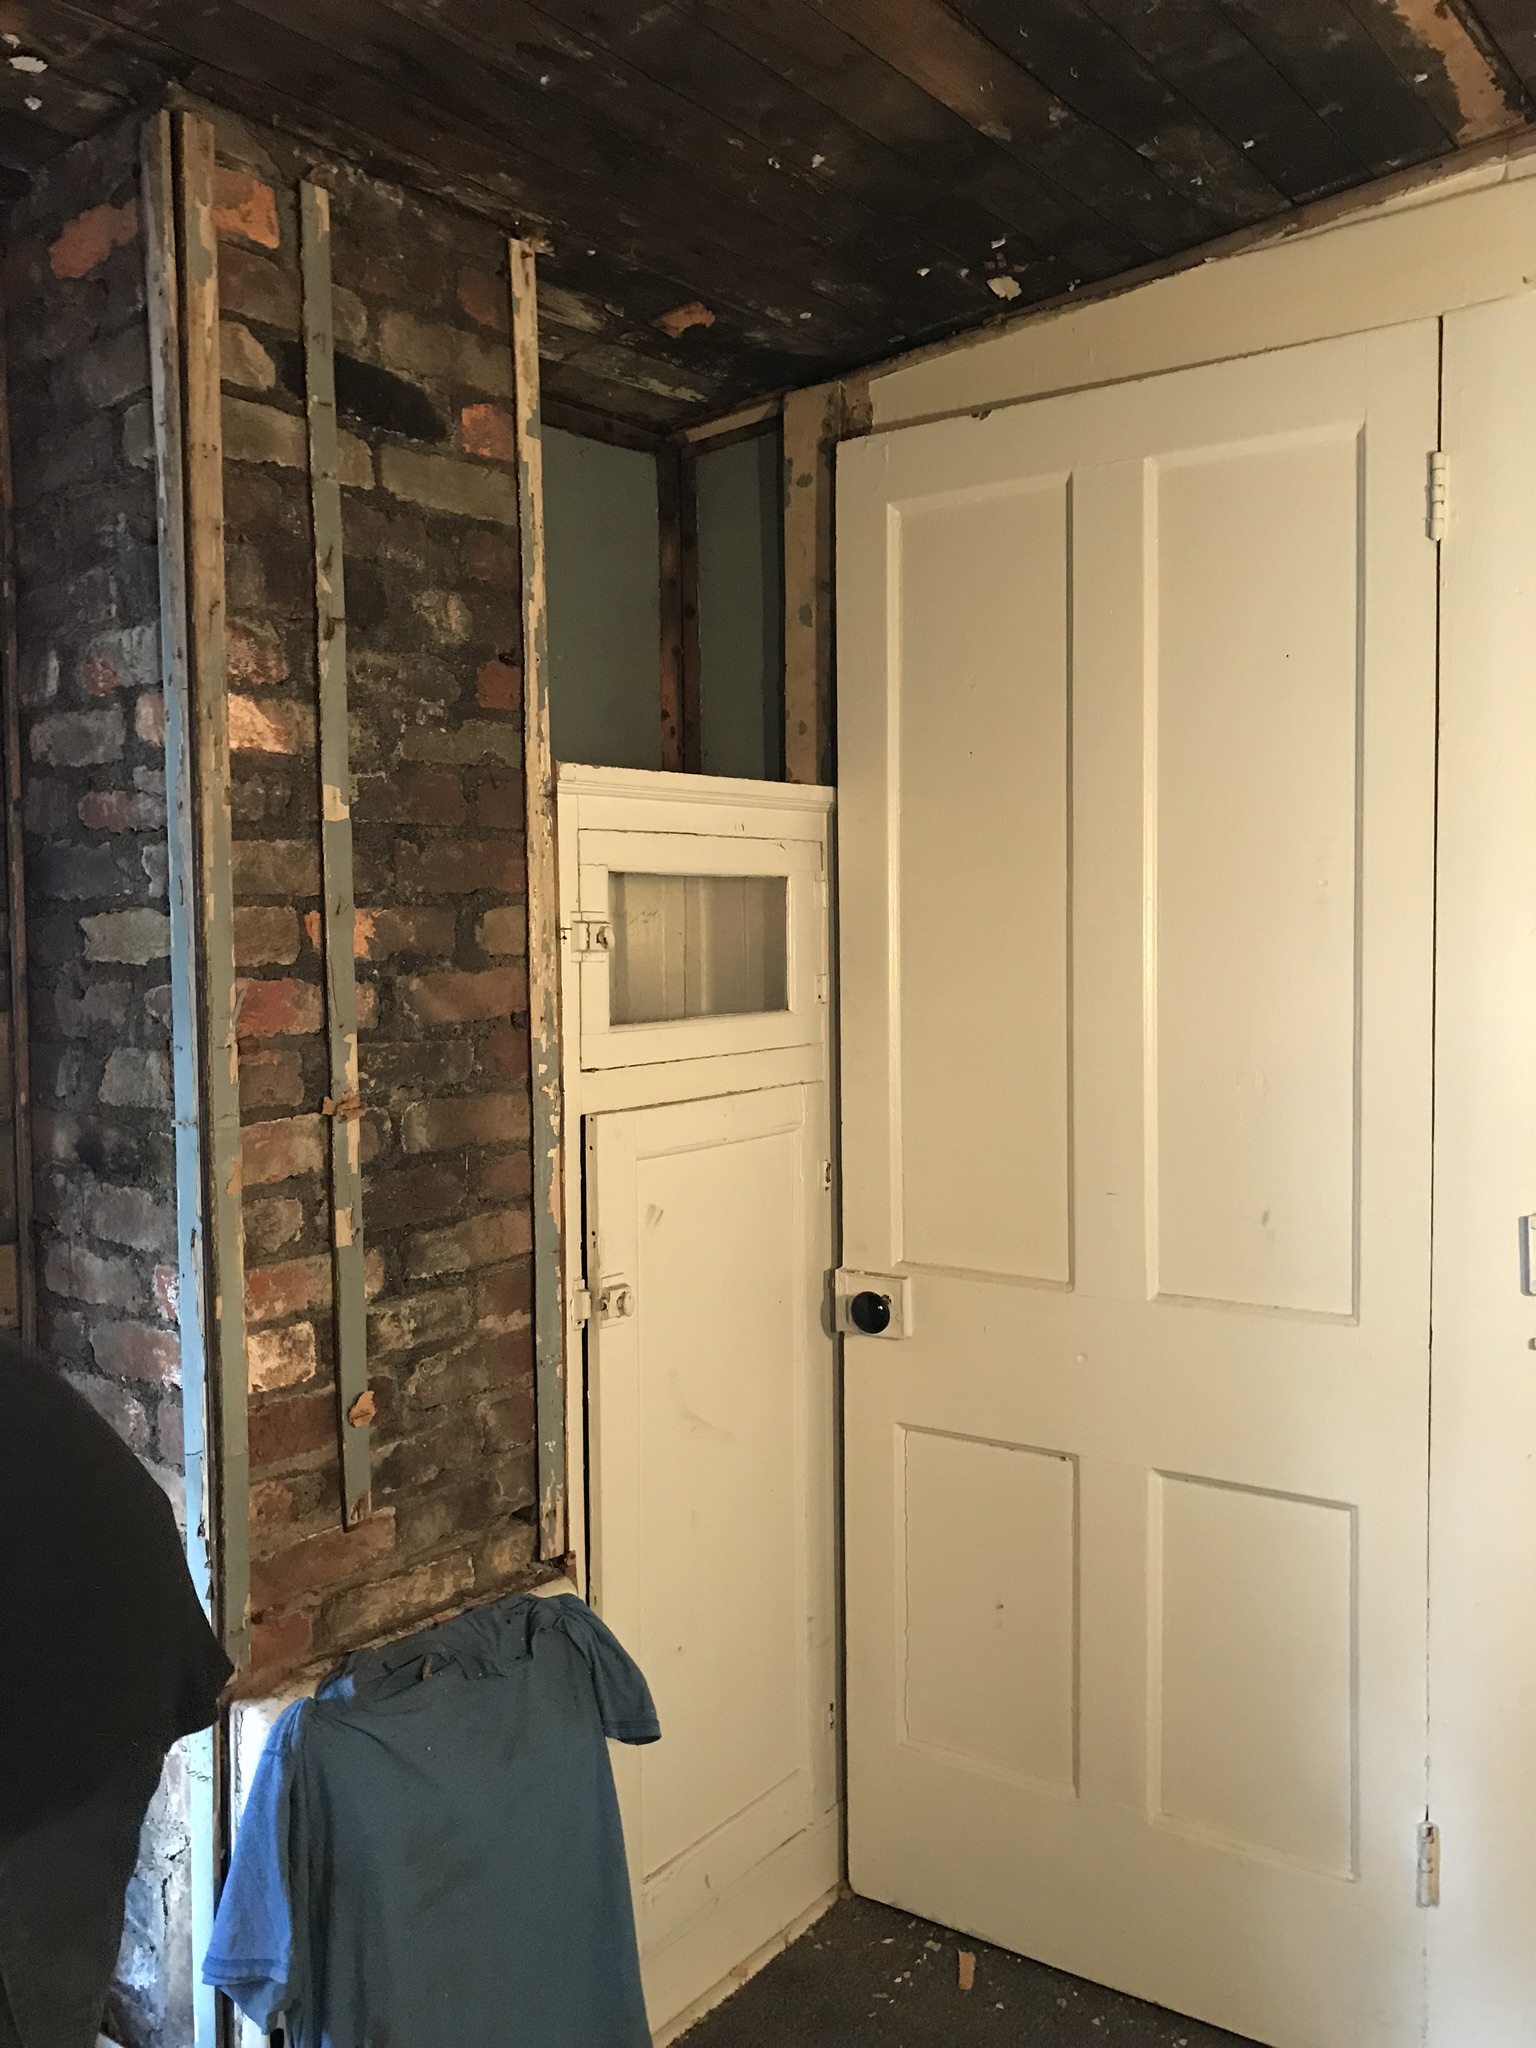
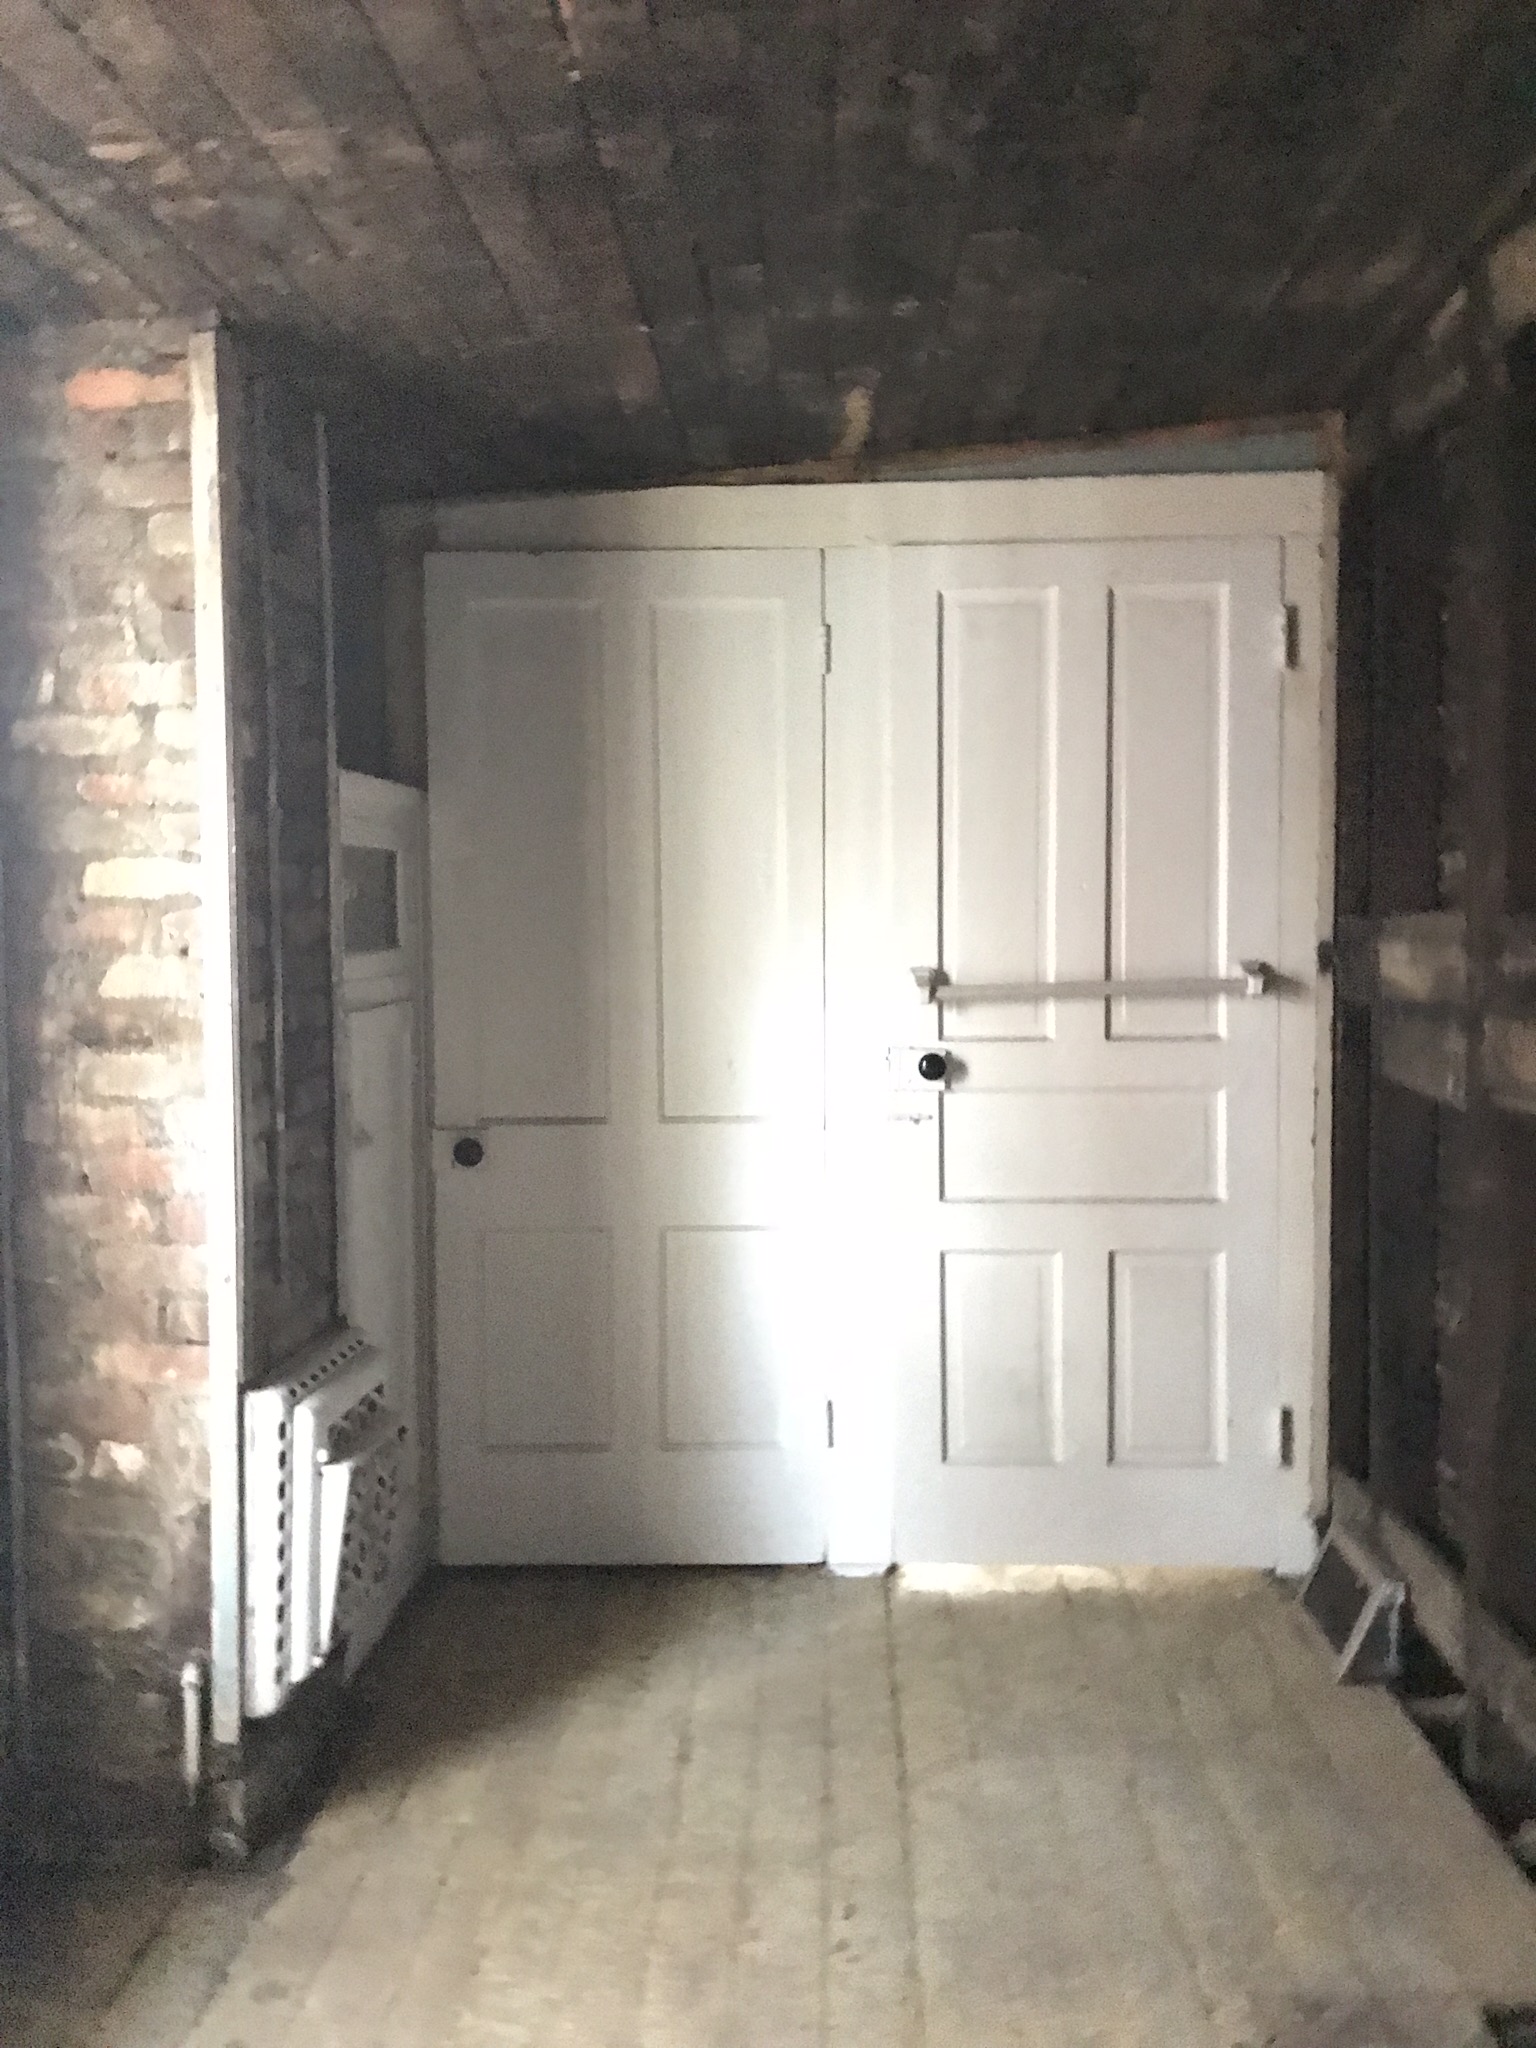
And the walls? That paneling. Gone! Down to the studs and very dirty ‘shiplap’. I just couldn’t cover up the beautiful back wall (Sealing a Wood Plank Wall) and the rest of the walls and ceiling was covered with drywall. I decided to leave the brick chimney exposed and sealed it (more on that with this post: Sealing Brick). I love that kind of original charm!
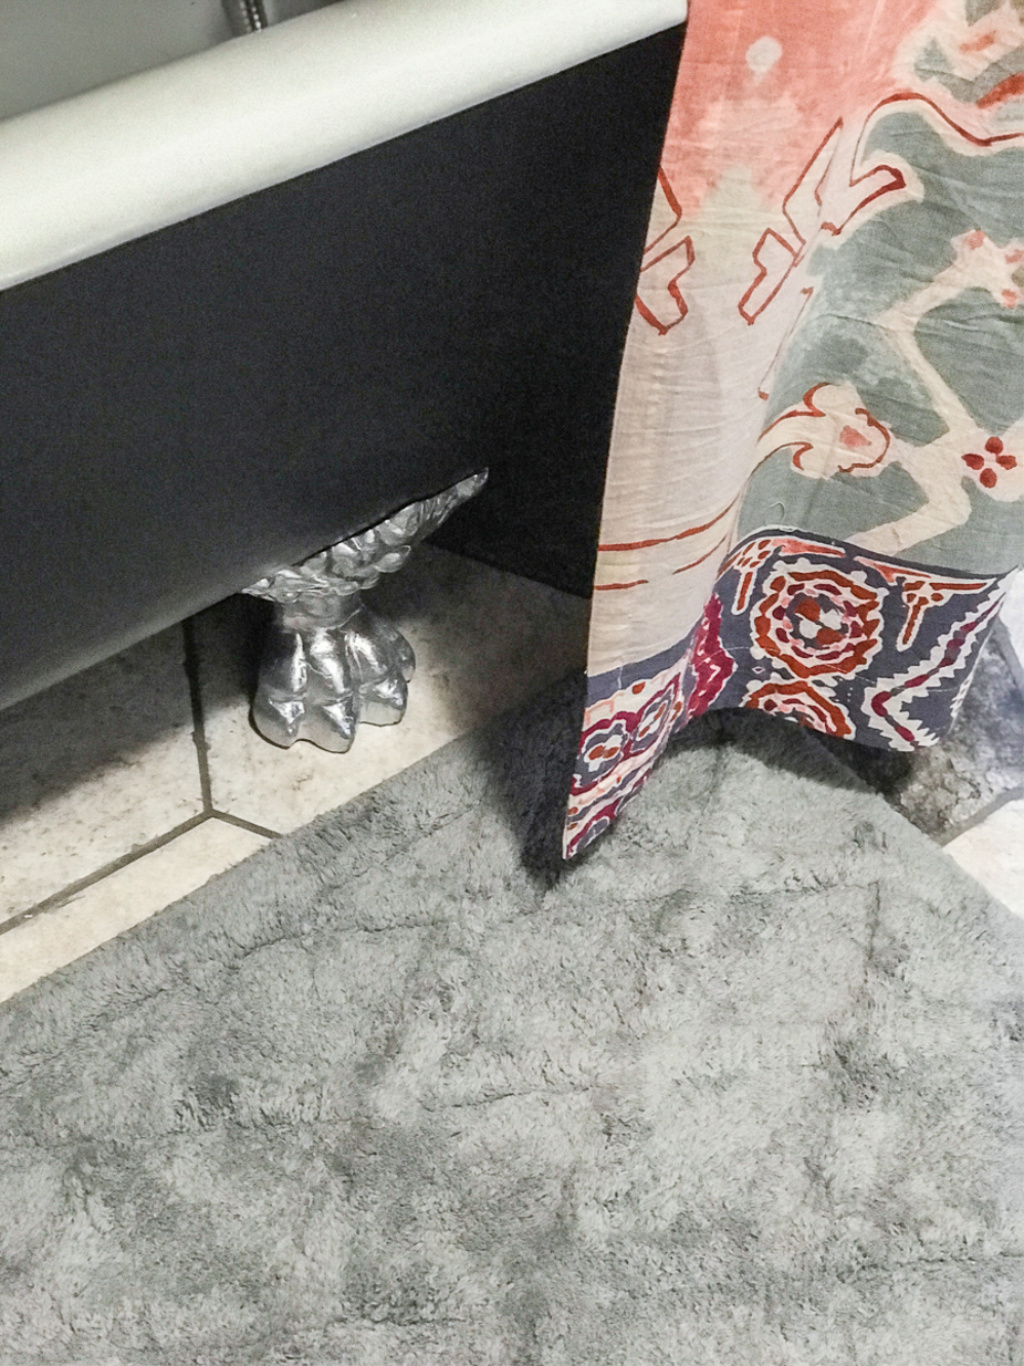
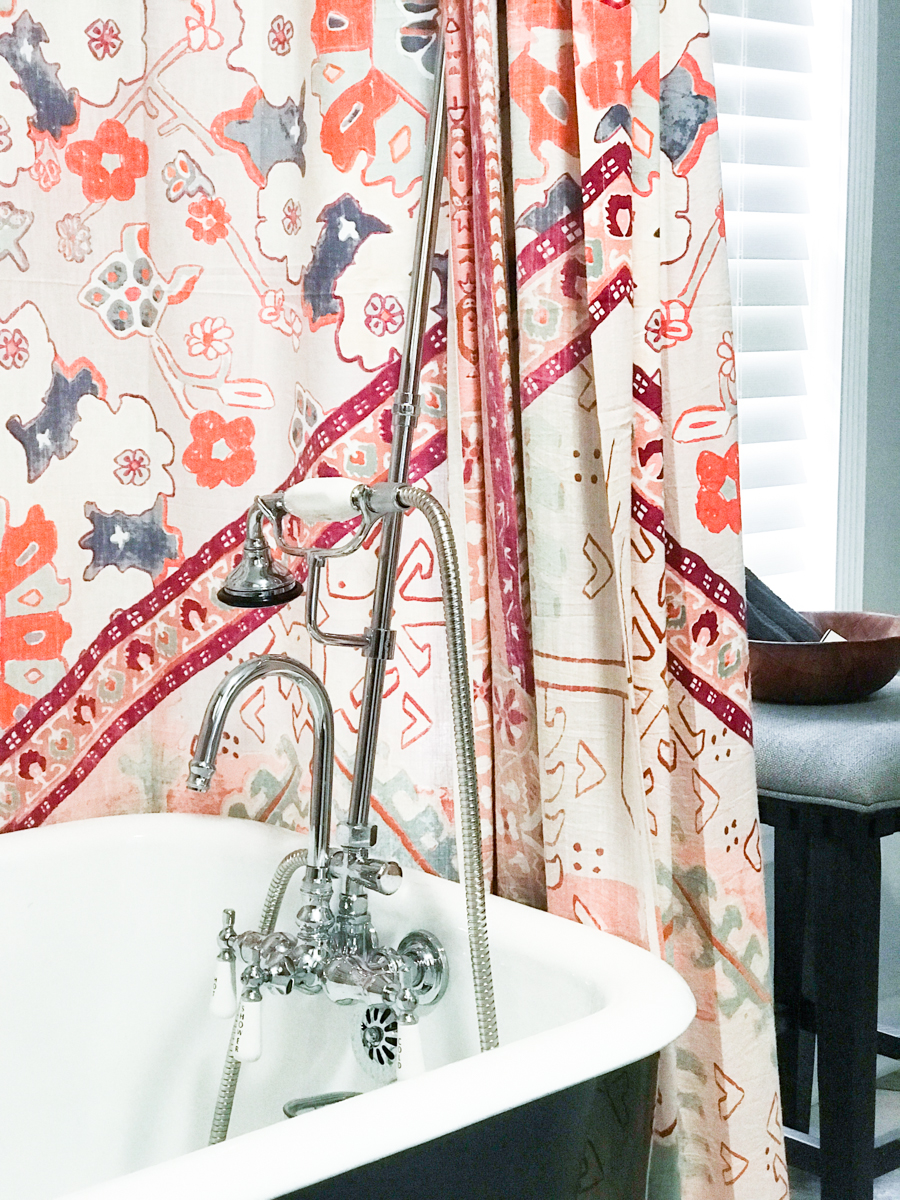
The tub. Oh man. I can’t believe it was boxed in! I did hire out refinishing the inside (David Gunn). Russ sanded the outside for me and I applied a couple of coats of primer and paint and gave those beautiful feet a fresh new look. Can you believe it was all originally hidden? it’s gorgeous!
Before:
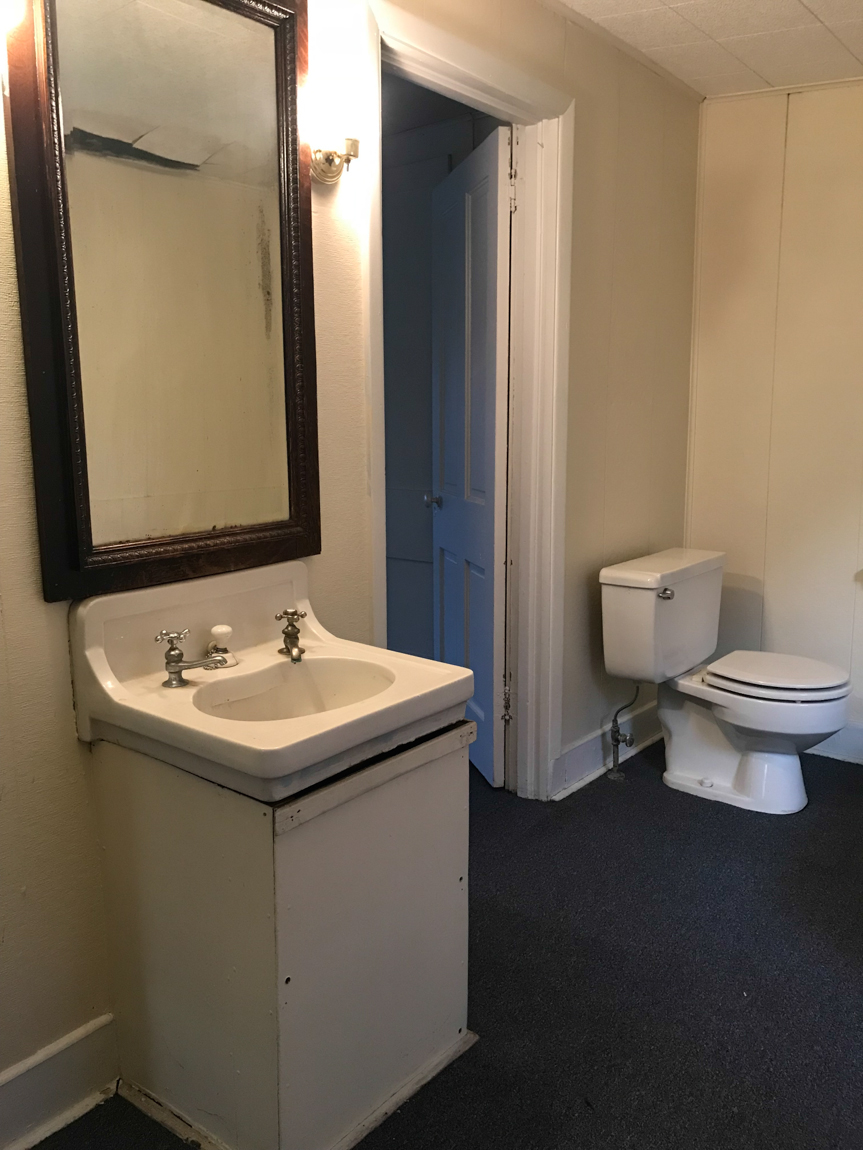
 Before:
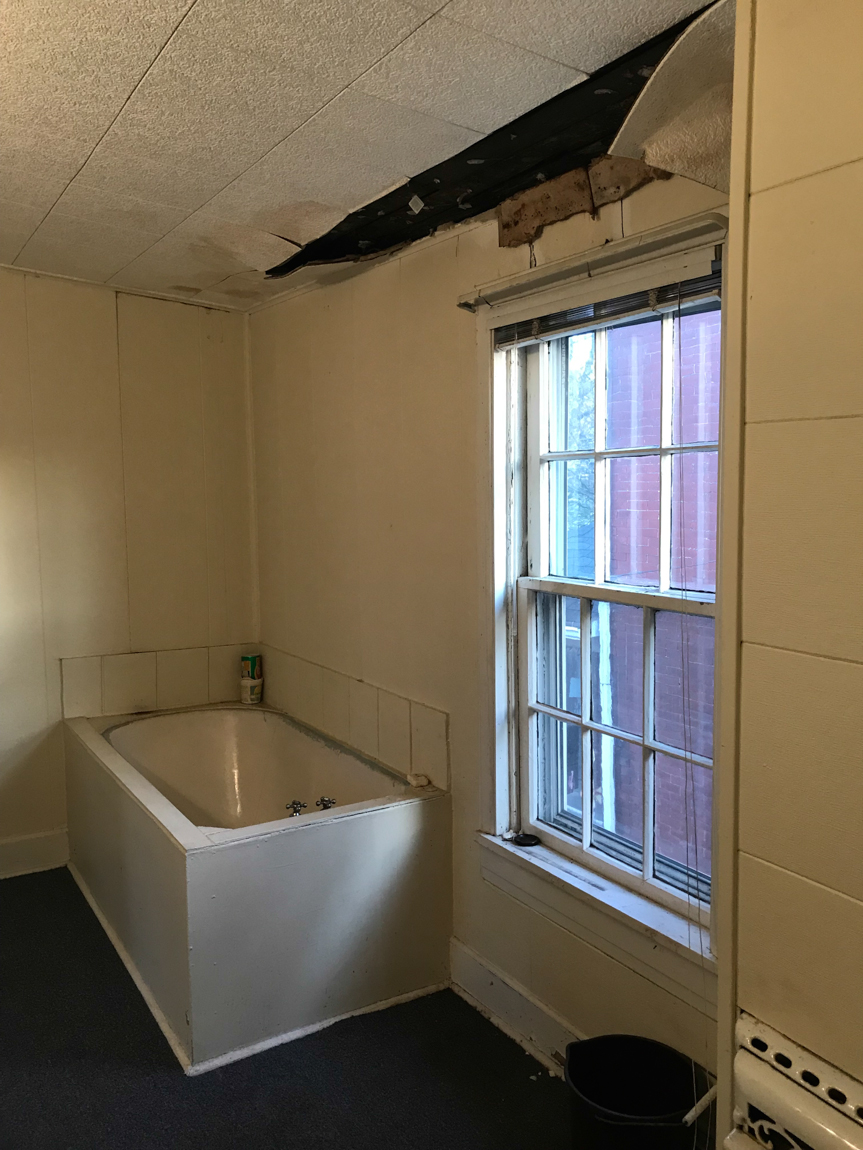
 Before: Before:
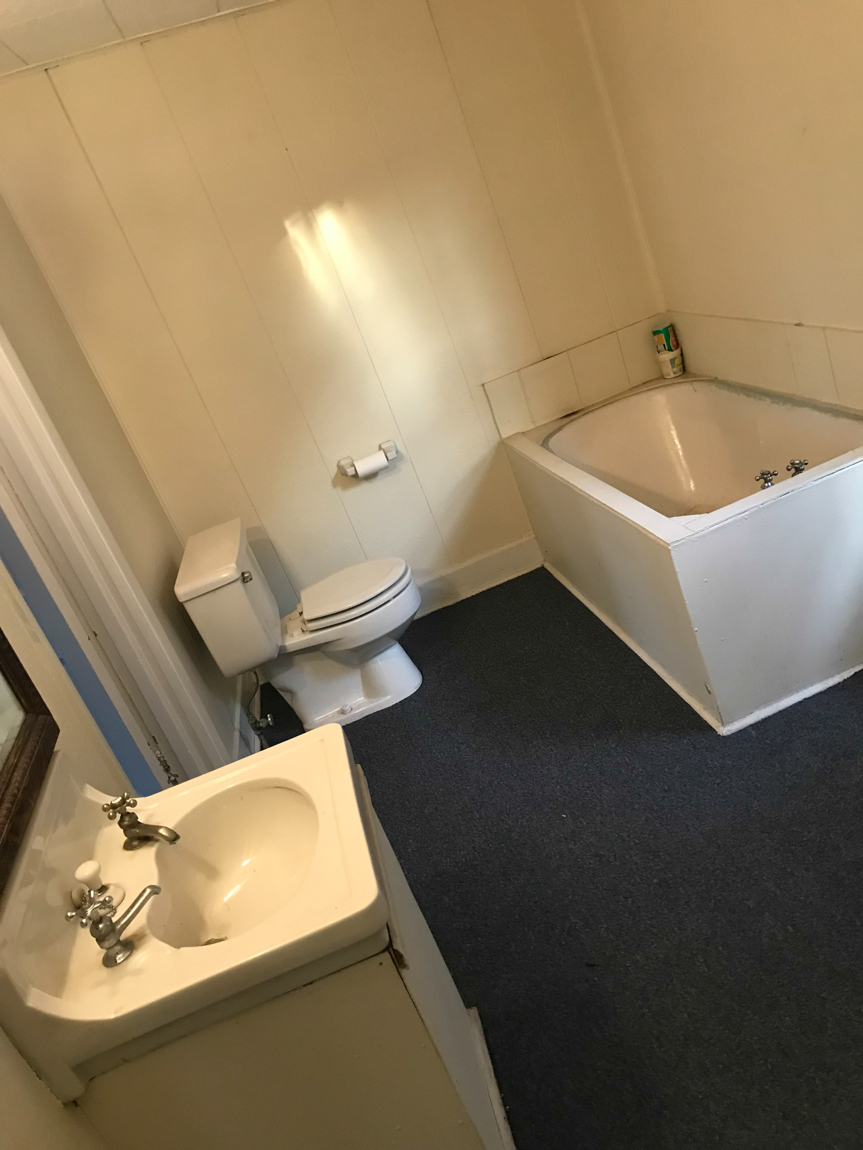
 Demo time:
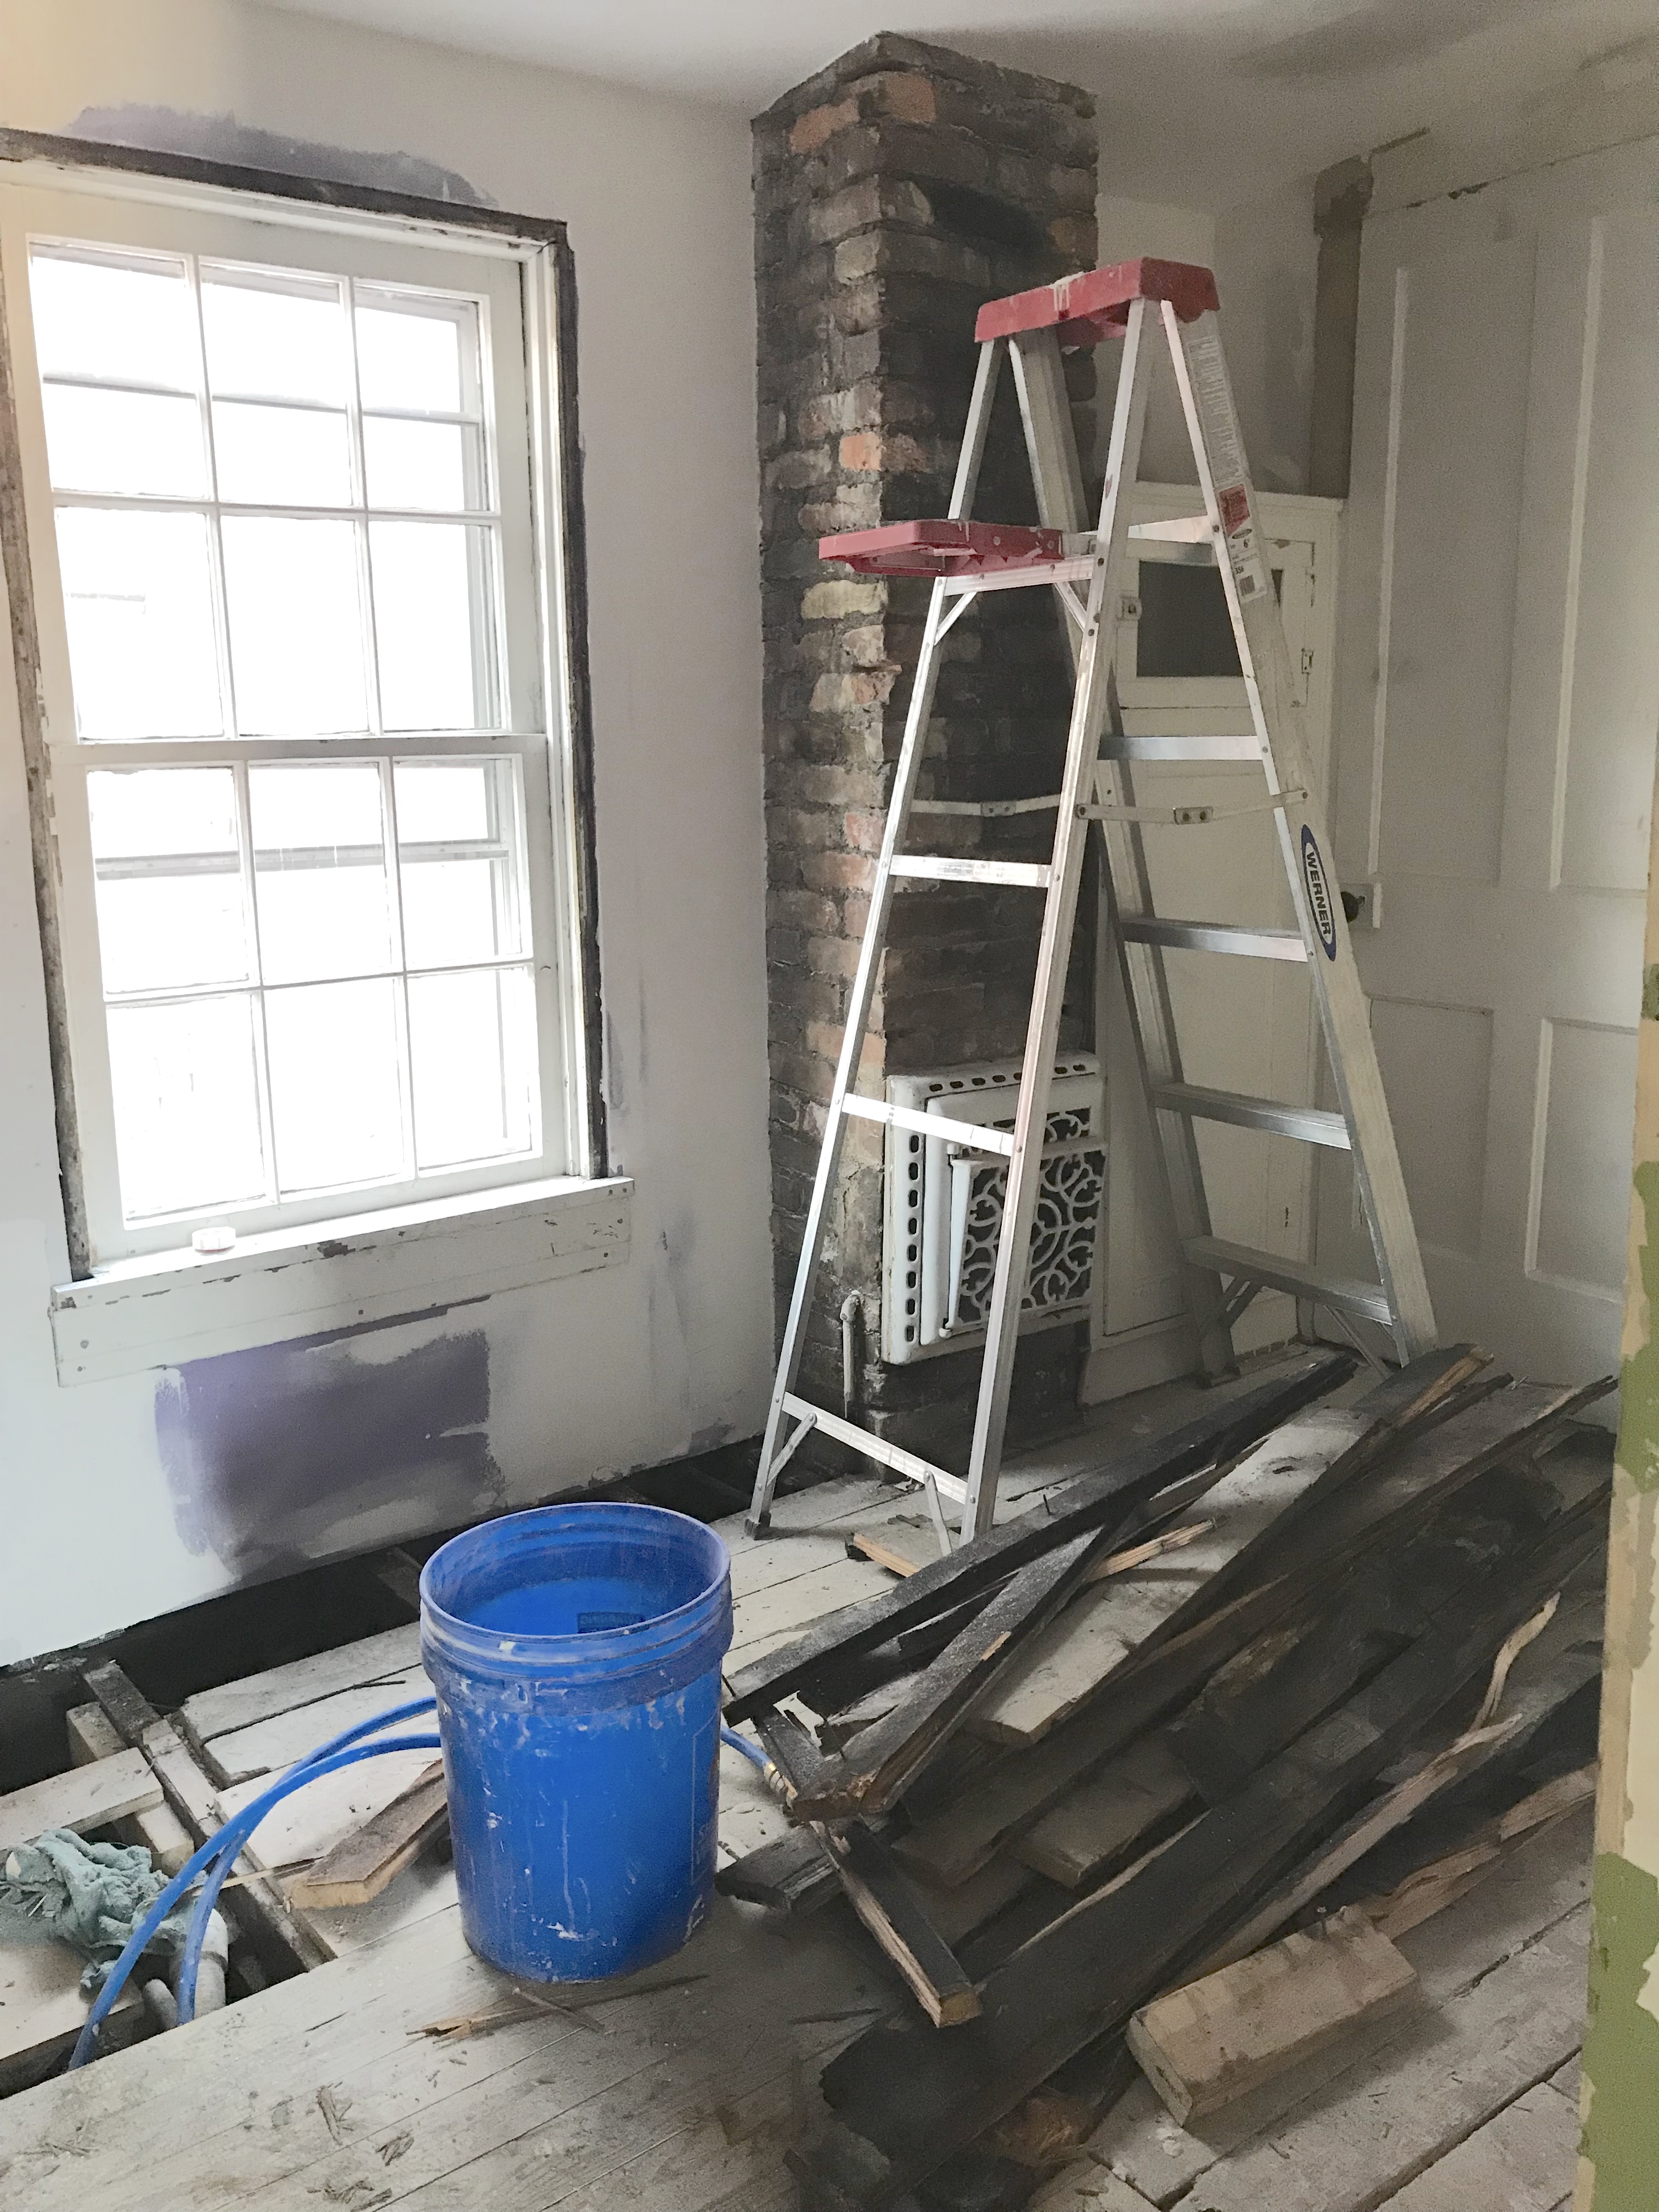
  A work in progress:
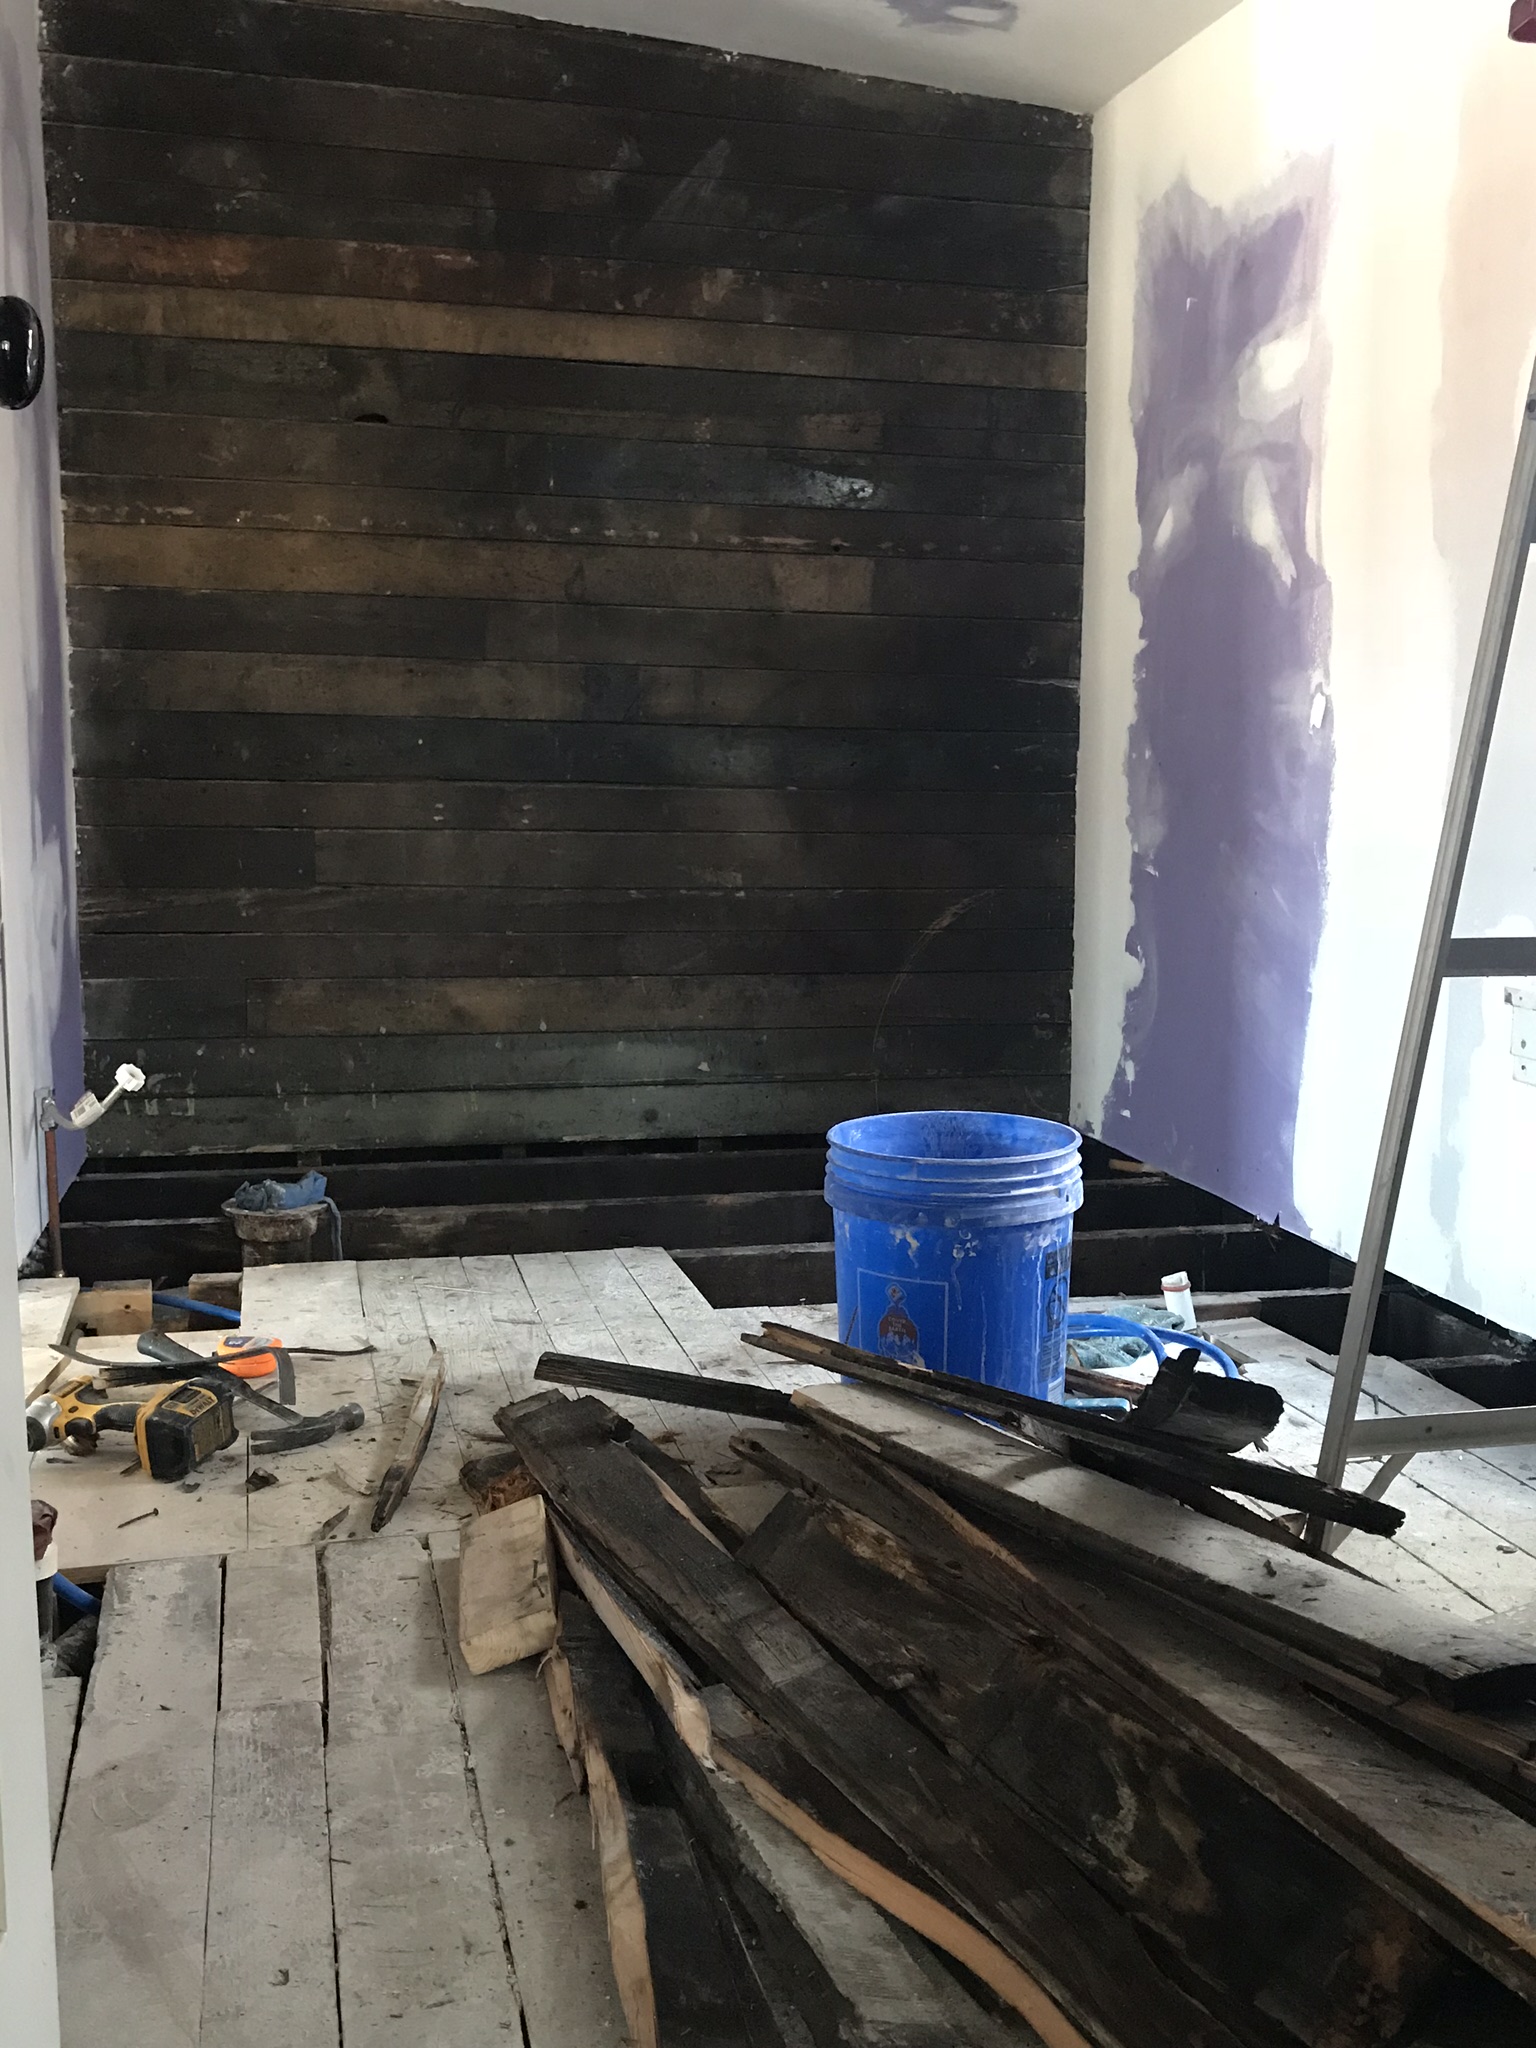

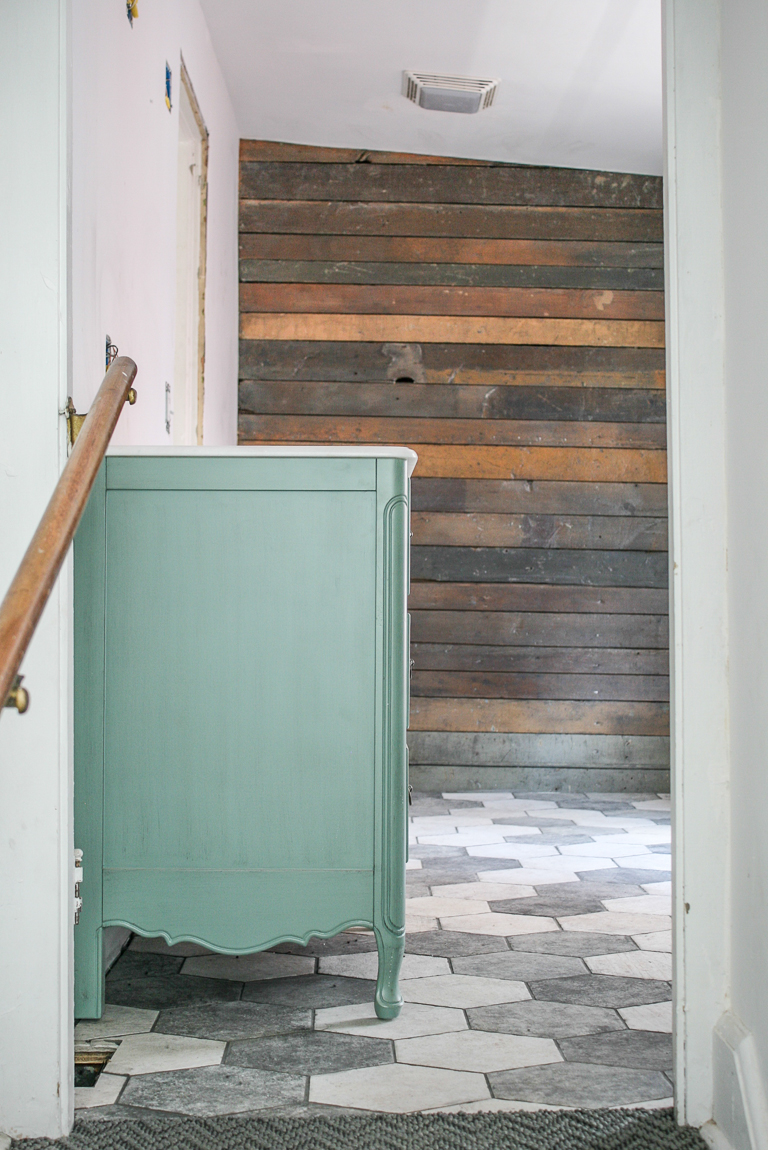
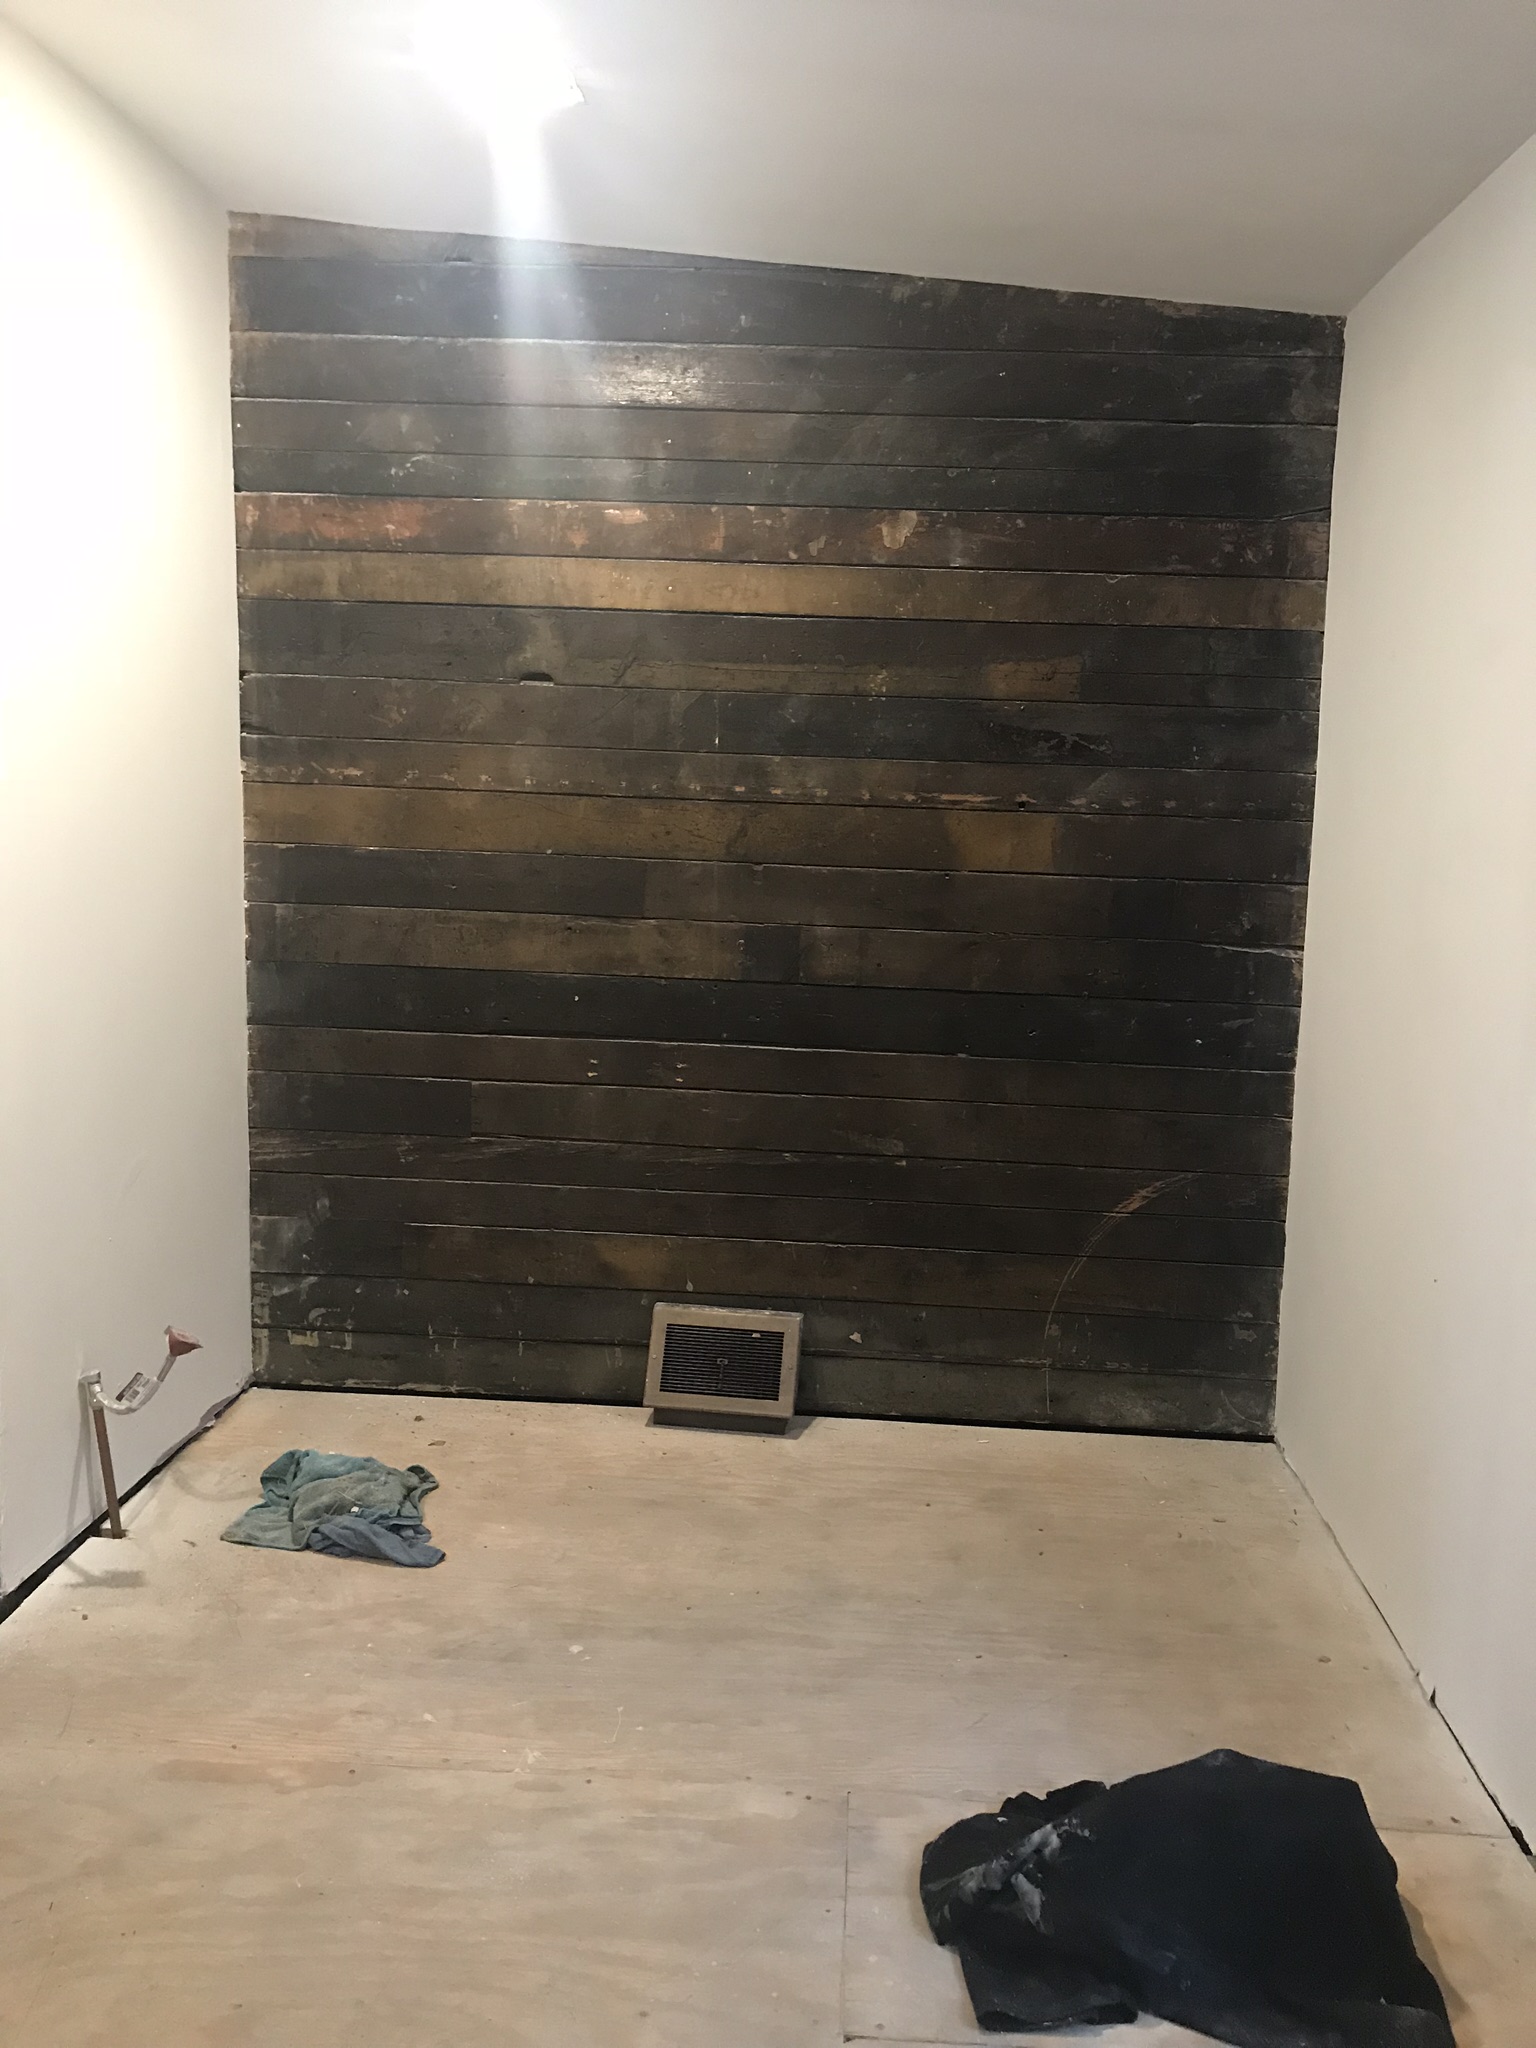 Pretty original wood plank wall becomes a feature:
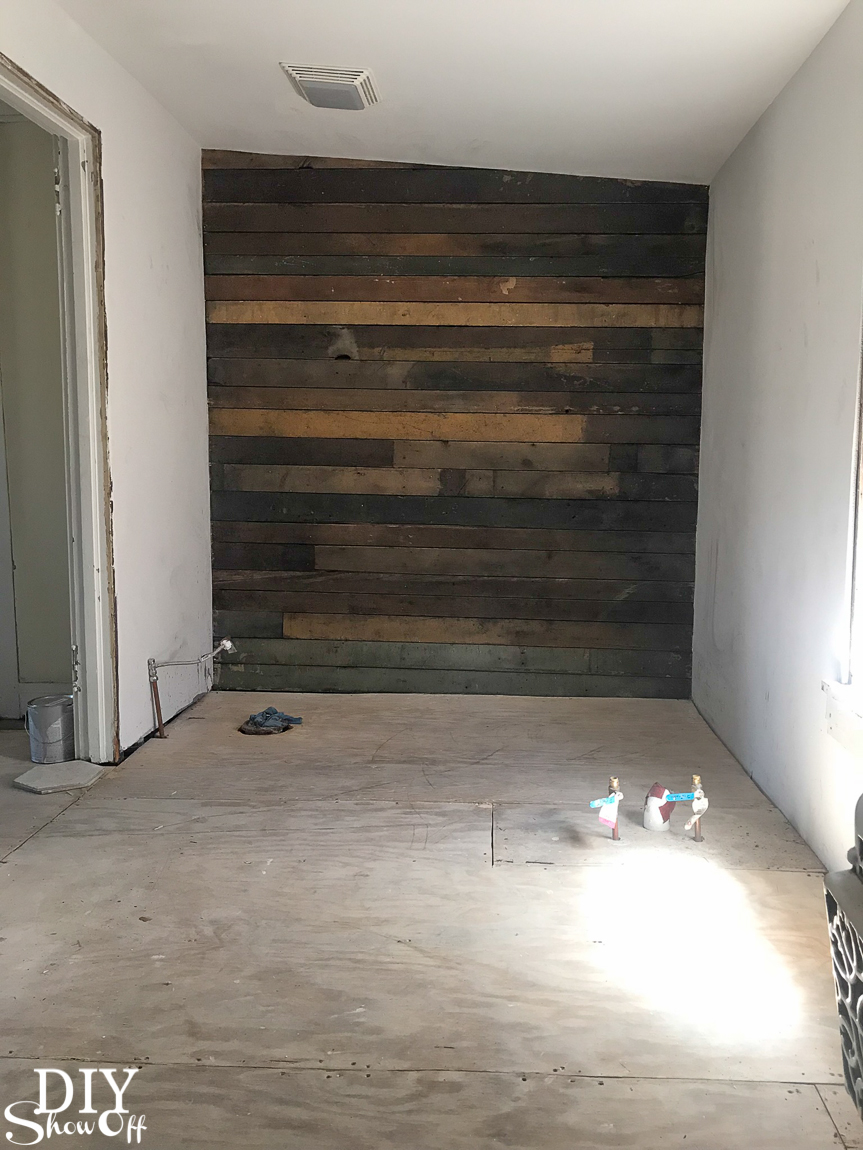
 Time for new tile floor!!!
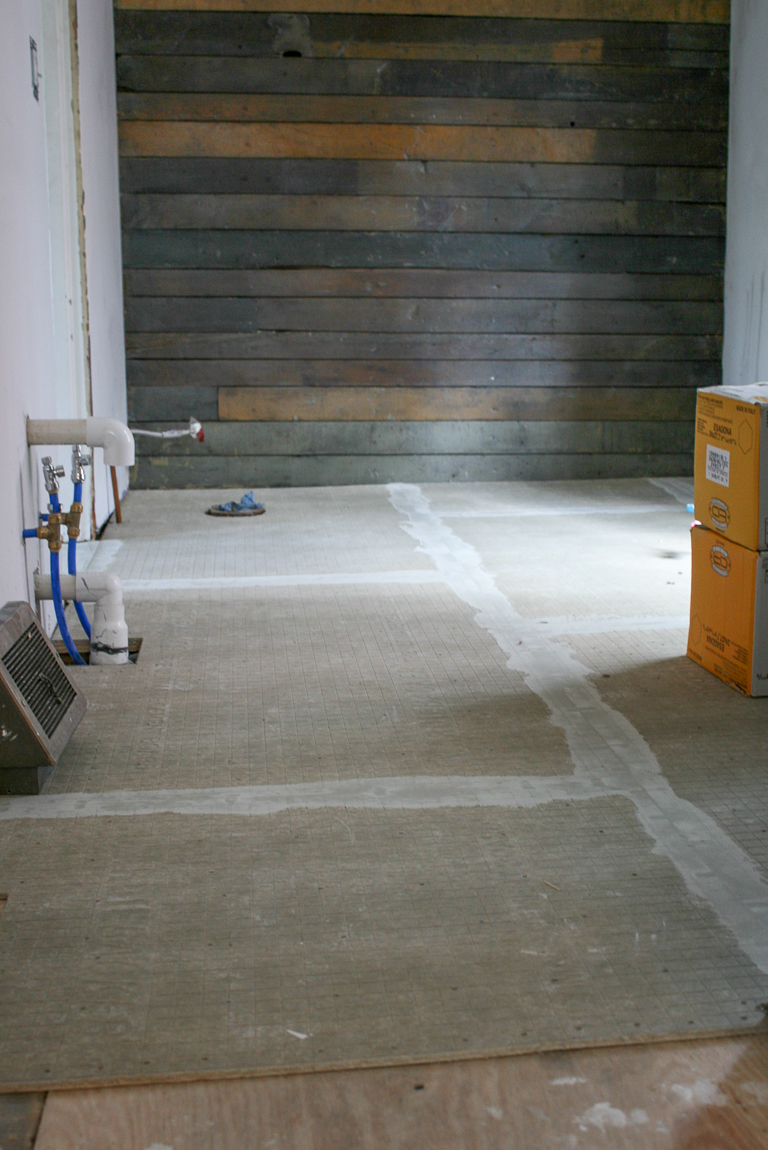

Before:
 Before:
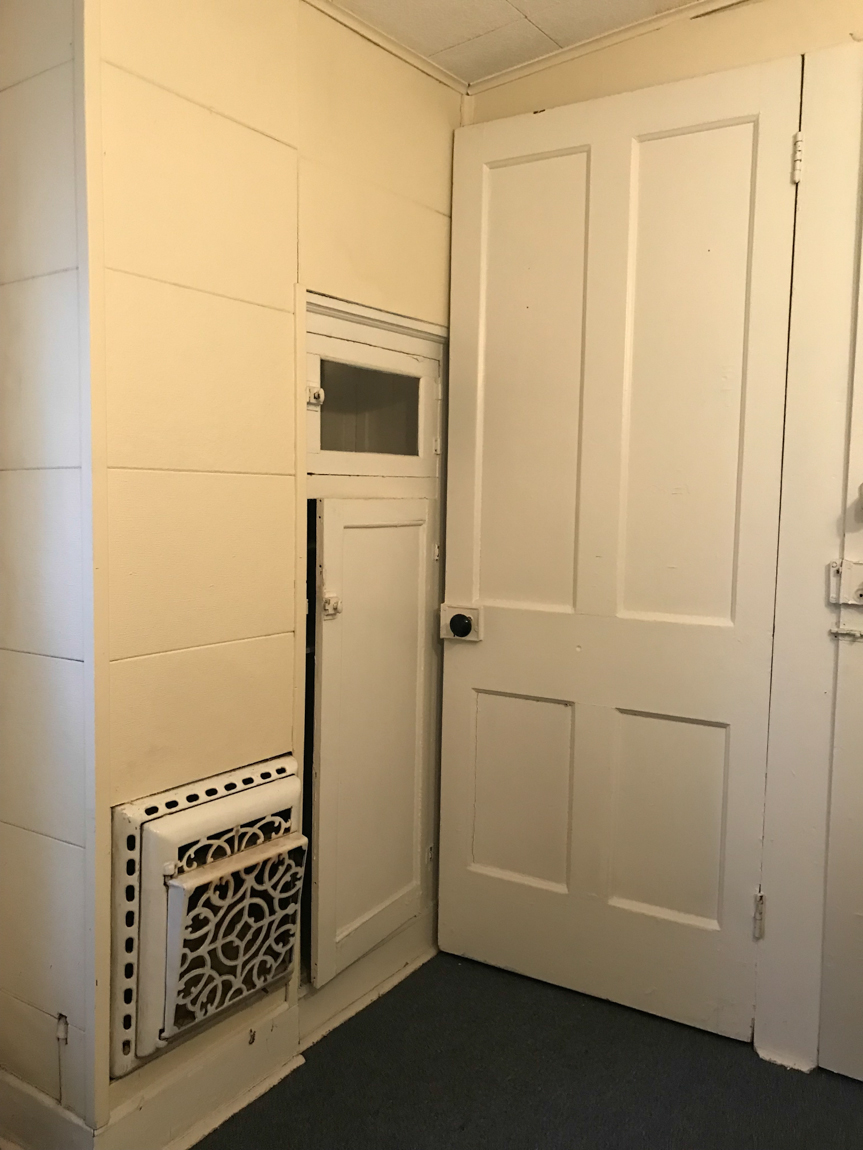
 Demo time:
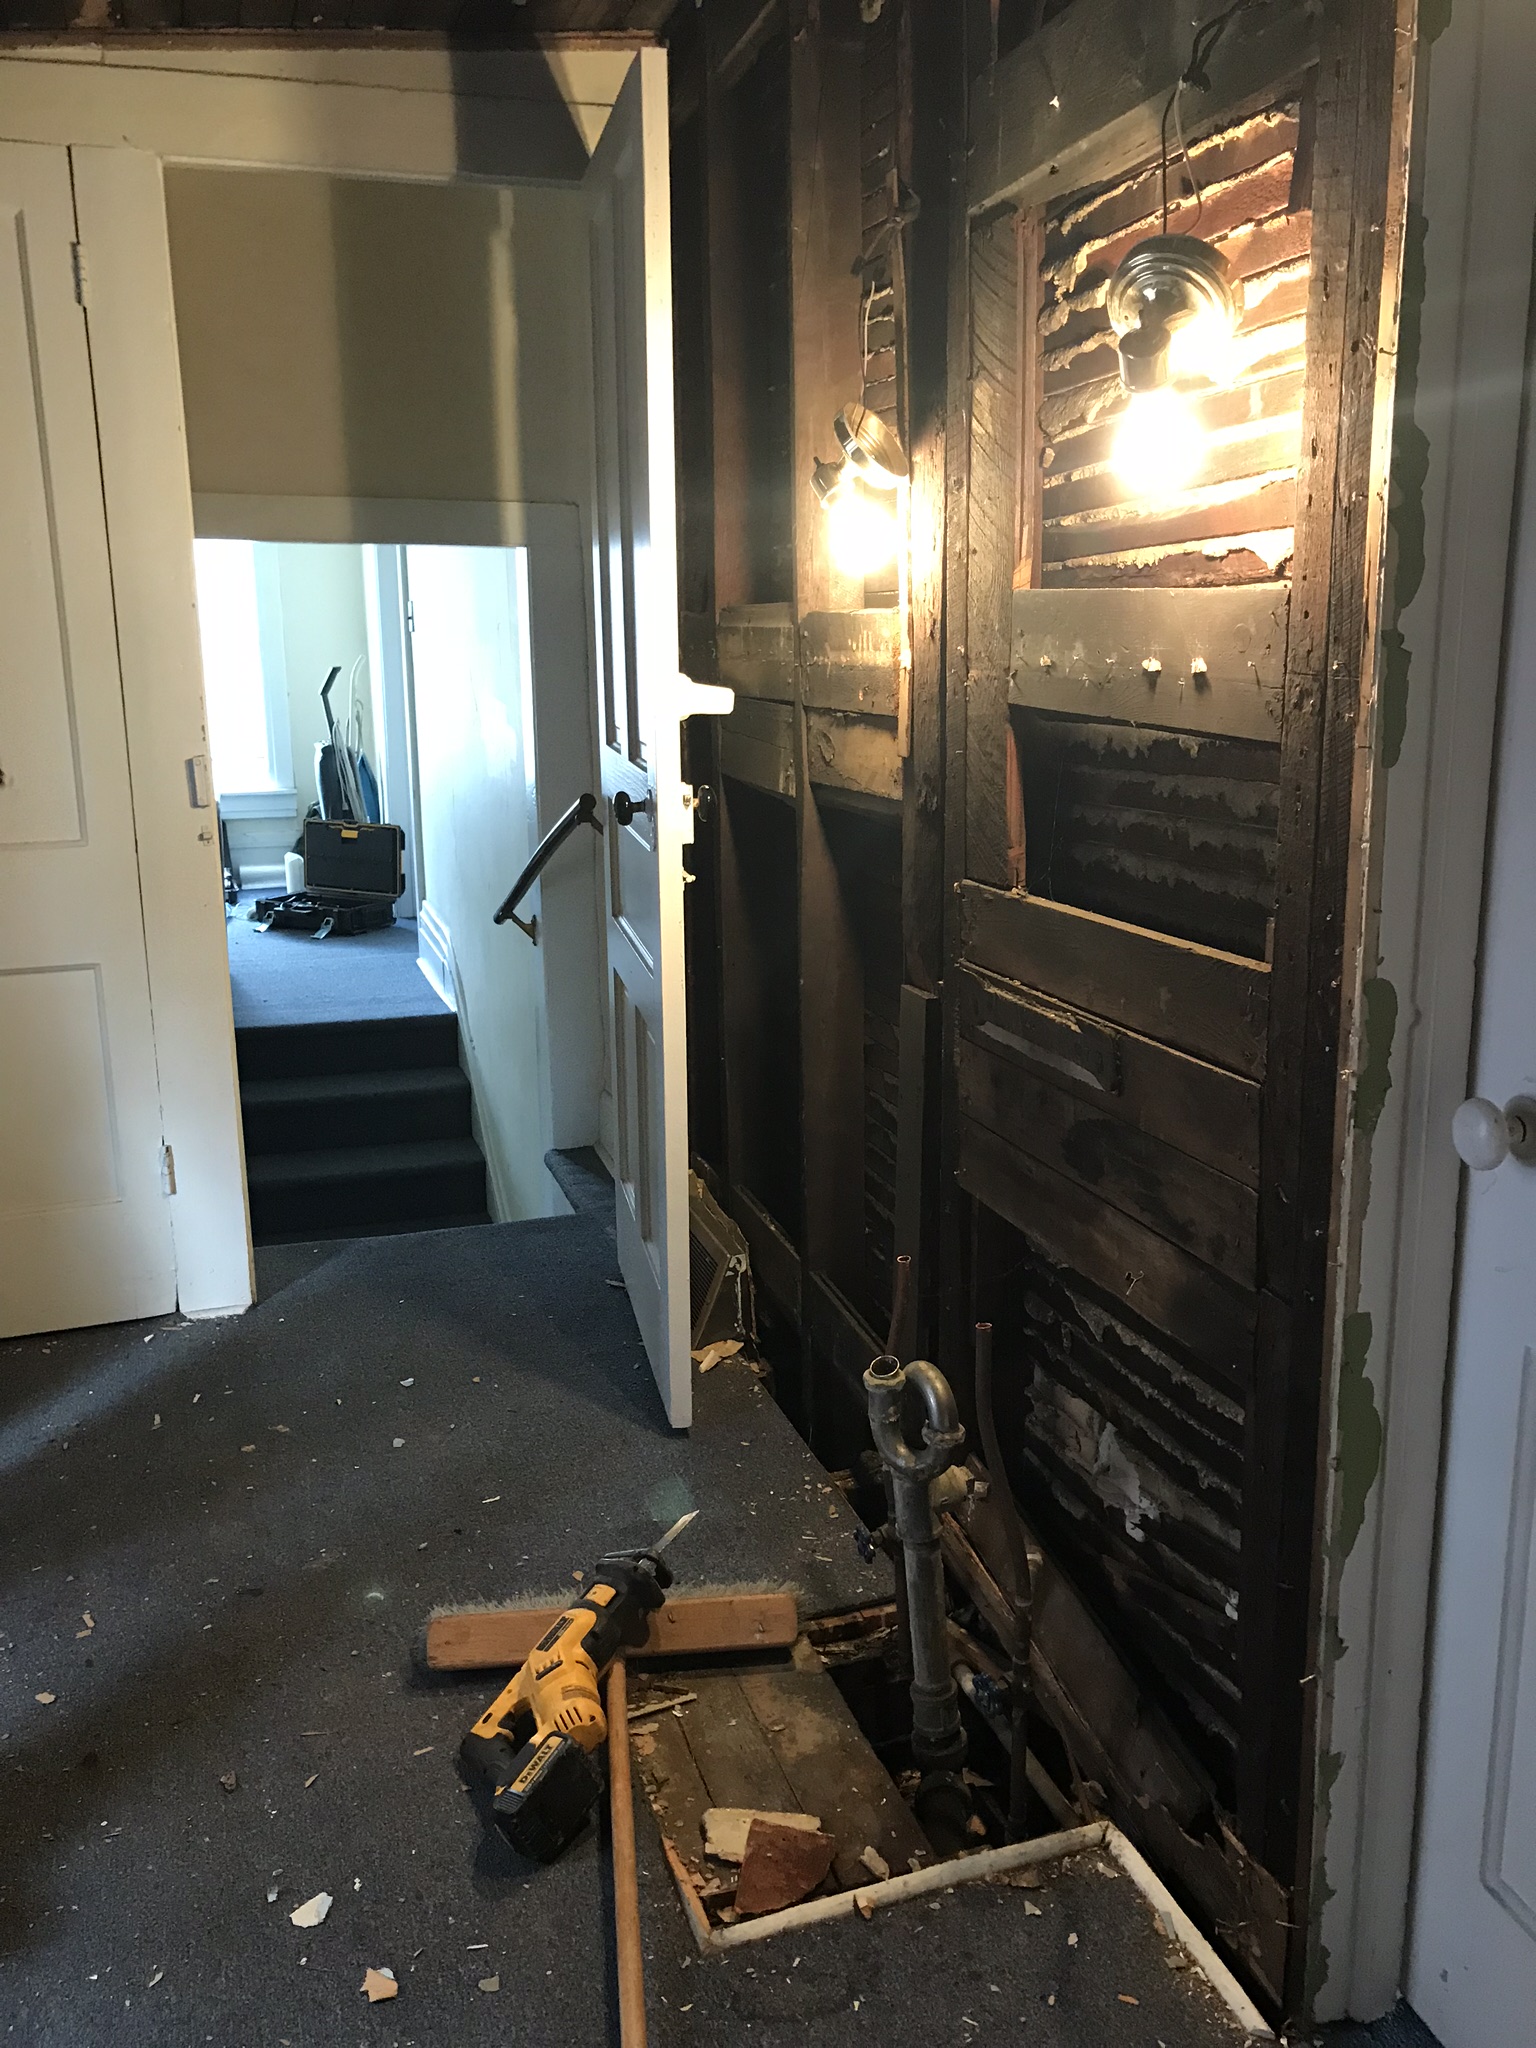
 A work in progress:
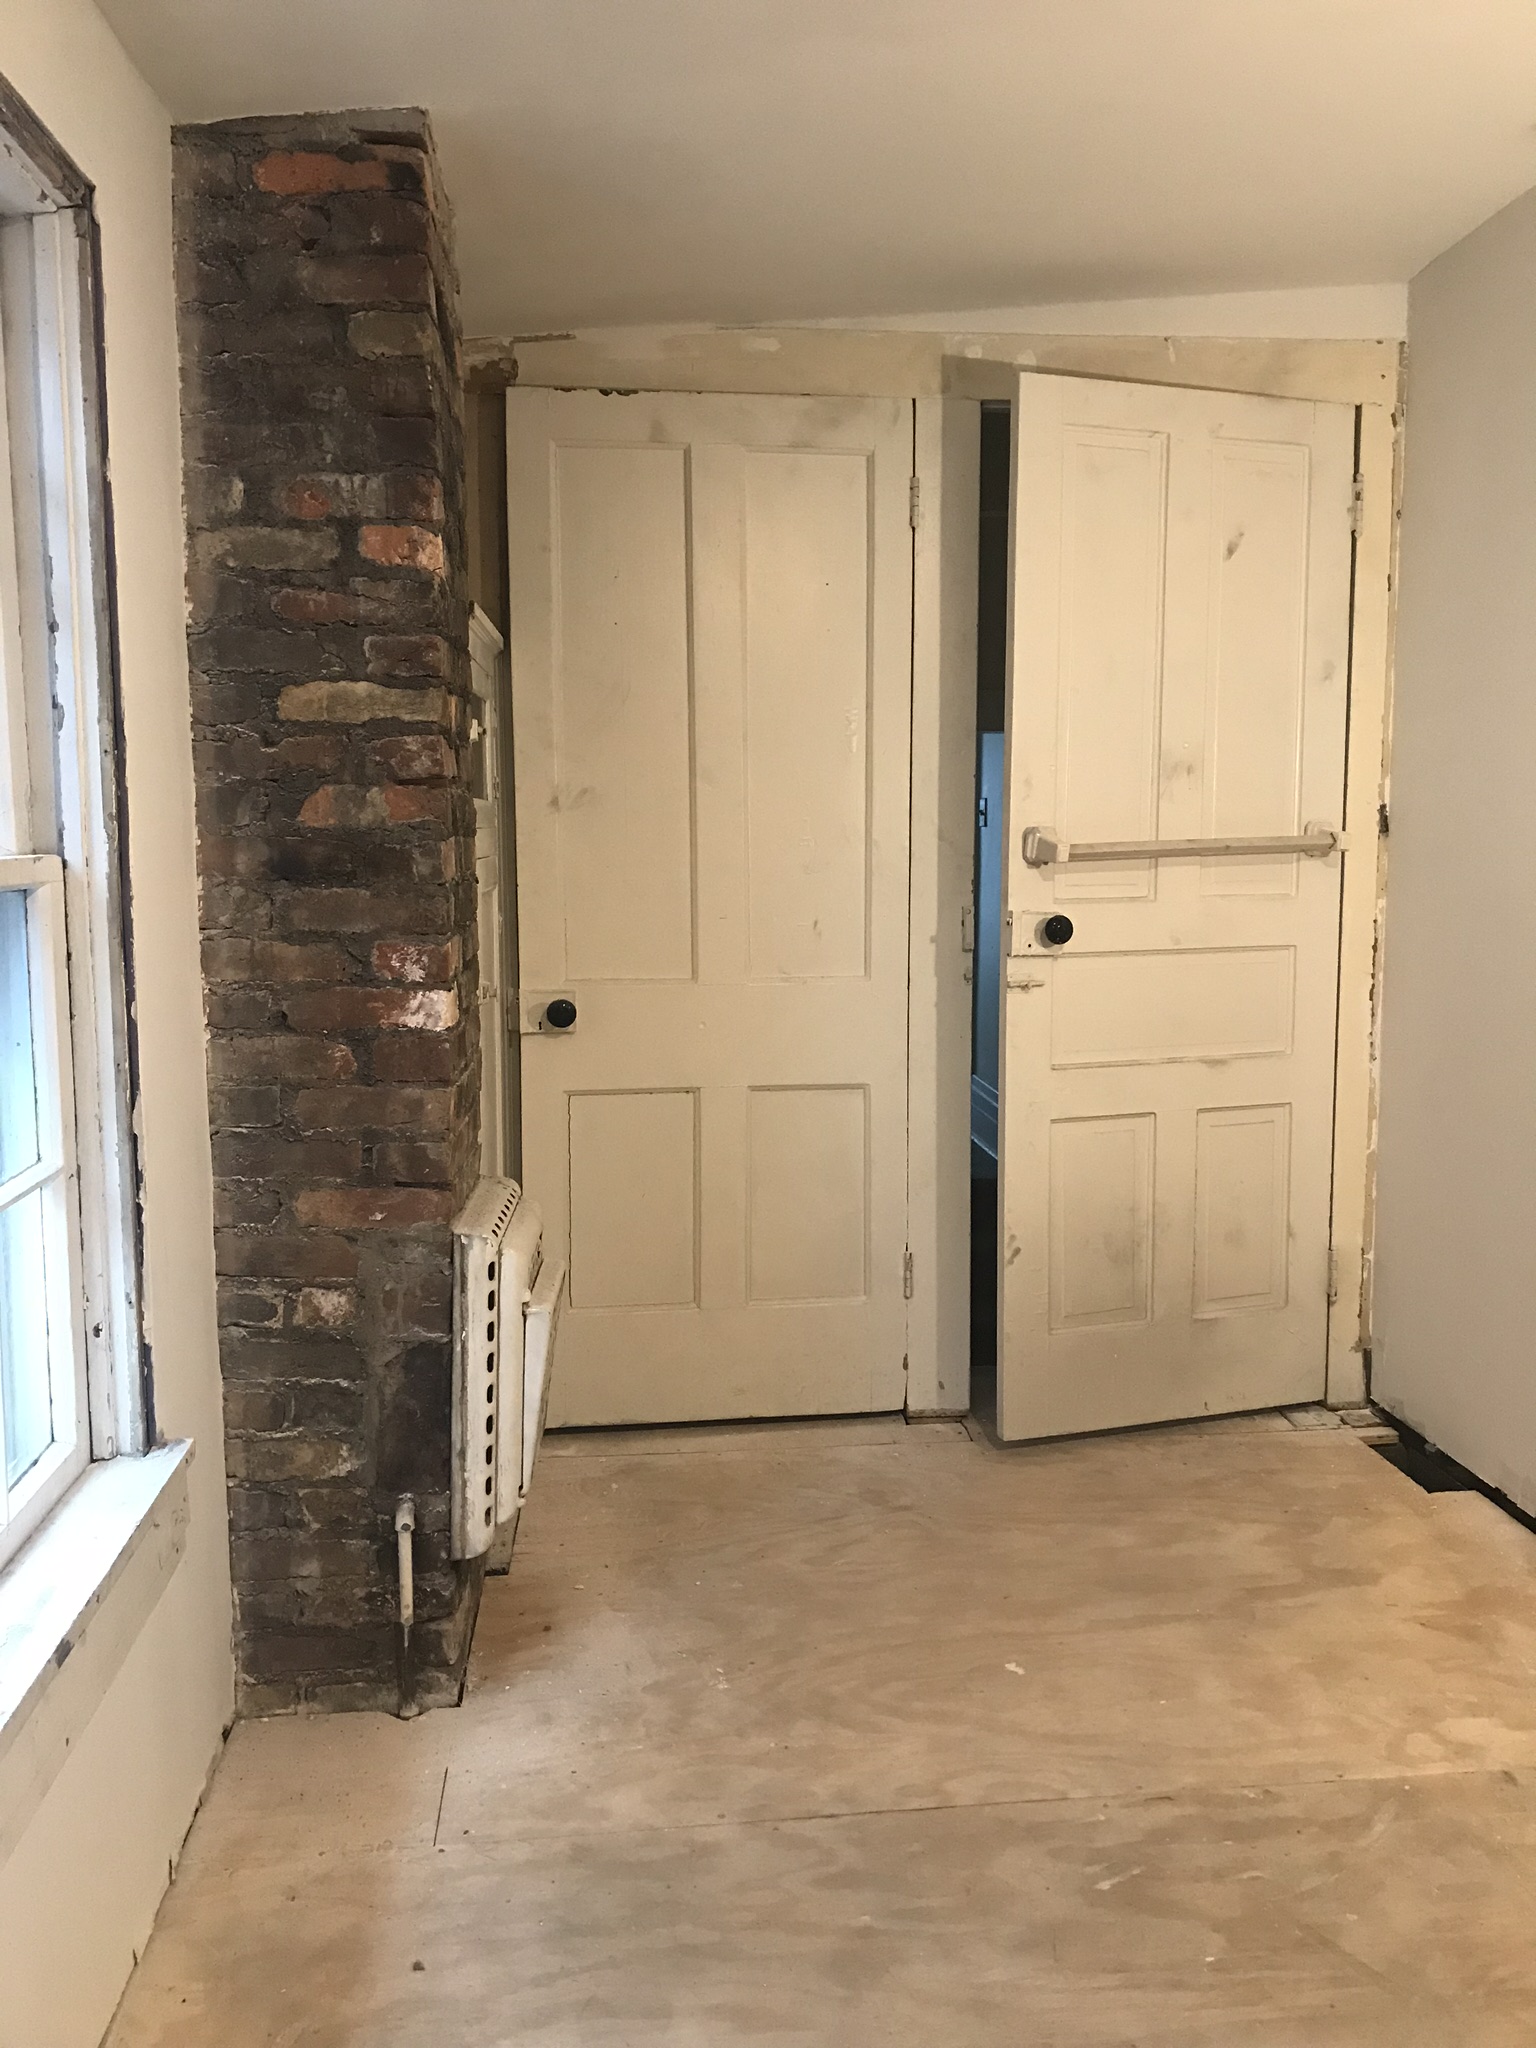
 Keeping the brick exposed and sealed…
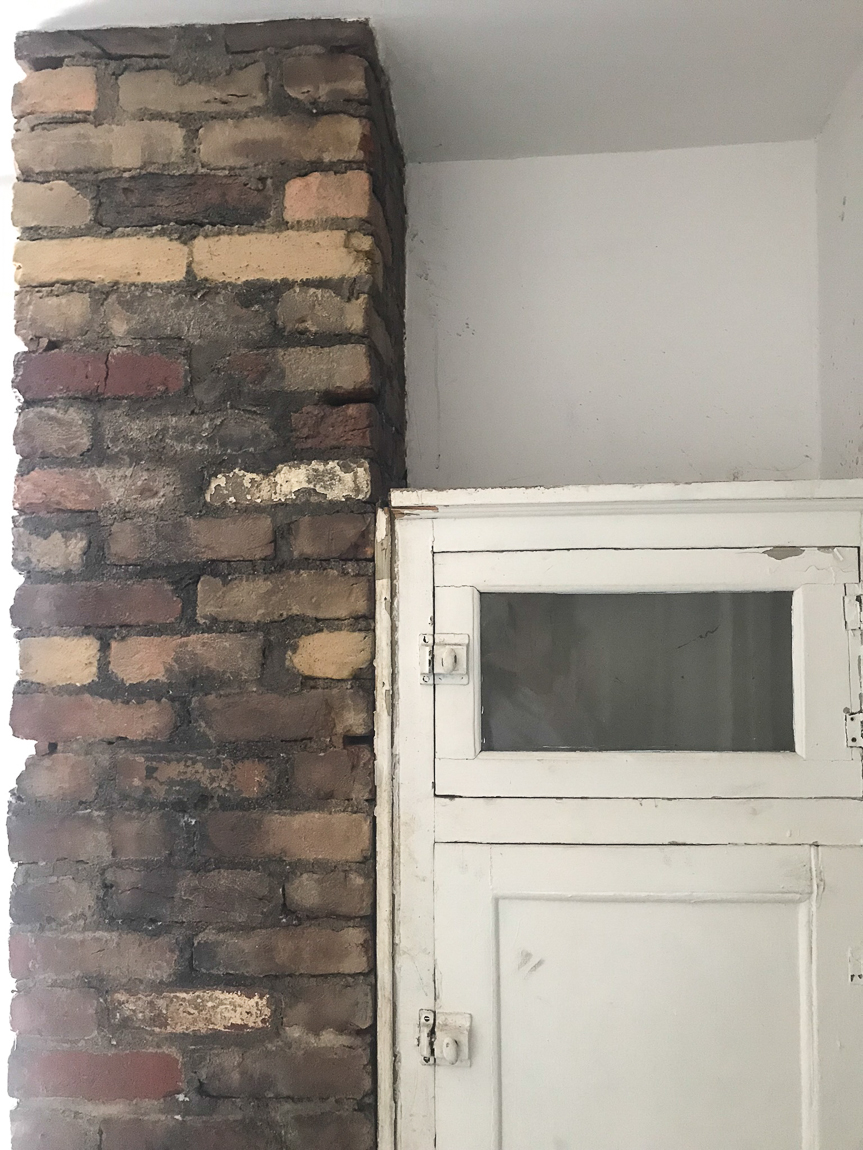
 Beautiful new tile floor and vanity…
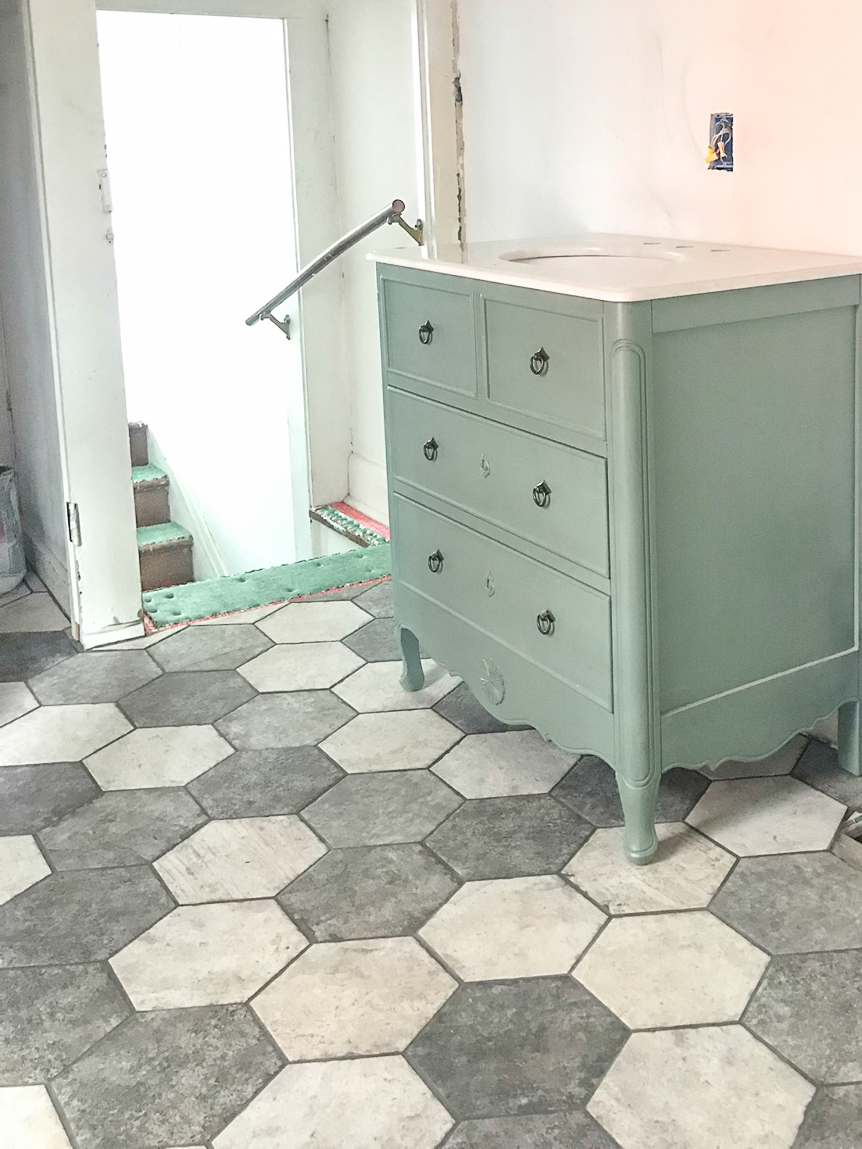

Before: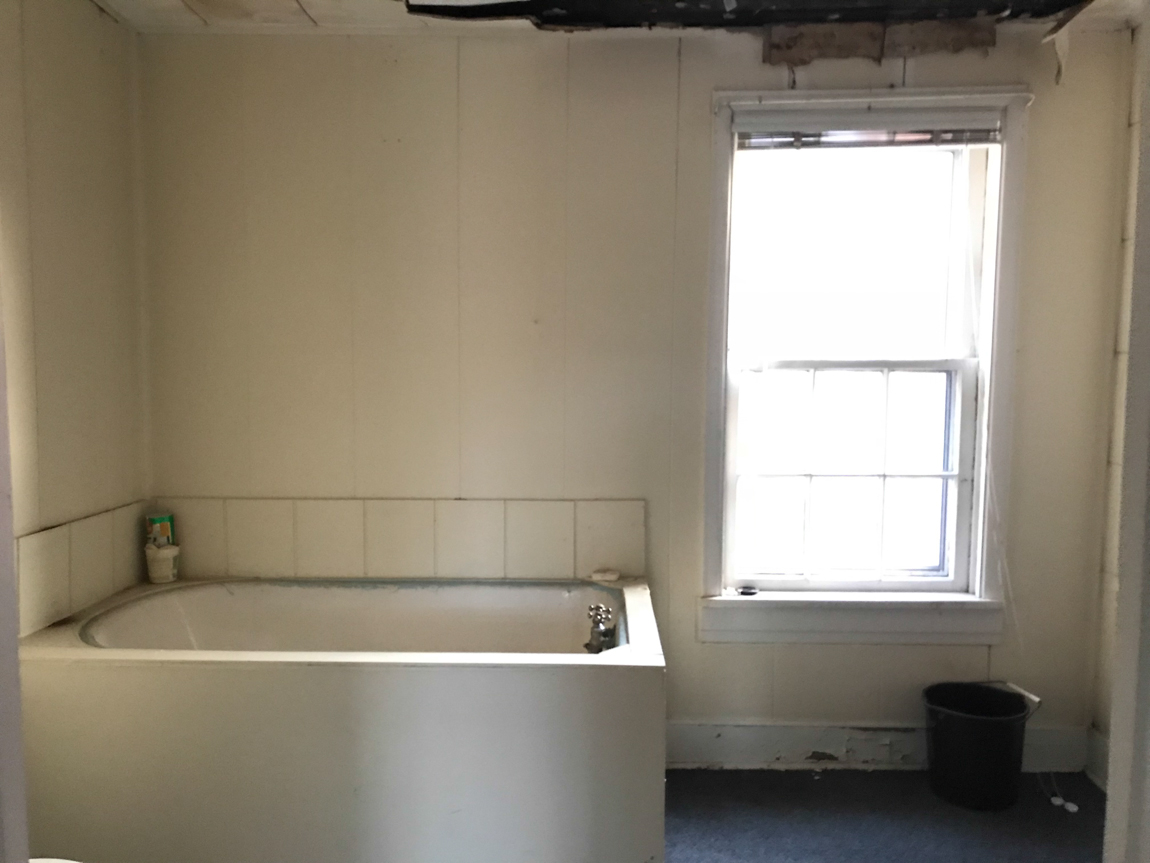 Time for demo:
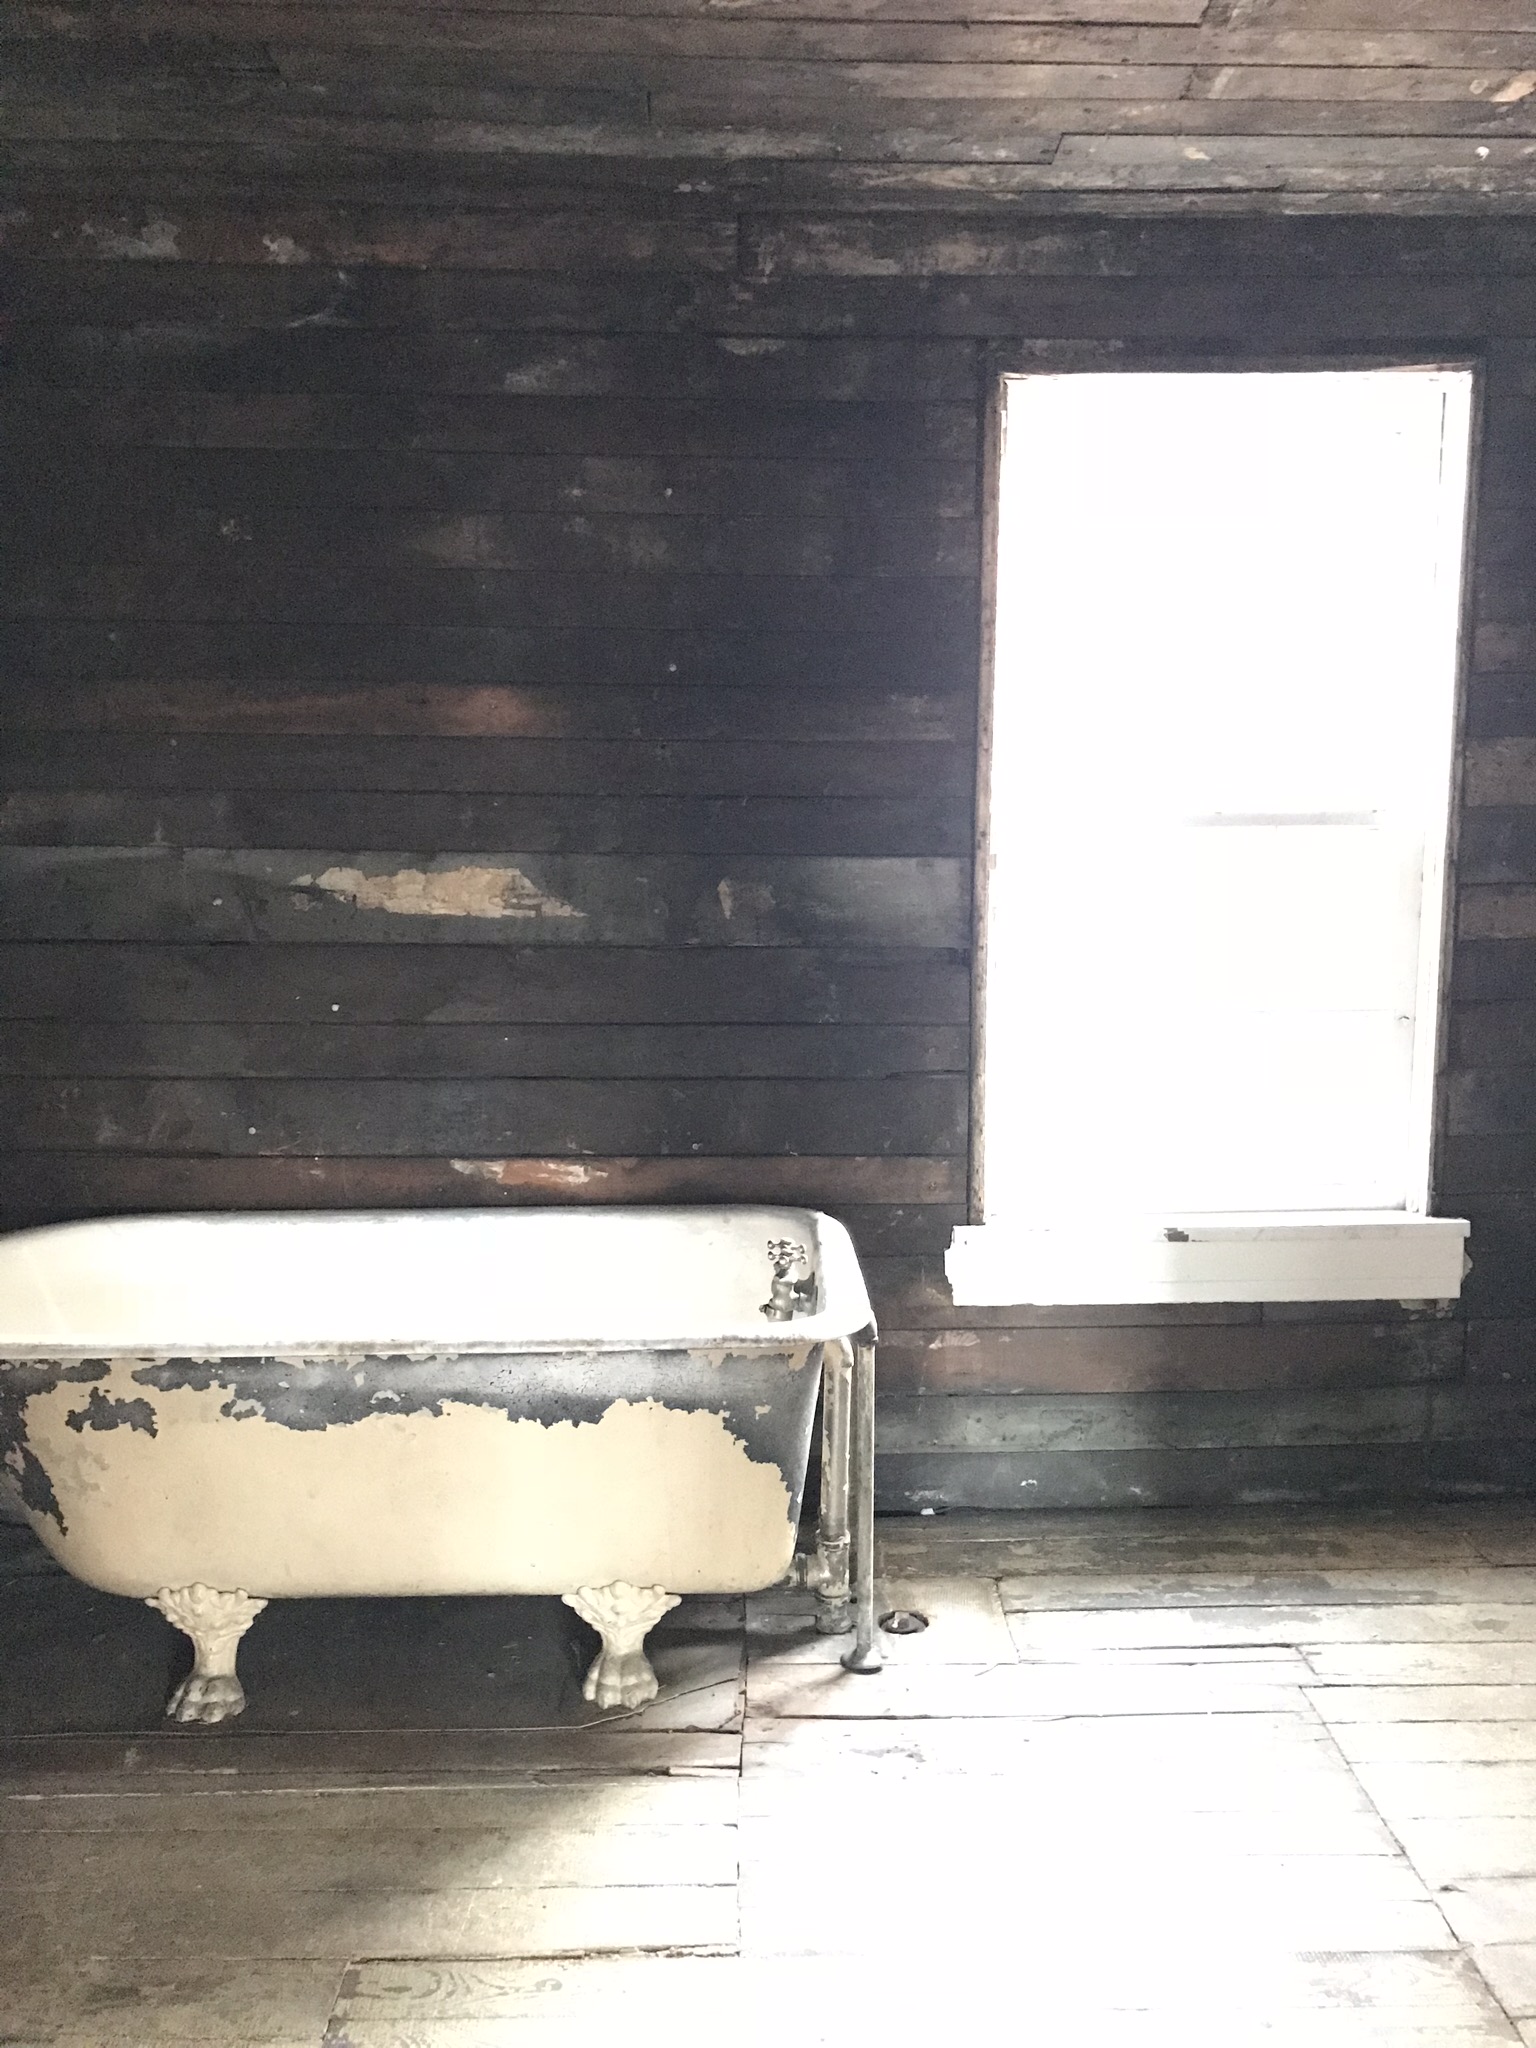
 Cleaning up:
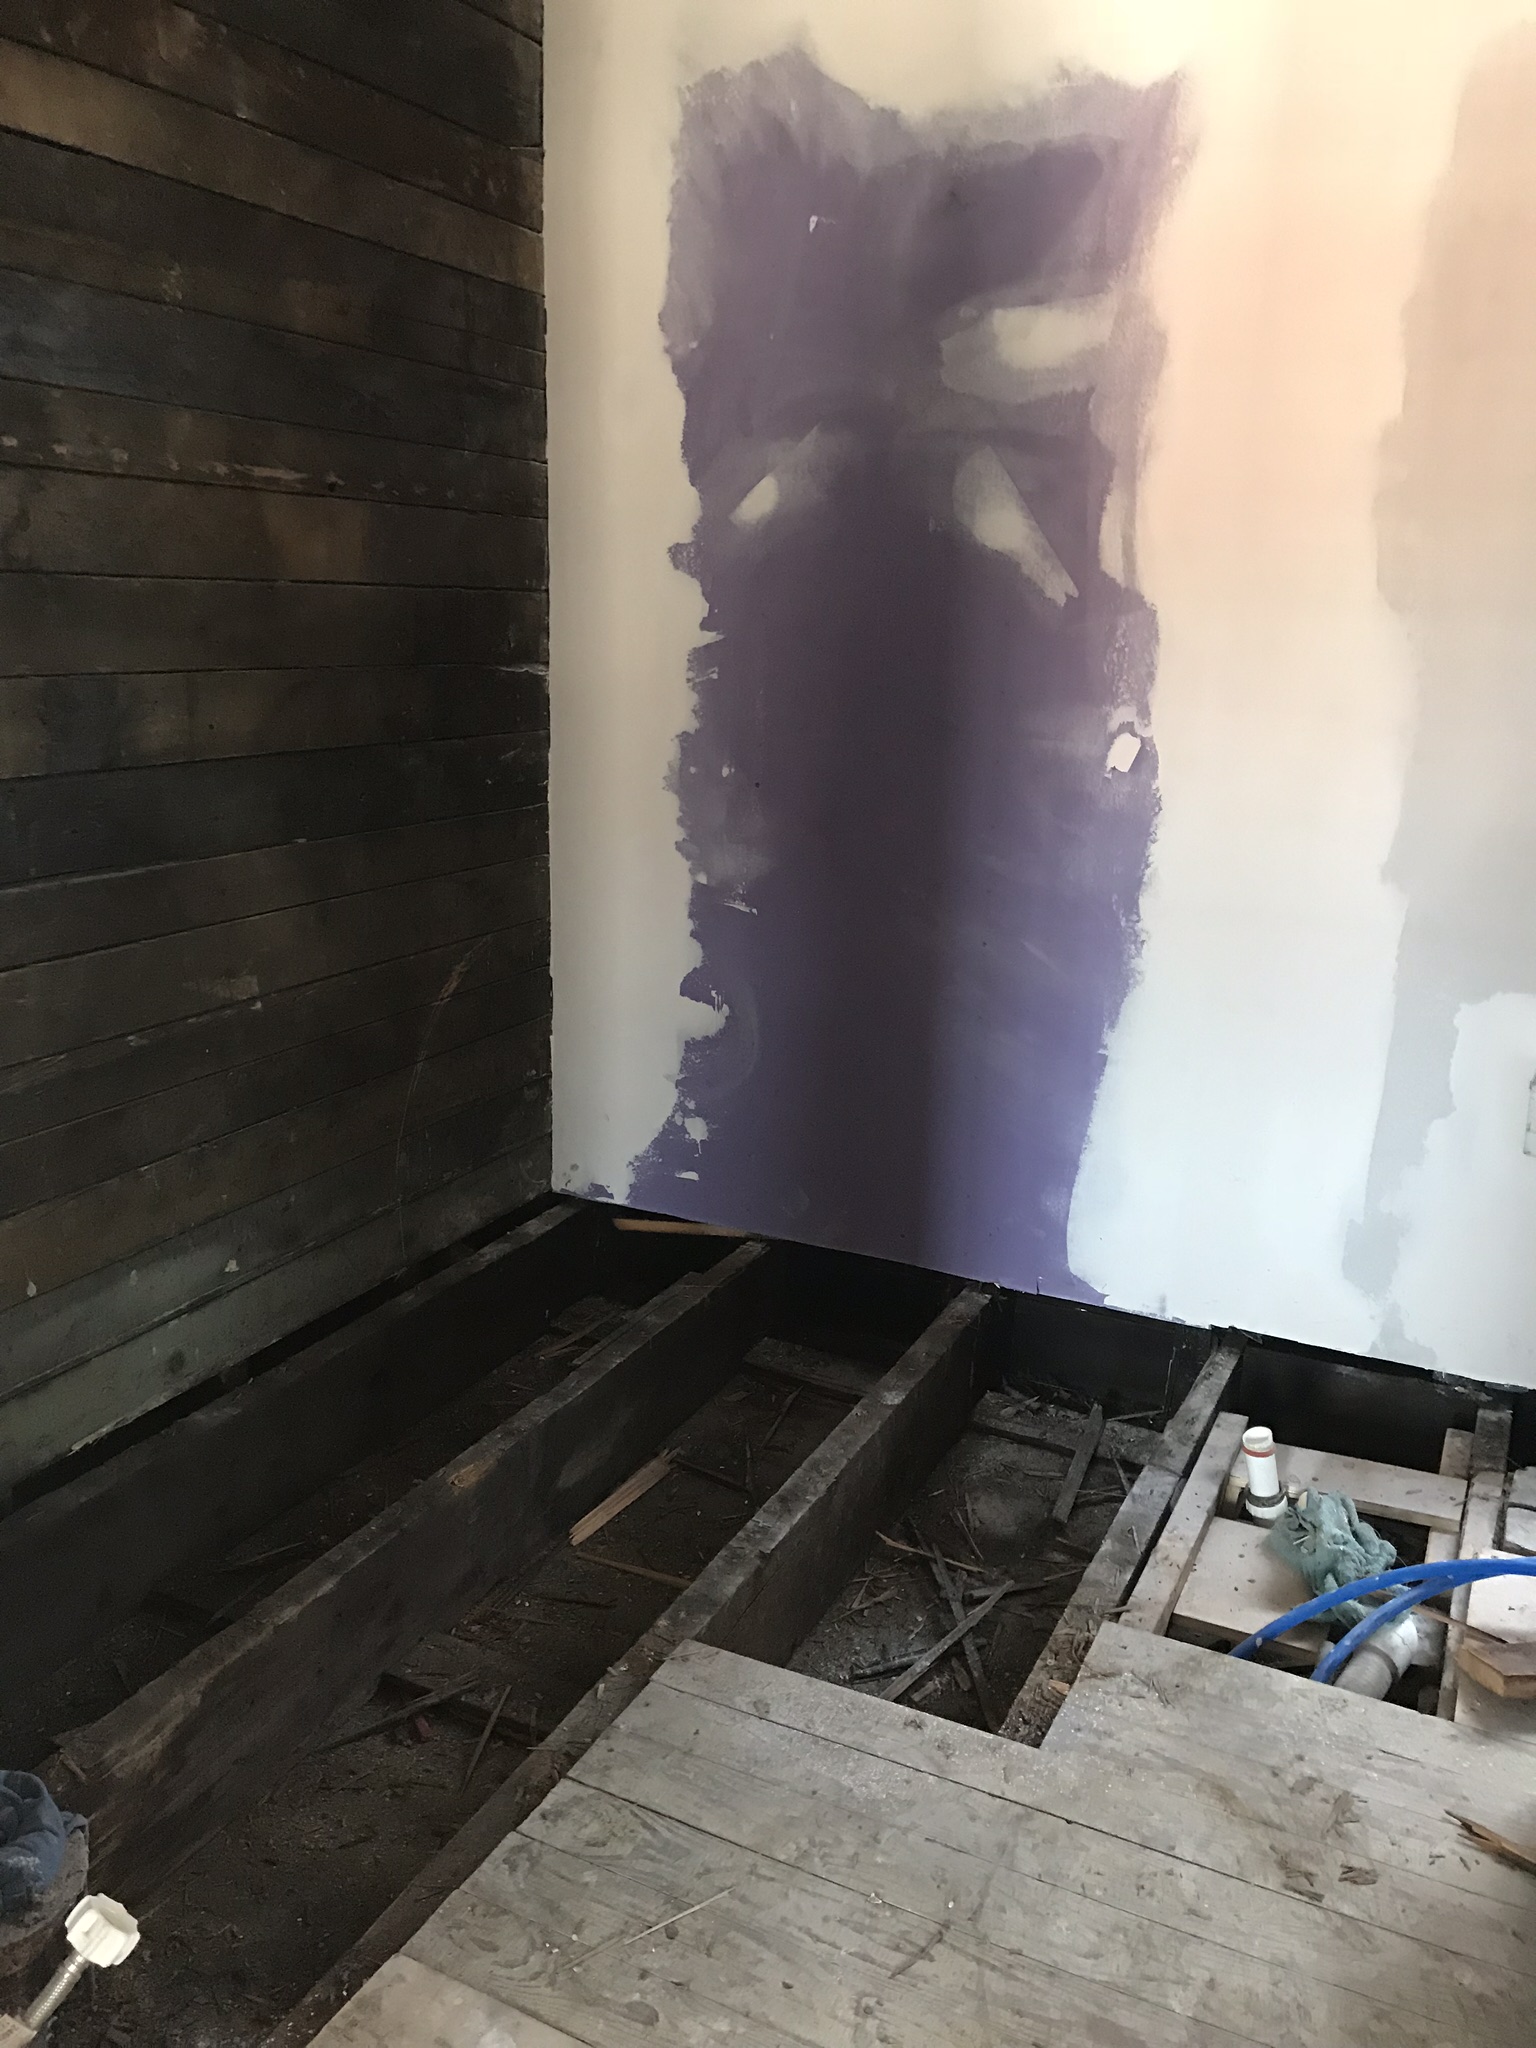
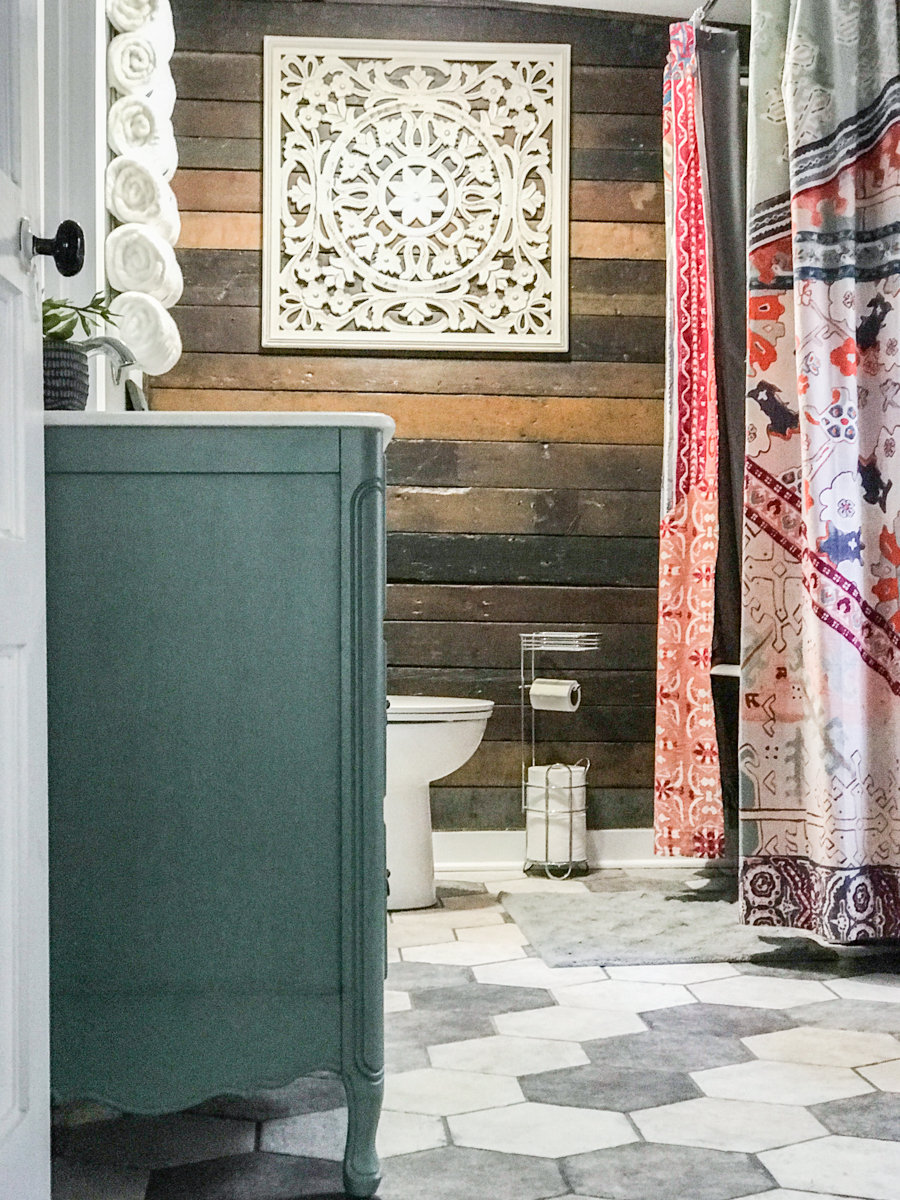
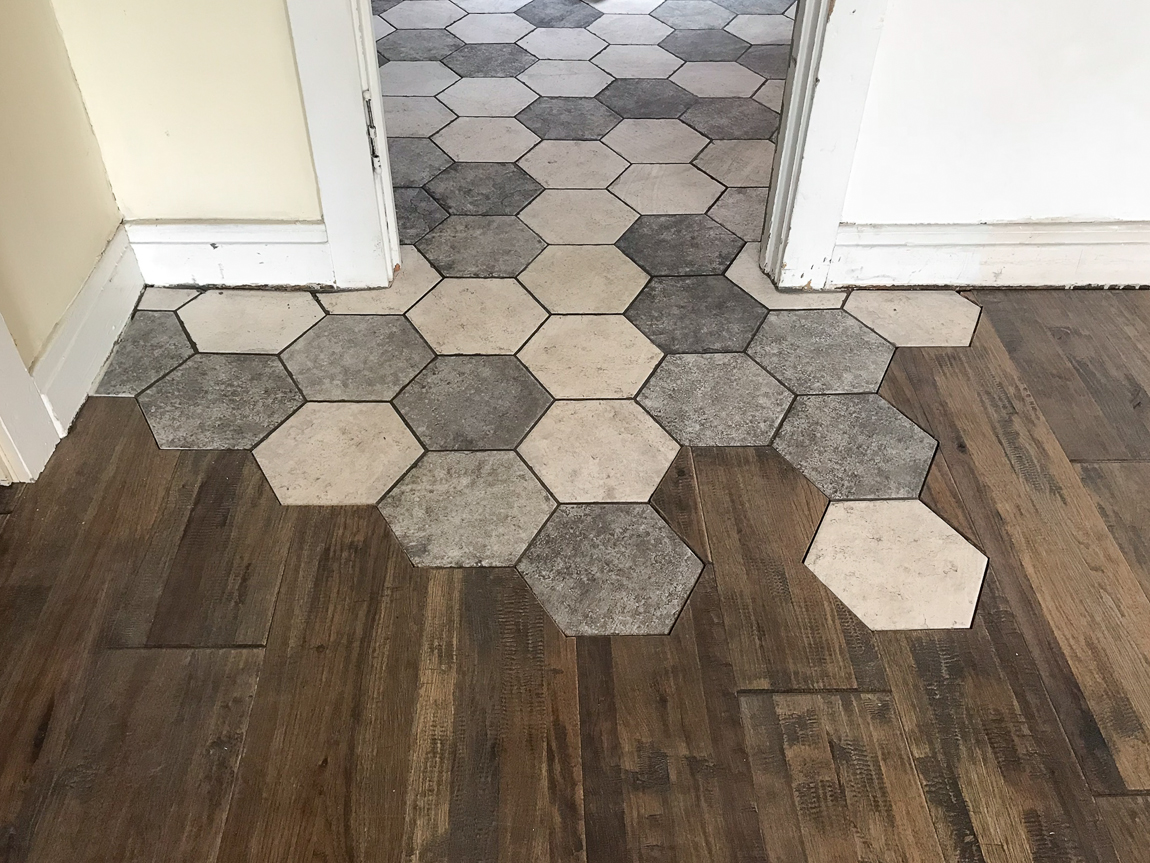
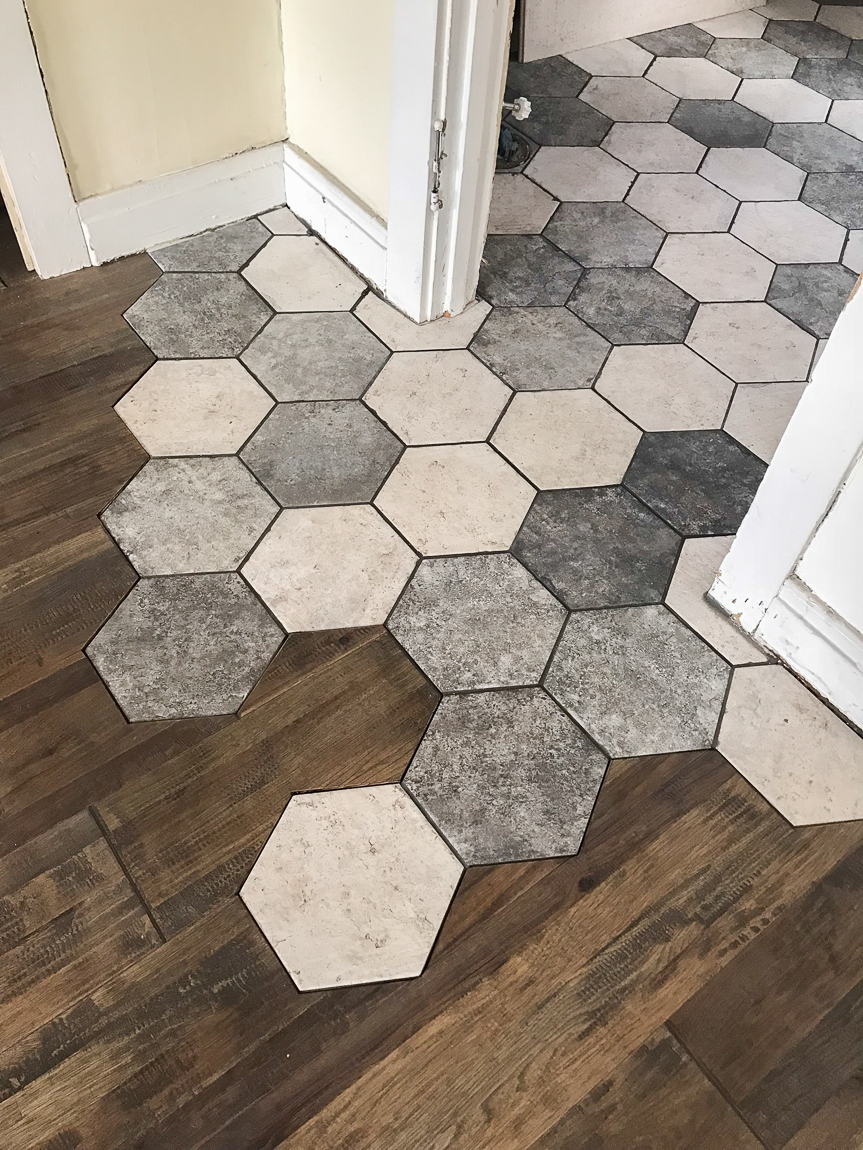
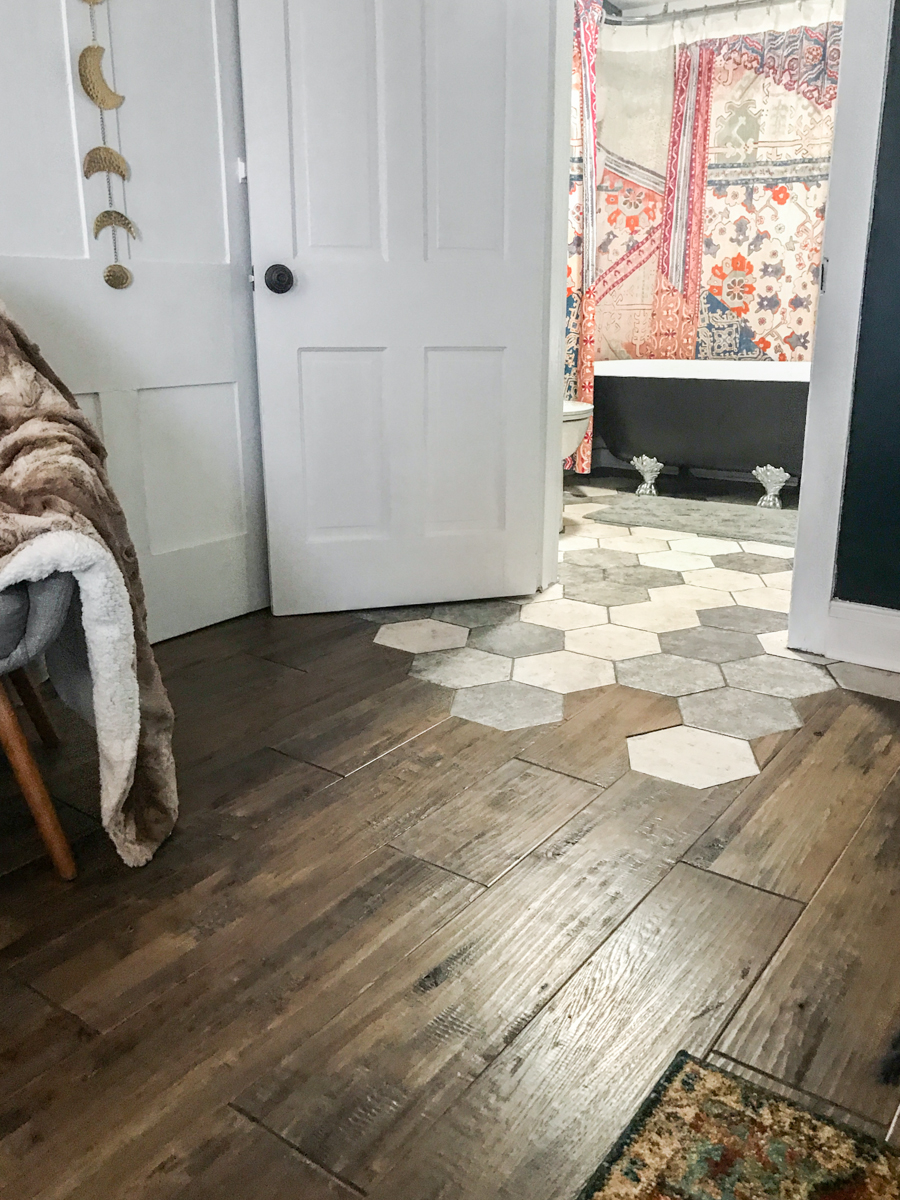
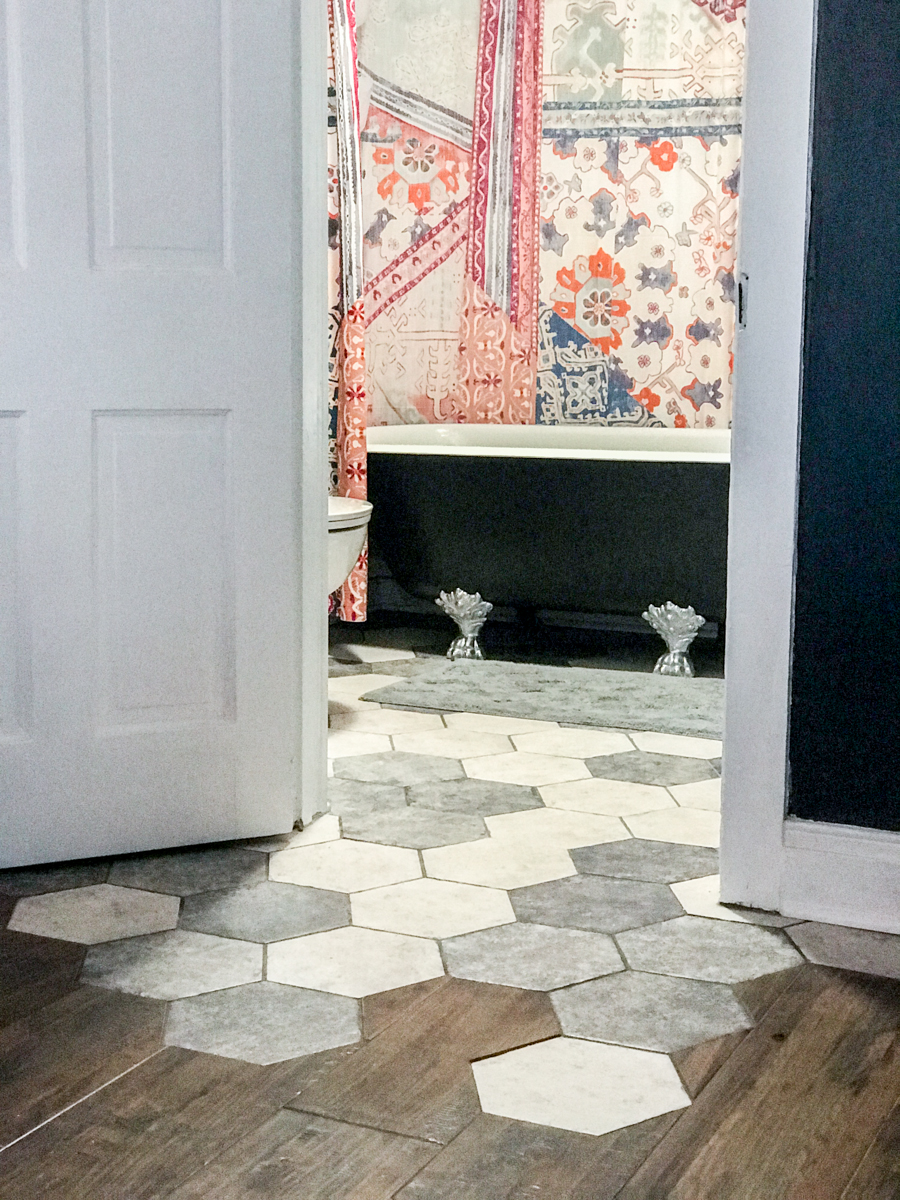
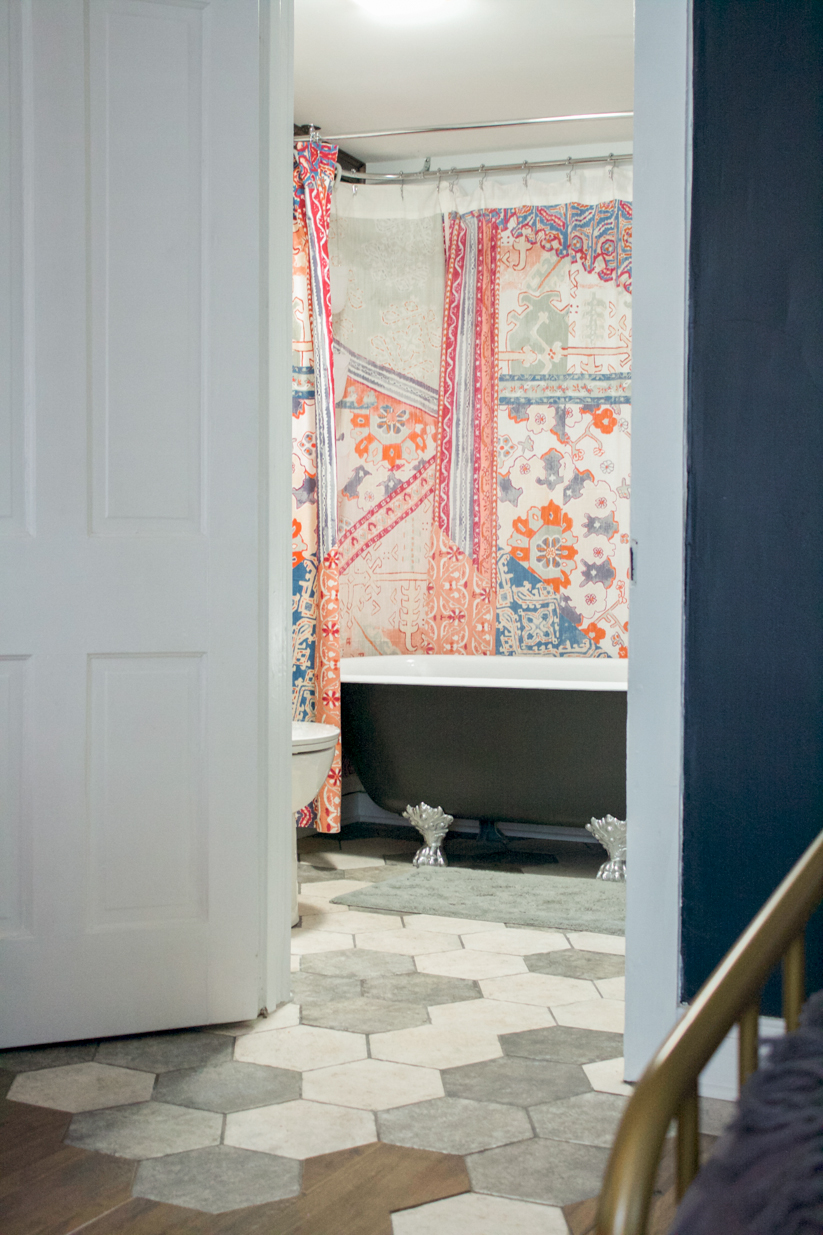
 New hexagon tile flooring spills into the hardwood from bathroom to bedroom. LOVE the creative freedom to do something different so much!
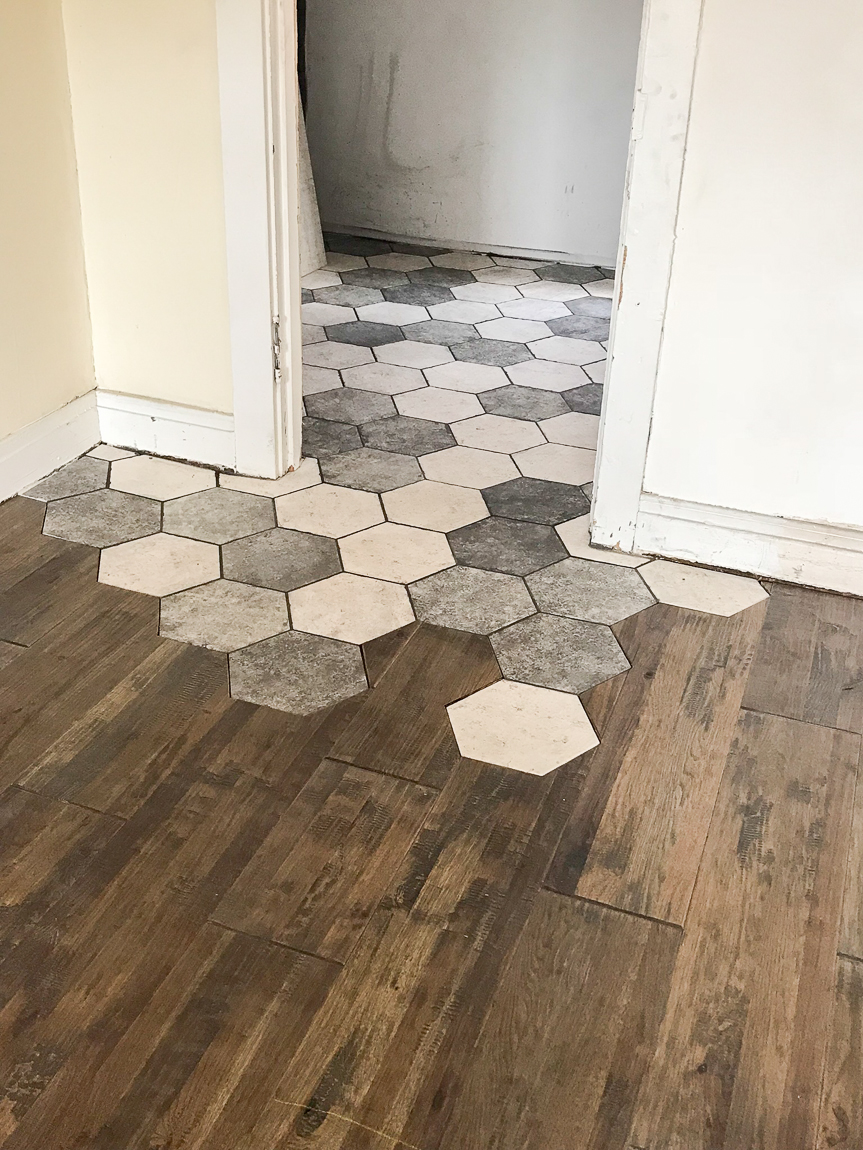
 Vintage clawfoot before:
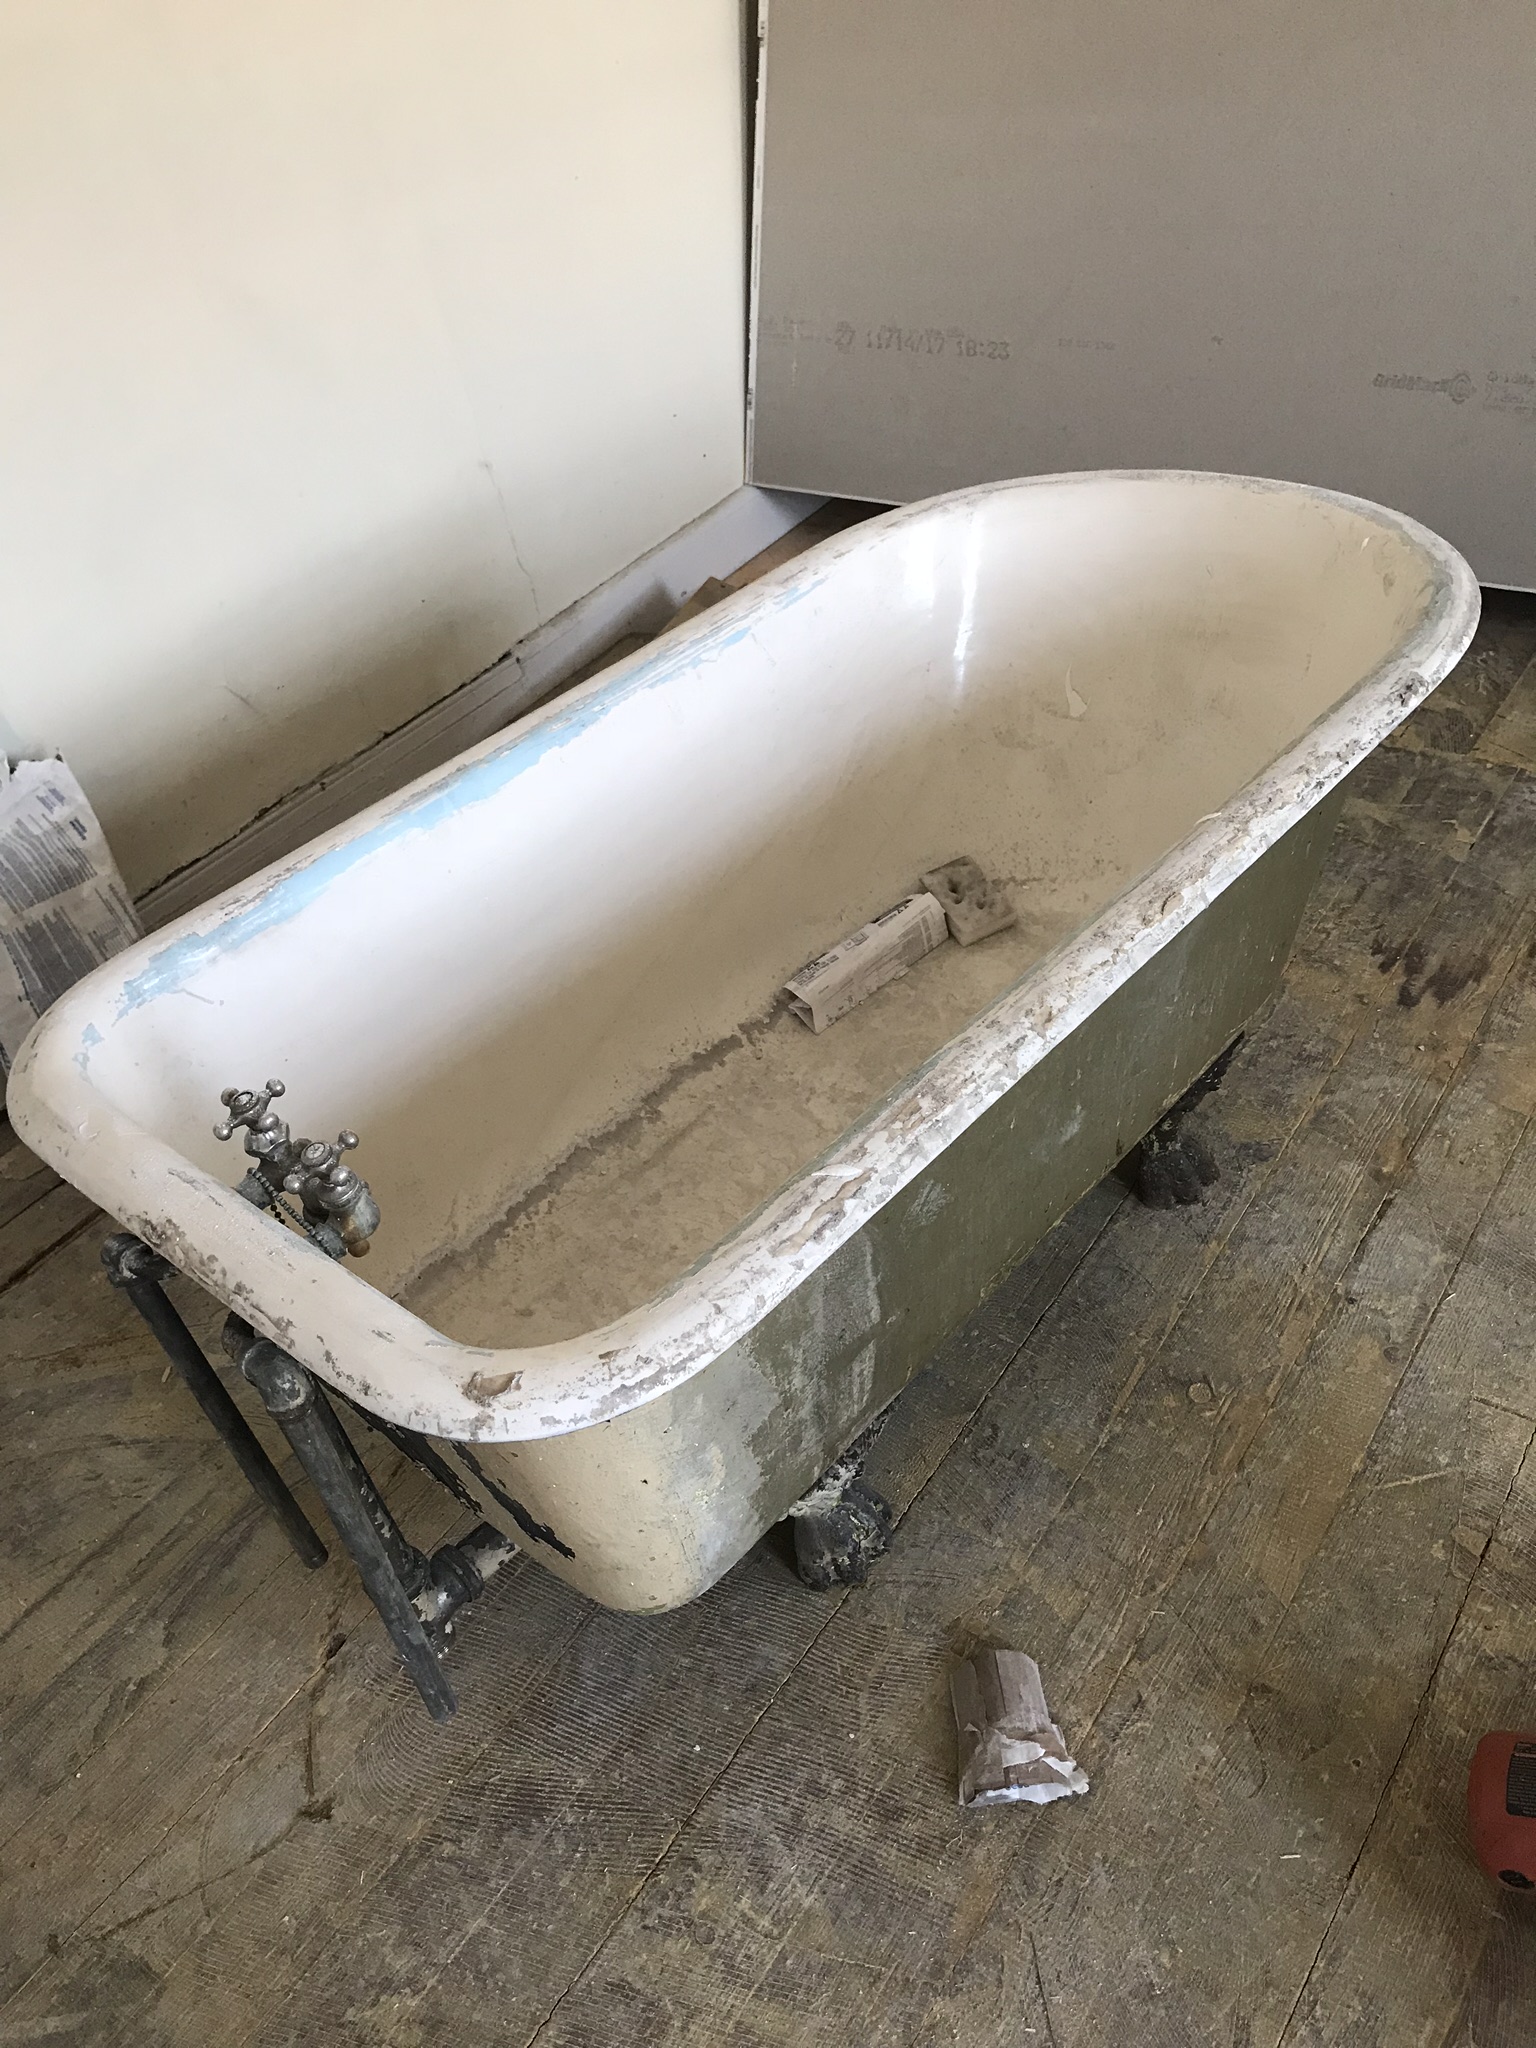
Whew! What a LONG hard job! But what a beautiful transformation! I have yet to soak in that tub but it’s on my list of things to do this weekend!
Share your thoughts!
What do you think? Quite a difference from before to after, right? Ready for a relaxing get-away?
Next up:
Things left to do: build a shed door for out back (I did create a beautiful small seating area … I’ll share a few pictures of that next). I also need to build a door for a sliding barn style door between the bedroom and kitchen/dining/livingroom area. But other than that, it’s pretty much done! All decorated and furnished from dishes to bed linens, great amenities and attention to detail. I’m so proud of how my vision came together and look forward to hosting LOTS of guests! Let the bookings begin!
More about #helloredreno
You can book Suite Thyme if you’re traveling to the western PA area! I’d love to meet you! The building has so much historical charm. It’s about one block from our town’s Main Street. The bus stop is literally steps away. There’s an antique shop nearby. There are breweries, the YMCA, shops, restaurants, salons, florists, candy/coffee shop, holiday parades and festivals within walking distance. So fun! If renovation from blah to ahhhhh is your thing, come and check it out in person!
Ready to book a stay away at a home-suite-home for a Suite Thyme? Book Suite Thyme! Mention DIYShowOff and we’ll include a special gift with your stay.
So subscribe and be reminded of updates as the renovations progress! I’ll share before and after photos, projects underway and updates, plans and design boards, sources and links as they relate as well as fun events going on in and around the downtown area. I’ll be using a specific hashtag on social media to keep things all neat and tidy and organized.
#helloredreno and #suitethyme
I welcome your thoughts and ideas! And as always, thanks for your encouragement and support and for sharing in my joy and vision!
The #helloredreno project diary:
Project Diary #12 – Christmas at the Studio
Project Diary #13 – Wallpaper Mural
Project Diary #14 – Entryway, Stairs & Landing Before & After
Project Diary #15 – Apartment Living Room Before & After Reveal
Project Diary #16 – Dining Nook & Coffee Bar
Project Diary #17 – Apartment Kitchen Reveal
Project Diary #18 – Boho AirBnB Bedroom
Project Diary #19 – Bathroom Before & After Makeover