


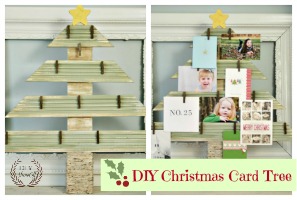
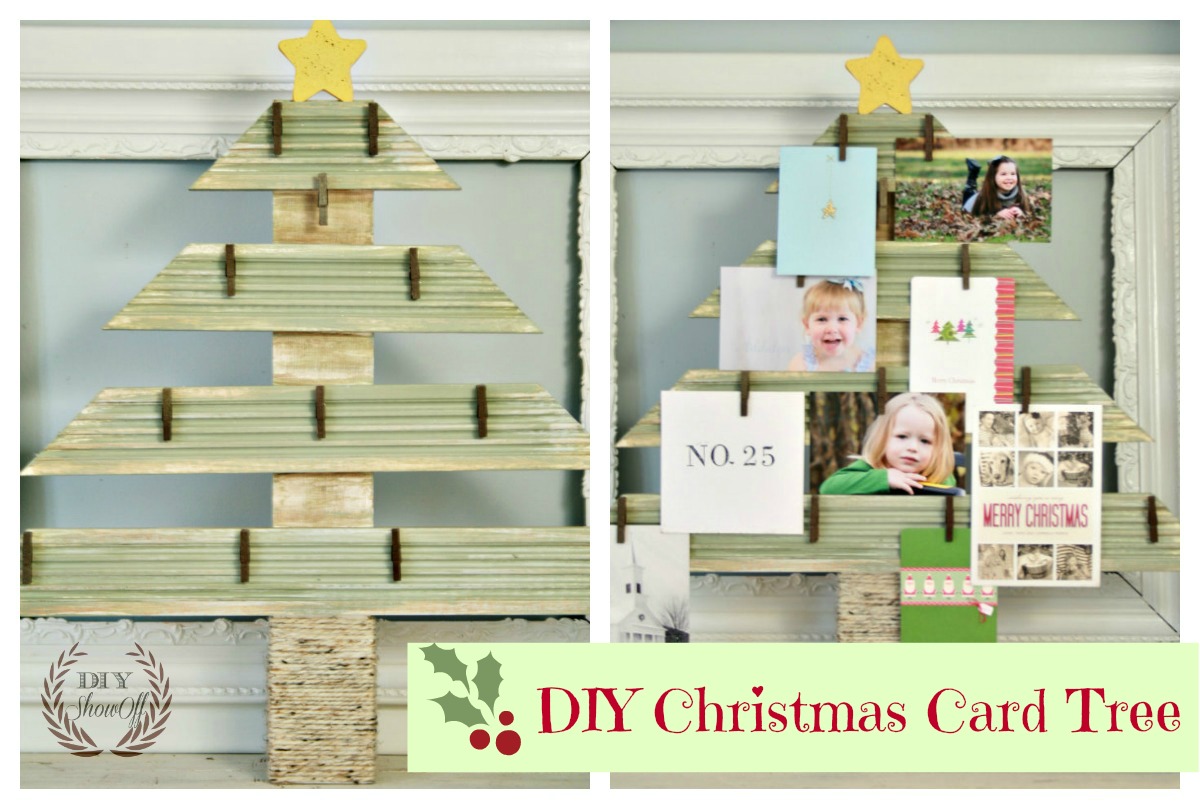
Christmas cards have been arriving in the mail! It’s the best time of the year for checking the mail. Walking to the mailbox in cold temps, anticipating ‘good tidings’ and walking back into the house with a warm heart. Thoughtfulness and “Merry Christmas” delivered to our mail box. It’s just one more part of Christmas giving that makes my days merry and bright! We have two ways for displaying Christmas wishes. One is something I put together using scrap wood and trim pieces:
How I made it:
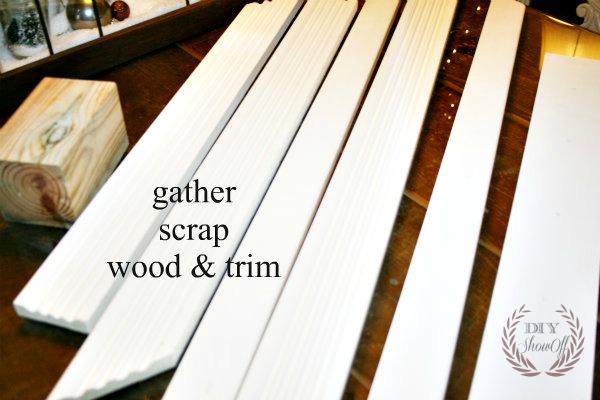
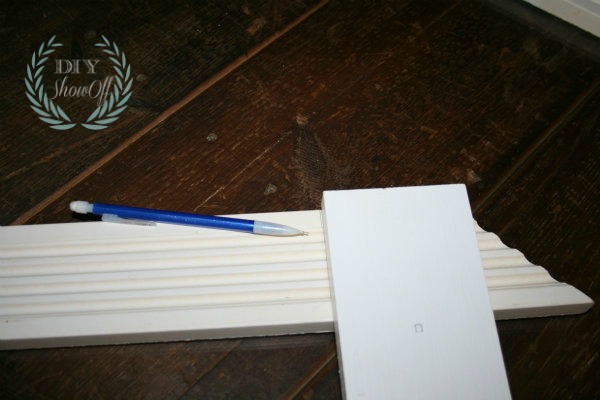
I gathered the scraps of moulding we had lying around, a 1×3.5 and a 4×4 scrap block. My 1×3.5 is about 21 inches long, the 4×4 is about 6 inches long. Adjust measurements for what fits your scrap wood.
I placed pieces on my 1×3.5 to get an idea of where things would go. I often use FrogTape as a measuring tool and in this case, I used it to evenly space my trim pieces by using them as a guide between trim pieces. I used the 1.88 in. width. I also left a small space above the “top” trim piece to allow room for gluing on a star.
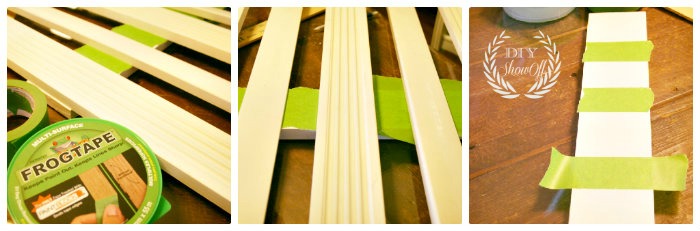
I measured my trim to fit the 1×3.5 piece for the top of my “tree”.
I cut my pieces at a 45 degree angle.
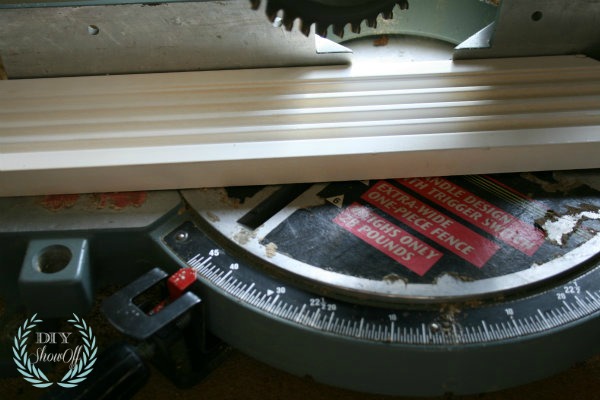
And lined up each piece for cutting…

and cut each piece at a 45 degree angle.
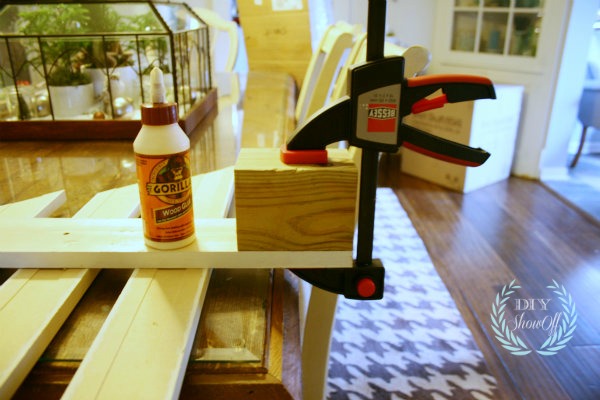
All pieces are glued using Gorilla Wood Glue and clamped as well as screwed into place.
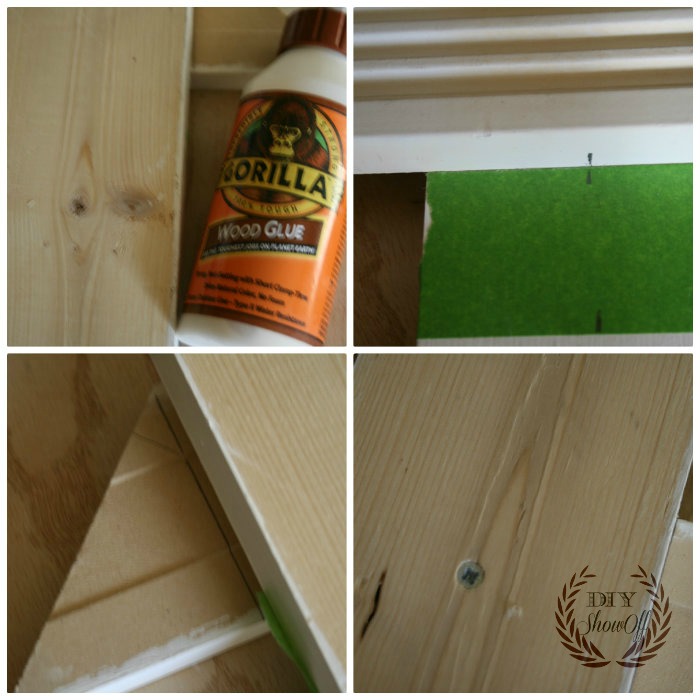
The 4×4 was glued and clamped to the bottom {back} and serves to make the Christmas card display free standing.
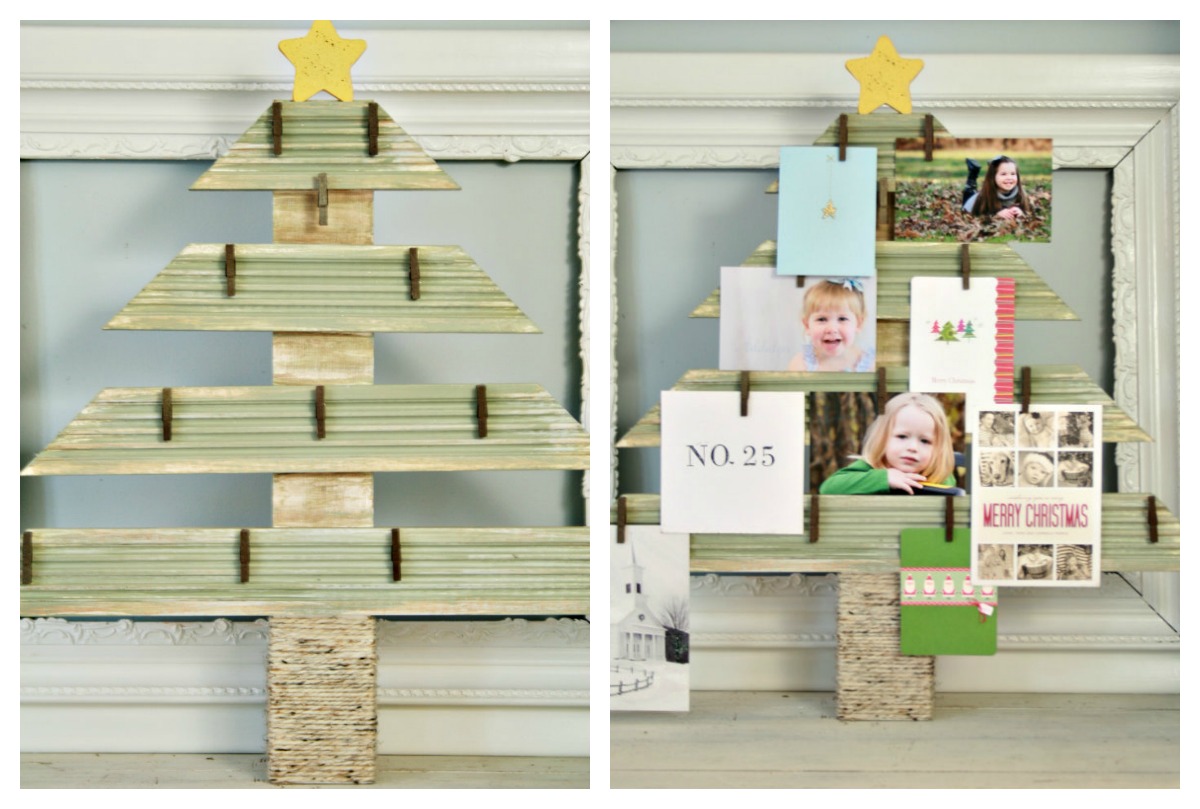
Everything got a coat of milk paint (General Finishes “basil”) and glaze with a dry brush with a spritz of Krylon Glitter Blast. {front and back} FrogTape was used to keep the 4×4 block of wood from being painted (I considered staining the wood block but see instructions below for my change in plans).
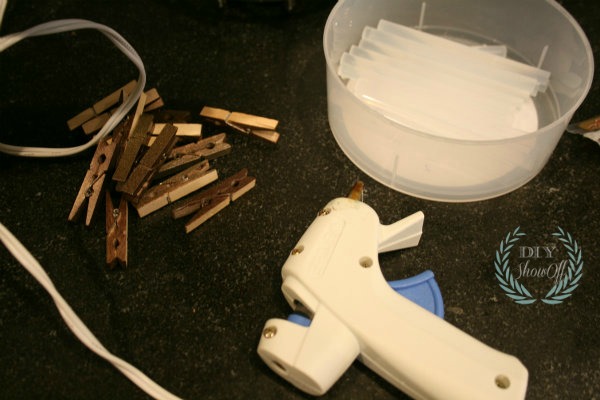
I spray painted small clothes pins and a wooden star.
Next I hot glued the clothes pins into place, staggering so cards won’t overlap by too much when displayed {FrogTape containers are great for storing glue sticks and keeping craft supplies organized}…
and the star on top.

My plan was to wrap the base using jute twine. But I’ve misplaced it, so I used a pretty wool yarn I had on hand, securing with hot glue.

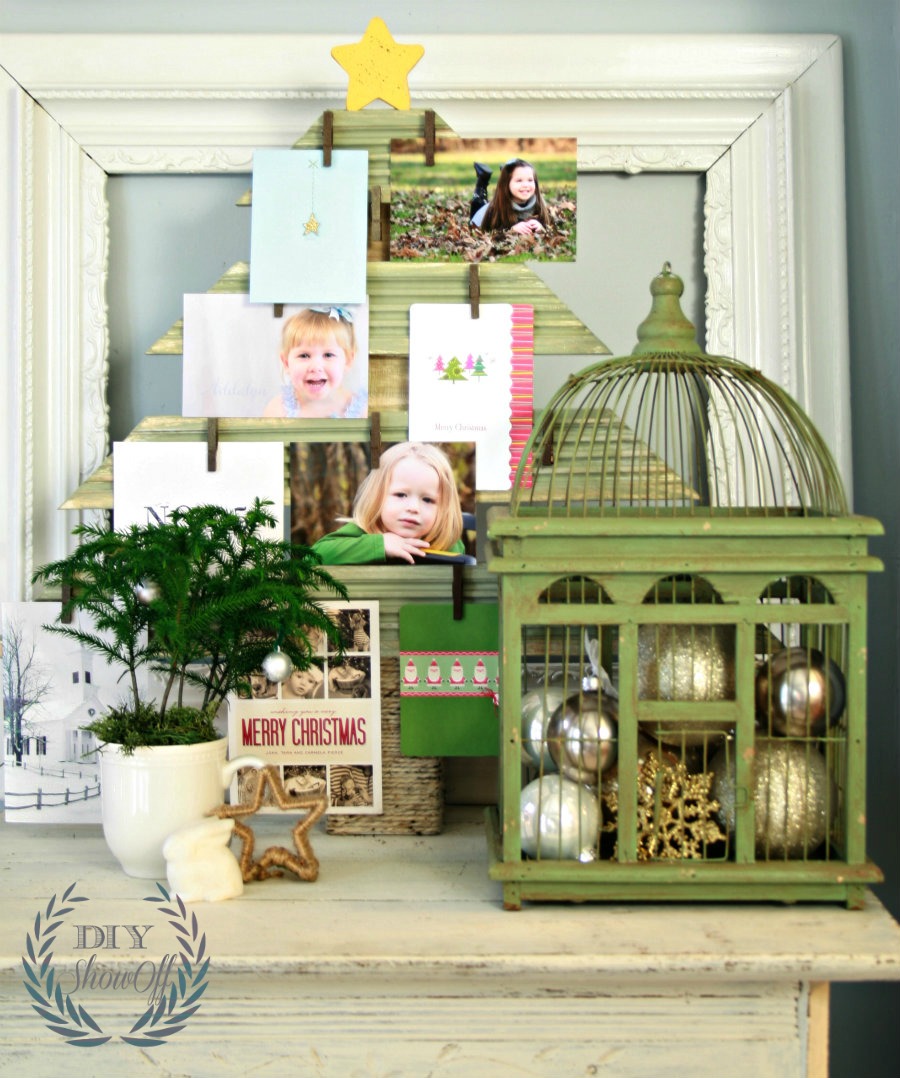
It’s such a cute way to display Christmas cards and pictures of my nieces and nephew:
a little Christmas card vignette display…
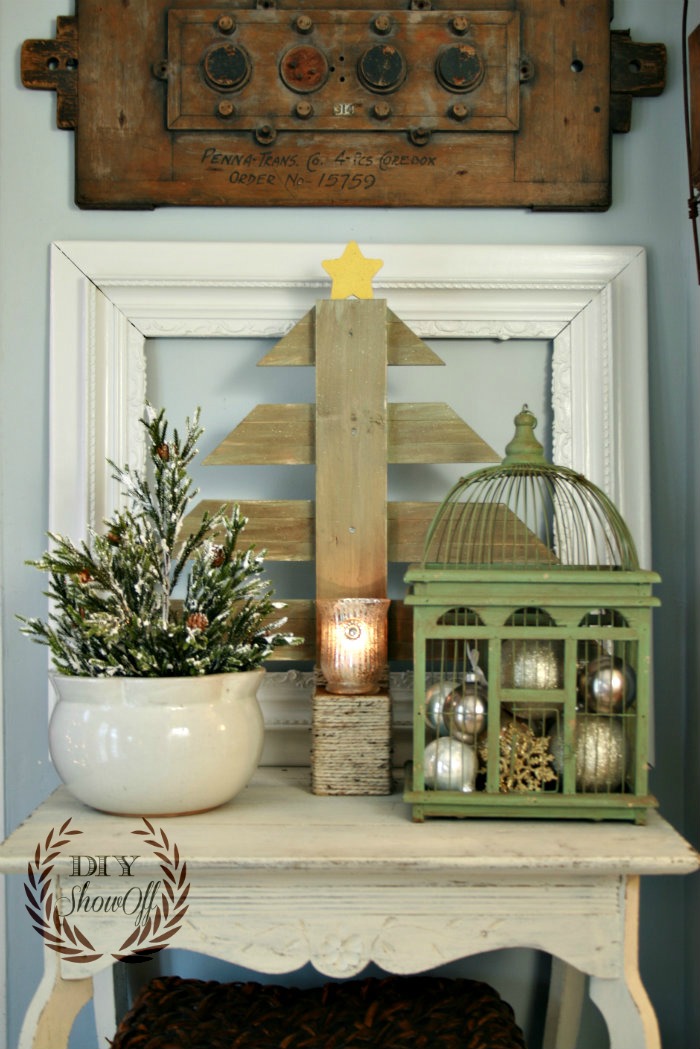
Doubles as a candle holder: When I don’t have anything to display, I can flip it to the back side, add a votive holder and candle…
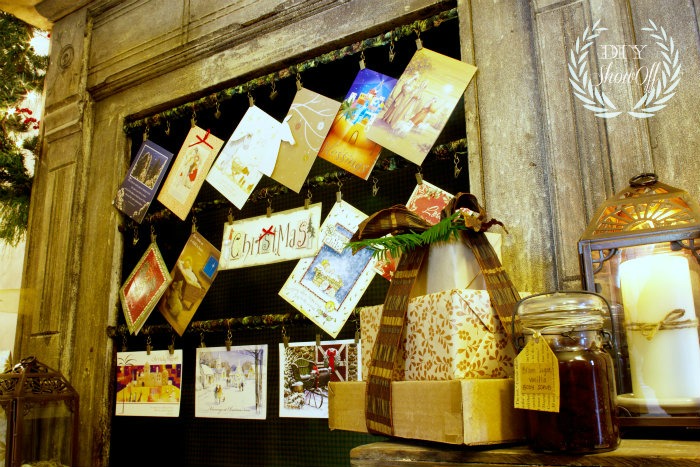
Quick and Easy DIY Christmas card/photo display: Our other Christmas card/photo display is a tension rod. I simply sewed a sleeve, added curtain rings with clips. It’s been displayed in our window frame, on a small book case and in a (non working) fireplace opening. Here’s a picture from last year:
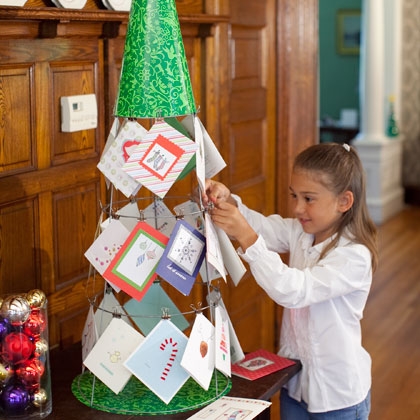
I love this idea from Family Fun too – a tomato cage Christmas card holder…
for more creative ideas, see my HomeTalk Christmas Card Display clipboard…
Which do you prefer? How do you display your Christmas cards? If you have a do-it-yourself Christmas card holder, feel free to leave a link in the comments {and I’ll add you to my HomeTalk clipboard}. 🙂
Sharing here:

*This is a sponsored post brought to you by FrogTape. The opinions are completely my own based on my experience. Results may vary.
I love this idea! Simple, easy and practical. And it looks fantastic! I like how it doubles as a candle holder. I like both display ideas for Christmas cards. 🙂
What a simple decoration you have here but still attractive……
Cute idea Roeshel!
What a great idea! I will be making one of these for next year for sure! Thanks for sharing the “how to” (and the inspiration).
Pingback: DIY Holiday Highlights ParyDIY Show Off ™ – DIY Decorating and Home Improvement Blog
I love all these card hanging ideas!
Great site! I am loving it!! Will be back later to read some more.looking for more updates.