DIY Triple Clipboard

We’re working on a special area for Mr. DIY.  Here’s one of the things we made for the area:

DIY Triple Clipboard Tutorial
Materials:
Board (I used a pre-cut unfinished wooden shelf base, approx. 4′ x 12′ x 1″)
Vinyl Chalkboard Tags from Ten23 Designs
Screws to secure to wall (or Dischangers)
1.  I used the Rockler TransTint Dye to stain my piece of wood which will be the back of my clipboard. (Mix according to instructions – add more for darker/less for lighter color).
2.  Allow to dry.
3.  Measure and divide board into 3 equal sections (I used a Sharpie – I don’t mind the line showing to separate the clipboard areas).

4.  Peel and stick vinyl chalkboard tags into place. I placed mine above the area I intend to secure the clip.
5.  Layout clips and mark where pilot holes need to be drilled.
6.  Drill pilot holes.
7.  Attach clips using screws provided.

(Oh – I wasn’t fond of the brassy color so I gave mine a coat of antique gold spray paint and splattered with a darker brown for an ‘old’ look).

8.  All done and ready to hang (we secured to the wall using drywall screws into studs but using Dischangers will allow your clipboard to be more mobile for moving).

More on this clipboard’s specific purpose coming up! You’ll never guess.  🙂

Ps. Still working on the subscription issues…I’m keeping my fingers crossed that the full post shows in the feed today!  EDIT:  It looks like the full post is in the feed but images are not.  Back to the drawing board! Thank you so much for your patience!

DIY Project Parade ~ Sitting Room Before and After

My love of DIY is sometimes madness! We have an empty nest this year. We planned a vacation in December because it sounded good at the time to get away while it’s cold and snowy here and escape to somewhere warm and toasty.  However, it’s a busy time of year. I’m in a bit of a holiday panic.  Since we have so much going on, I thought I’d only put up our smaller pre-lit tree in the living room instead of our monster not pre-lit.  I rearranged furniture, vacuumed all over, set up and fluffed the little tree.  I didn’t realize it was so little – it looked lost.  Sad, really. I don’t think I even needed to rearrange furniture. It just wasn’t going to work. I had to bring up the monster.
So…time to move the little tree to our little sitting room. Only the walls were dingy. A DIY girl cannot decorate and just add Christmas to a blah sitting room! Of course not! So, 4 days before our trip (I hadn’t even packed yet)…I decided to freshen up the walls in our sitting room so that the tree would be happy there.
Sitting room before: I loved the color…it was just scuffed up and scratched and even dirty.
(prepping the room to paint)
Armed with Dutch Boy‘s Refresh paint and my Purdy paintbrush…I had this room repainted in no time flat! One coat. No taping.
You can see the difference here in progress. New wet paint…
Pretty new color is Dutch Boy’s Ypsilanti Skies (yes, I had to go look that up to spell it right only to discover that spell check already knew)….
 
Now it’s a lot fresher and brighter. I love the light blue/gray with the cherry furniture and green from the Christmas tree.
before
after

before

after

before

after

I even made a sign for our coat closet…

More after pictures:

DIY Ornament Wreath tutorial by Mommy is Coo Coo
Mine is a gift. Thanks, Amanda!

I‘ll be sharing a tutorial for the DIY curtain rod and DIY script dropcloth curtains and more coming soon!  🙂

The DIY Show Off
Let’s see what you’ve been up to!
1. You must use the button above (ADD BUTTON HTML CODE FROM SIDE BAR TO YOUR POST) and link to this post to share the linky love. You post must be recent, shared at one DIY Project Parade only (not continuously) and be DIY related.

2.Include your name or blog name and project title. Add your permalink (not your blog url, but your DIY project post url). Feel free to link a Past Post, just invite your readers in a current post with a quick note.

3.Or email your link to thediyshowoff@gmail.com and I will add it for you.

4.If you notice your link has disappeared -please add the link back to The DIY Show Off to your post today, a button or a quick note to your readers about the party and try again! I love when everyone participates and readers check out everyone’s links, but I think the return favor of linking back is the nice thing to do so everyone plays fair and enjoys all of the projects and links. Also – this blog party is for DIY projects only. Links not related to DIY will be deleted. Please share your link one week only. 
5.  If reading this in an email, pop over to http://thediyshowoff.blogspot.com to see the inspiring DIY projects linked up!
6. If you have a Holiday link to share, feel free to link up to here too!

7.  NOW you can “like” the links!  What a fun idea!  Most liked links may be included in a post of DIY Project Parade highlights later in the week.
8.  Visit a few other links to make some new friends, get some creative ideas and feel free to leave me a comment. I’m likely sitting here on the computer and could use a happy distraction! 

Sharing here this week:

Pin It

Guest Blogger Thank You and Recap

Good morning DIY friends!  We’re back to home sweet home after soaking up some sun and relaxation.  We had a lovely, peaceful and fun time here…
Tensing Pen, Negril Cliffs, Jamaica
but in the meantime – I’ve missed you all!  Seriously…blog withdrawal! I can’t wait to catch up!
While we were away with limited internet access, there were some issues with email subscriptions. As in “none” for about a week.  Thankfully my genius technically savvy webmaster, Stacy from She Knows Design, was able to save the day and get things back on track.  Then we noticed that only a teaser was being emailed.  I’m hoping that today – you’re getting the full posts again if you subscribe via email. 
In the meantime, I fear you may have missed a few amazing ladies and their DIY guest posts.  So, please join me as I give a HUGE THANK YOU to these talented and creative DIY bloggers who took the time to share some awesome projects and in case you missed them (frustrating feedburner and bad timing!), I know they’d love LOVE LOVE to hear your comments or for you to click their blog button for a quick visit and a “hi”! 
1. DIY at StarDust Decor & Style. Olga shares her beautiful bedroom transformation. From boring before to romantic after… 
 
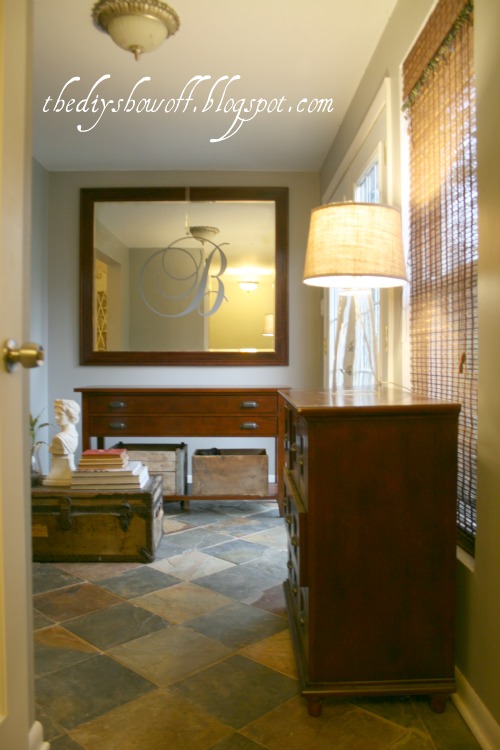
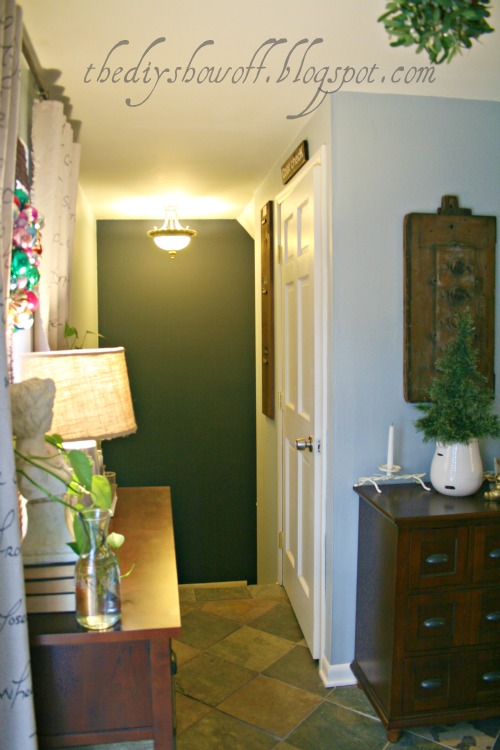
and a ho-hum hallway goes horizontal happy… 
.  
Olga, you’ve done an amazing job on a great budget. I love the changes!
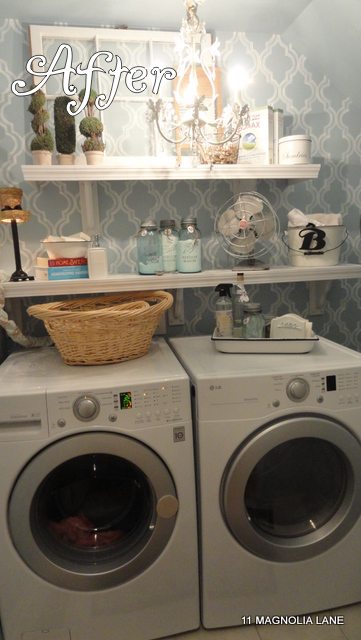
2. Christy is just one of the creative DIY girls at 11 Magnolia Lane and it was such an honor to have her share her gorgeous kitchen reveal… 
 
and fun laundry room makeover…Christy – you’re a DIY diva! WOW! 
 
  
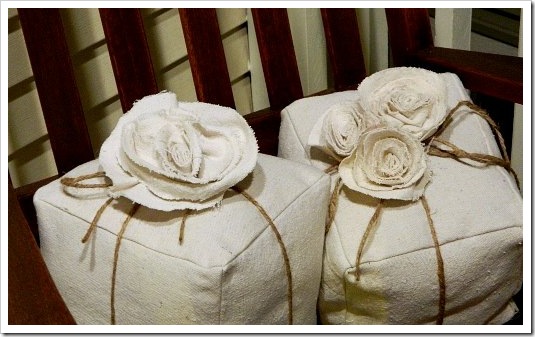
simple, no sew and great handmade gift ideas!  Thanks so much for sharing your creativity, Randee! 
Randee's Organized Chaos
4. Aren’t these DIY present pillows from Linda at It All Started with Paint adorable?! I’m so happy she shared her awesome tutorial – definitely a must do project! Thanks, Linda!
Present Pillows Twine on porch (550x413) (2)
it all started with paint
5. I love the tradition of handmade ornaments every year, don’t you? It’s a great gift idea too and Tammy from Type A has a great recipe for DIY clay ornaments
 
Thanks for sharing your tutorial for these pretty clay ornaments, Tammy! I love these for dressing up packages too!
Type A
 
and what a statement! Huge fun difference! I love the transition of blues. Gorgeous!
Unskinny Boppy
7. Sweet Lee (and Poppy) from Lee Caroline Art has a dreamy, peaceful French Cottage bedroom makeover worthy of ‘pinning’ for inspiration…I’d want to lounge in bed all day long!
 Beautiful job, Lee!
Lee Caroline Art
8. DIY raggy fabric vines are a beautiful garland option and Lesli from My Old Country House shares her easy tutorial…
 
How fun and so charming! Easy. Choose fabric to match your decor. Love!
9. Nothing more satisfying than a DIY knock off for prettier, creative and budget friendly decor.  That’s what Chris from Attempting Aloha shares with her Ballard Inspired Christmas Trees….
Attempting Aloha
10. It’s the perfect time of year for sounds that remind you Christmas is here and jingle bells on doors make me smile.  Handmade by Hilani shares her cute jingle bell door accent tutorial
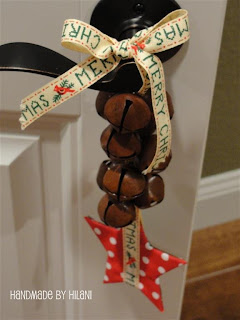
 . So sweet!  Thanks for sharing, Hilani! 
Handmade by Hilani
11.  And last but not least, Amy from The Salvage Collection shares her thoughts on the creative process in a fun way – hilariously helpful! Amy ~ you crack me up! Thank you so much for bringing a big smile to our DIY craziness!
via
The Salvage Collection


BIG ROUND OF APPLAUSE for these amazing ladies and their creativity and for sharing their thoughts and awesome DIY projects! As you know, I cherish my blog buddies and I’m so grateful for their DIY ingenuity and guest appearance the past two weeks. 
Thank you!

And I’ll be back later today with the DIY Project Parade – because before we left, while most normal people would be packing and getting ready for the holidays since vacation took up 10 days of precious holiday prep, decorating and shopping time, this DIY crazy girl was painting and doing projects up until the evening before we left. If you’re a DIY Show Off follower, you might understand my addiction. 😉   

The DIY Show Off
See you in a couple of hours – just need to snap some ‘after’ pictures.

As the Jamaicans say… “RESPECT”

Keeping my fingers crossed that the subscription emails are back to normal now.  Thank you for your patience! EDIT:  Does anyone know how to fix a feed? When I check “full post” to show, it does not show at all. When I check “short”, it does show just a teaser but I’d prefer the entire post to show. My pictures are resized so I know my posts are within the size limit.  I’m at a complete loss on how to fix the issue. I can’t seem to locate an answer via google.  Any help or advice is appreciated!


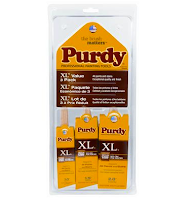
WINNER OF THE PURDY AWESOME GIVEAWAY IS…

 
ryanac32 said… 38
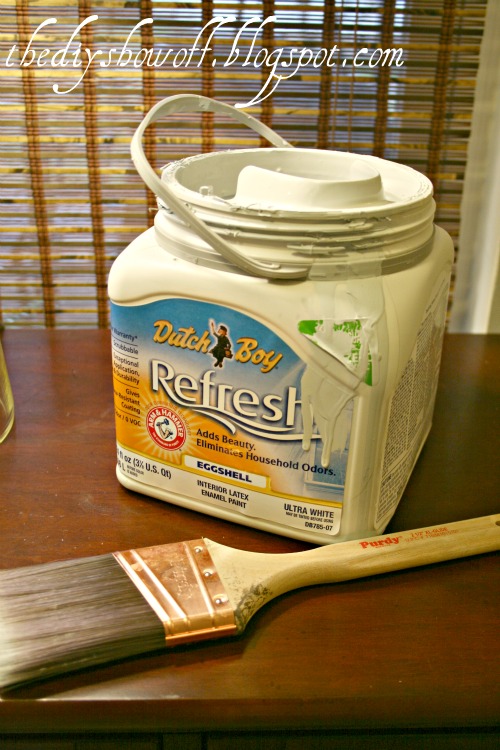
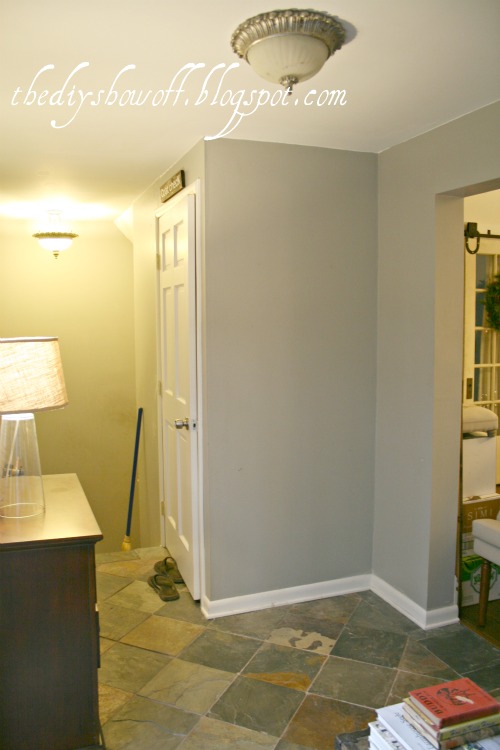
my next painting project is the kitchen