Hellooooo, blog friends! I’d like to introduce you to Allison from

You might already know her. She’s been featured at quite a few of our favorite spots but not without good cause. She has some amazing DIY projects going on. Click the links below to see the details on her original post.
I love this…so simple to do but what a statement.
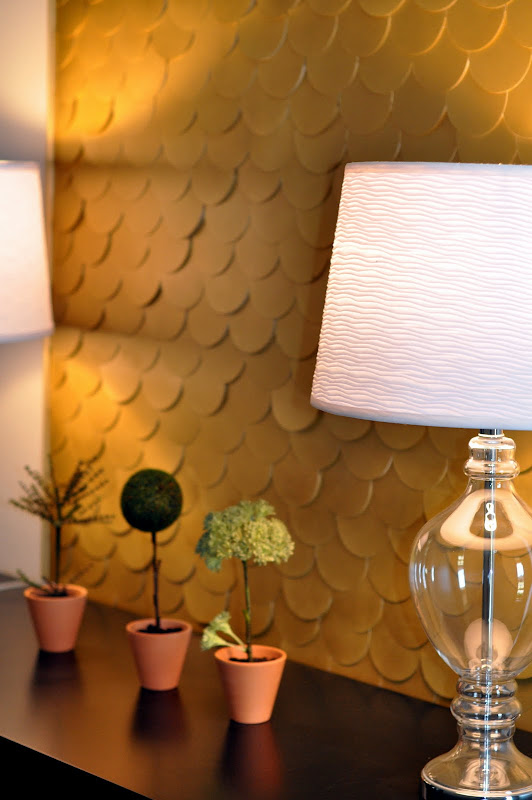
Would you believe those are posterboard circles, mdf board, trim and paint?

Love the sheen…

Allison was this chair’s fairy Godmother…
Before

Cinderella lives happily ever after…
Stunning!

I love the bright colors, bold patterns…

Not only is Allison a Stella & Dot rep, Etsy shop owner, painter, creative DIY’er and crafter, but they buy and fix up houses. I don’t know how she does it all. They took this kitchen…
Before

And with a really, really tight budget, turned it into this…

Unbelievable.
Pop over to Two Thirty-Five Designs to see more! While you’re there, enter for a chance to win a beautiful gift for yourself, stocking stuffers or to check off a pretty gift idea for your accessory loving friend.