DIY Fall Festival Friday!

I’ve actually been spring cleaning in the fall (a car full of junk donated and more space feels soooo good) and preparing for guests but Bri and I did manage to decoupage some pumpkins. Have to fit a fun craft project in there somewhere to break up the work, right? It’s not an original project but results are always original.
After seeing the beautiful scrapbook paper from Canvas Corp
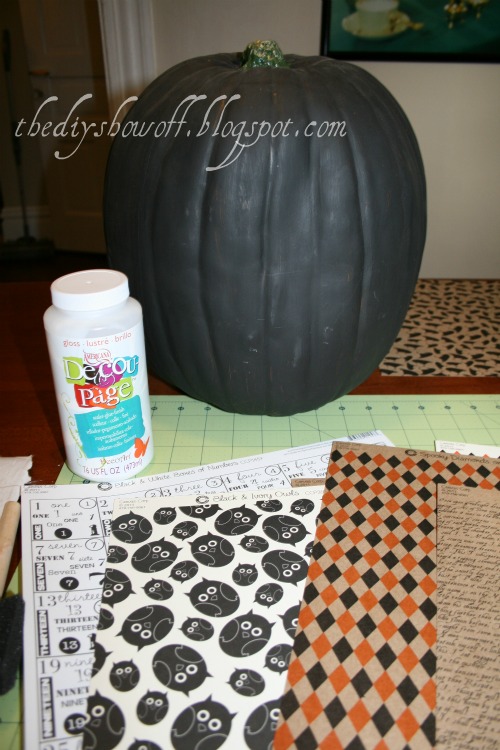
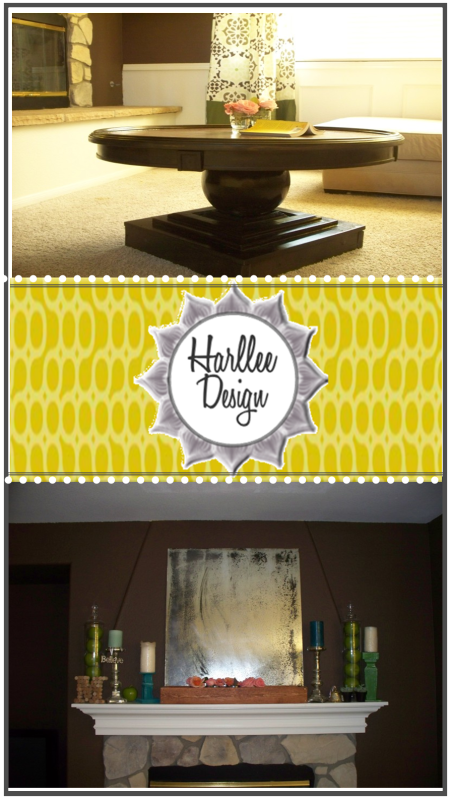
I chose to give my black pumpkin a new look to make my craft room a little more festive (I still have to do a reveal of my craft room ,don’t I? Enjoy the sneak peek!)…

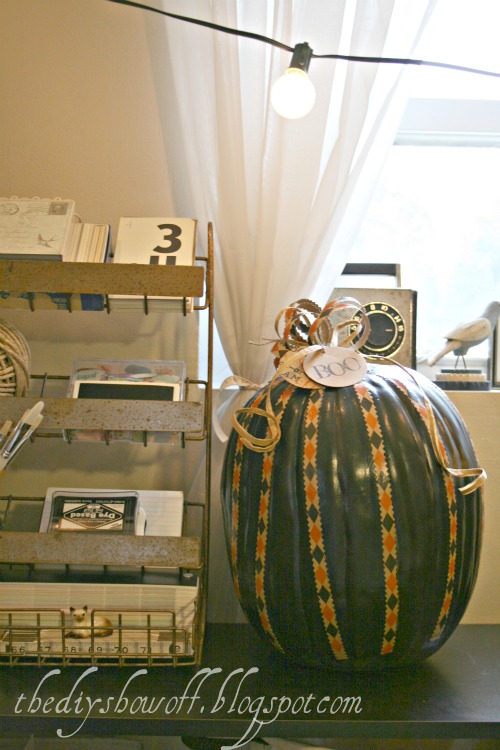
Deco Art’s Decoupage is so much fun to work with and results are a beautiful gloss or matte finish. See my  decoupage pumpkin tutorial at the DIY Club.

Here’s the pumpkin I decoupaged a few years ago…completely different.

Bri’s decoupaged pumpkins:

Have you given this a shot?

Speaking of pumpkins!  Check out Pumpkins and Power Tools – a  great TV segment that aired this week featuring Ken Collier from RDA’s The Family Handyman. The segment was inspired by the October issue of TFH and touches on DIYers and using power tools to spice up your pumpkins for Halloween.


Let’s see what you’ve been up to! 

The DIY Show Off

Rules:

•Create a blog post about an Autumn/Fall project that YOU HAVE CREATED. Feel free to include a past link, however please make a note on a recent post about the DIY Fall Festival to invite everyone over to join in or to search the collection of fall inspired ideas.

•Add your project title to Linky party below.  (example: House # Pumpkins)

•Type in the permalink address, not your basic blog address. A permalink is the address that links directly to your specific post. (example: http://thediyshowoff.blogspot.com/2009/08/house-number-pumpkins)

•Please add the DIY button or link to the party in your post to share the party with your readers.

•Although a tutorial is helpful, it’s not required. It just must be your project.  Please only link up same project once to one party.

•If you notice that you’re link disappeared, please make the correction according to the rules above and re-link!

• By adding your link, you give the DIY Show Off permission to highlight your project in a future post. Enjoy and be inspired!


See more of my projects at

Pin It

DIY Star – Issue No. 1

I don’t always get a chance to visit everyone as much as I’d like and even though I don’t always have time to comment (between my real job and projects, I really try to!).  If you comment, I do click your profile and visit you back as often as possible. You might not even know I was there but I try to comment when I can.  I notice you. You push away the ‘discouragement’ monster (and I want to make you feel the same way). I appreciate that you’re here. I appreciate your feedback, encouragement, support and help when requested. DIY Show Off readers are all DIY Stars! 

So, once in a while, I’m going to surprise a reader with a show off feature and share my recent blog crush, someone who has made blogging fun, someone who made me smile big or swell with pride, brought tears of happiness to my small slice of the www, someone who made me feel good about myself.  Because I think you’re all amazing and inspiring and hasn’t blogging introduced you to a whole world wide web full of inspiration? My favorite part of blogging is making new friends, getting to know those who share my DIY passion and simply encouraging you to be brave, just DIY. This feature (weekly?) will showcase who I feel is an exceptional blogger and DIY’er – helpful to others, non-competitive and just plain friendly and sweet – someone you’ll want to know too! If there was a show called DIY Star (maybe someday?!) and I could choose the talent, the friends I feature in this series are the DIY divas I’d love to have on my team.  
This week, I want to say a big THANK YOU to Rayan (also known as ‘Ry’) from 
A fellow DIY Club gal and not only does Rayan share my giveaways on Facebook and participate and give me thumbs up and make me feel like I’m doing a great job, she’s a DIY Star! She’s a furniture designer! She creates the plans and shares them. She showcases readers’ projects when they build from one of her amazing designs. I want to be Rayan when I grow up (don’t remind me that I’m already grown up – I know. I know!). 
I love that plans can be searched by Type, Collection, Cost, Tools and/or Skill Level. You must check out the Plan Index – you’re going to be so motivated to add building something to your DIY list. Love something you’ve seen at Pottery Barn, Restoration Hardware, Ballard Designs, Ikea (and more!) but the price has adding it to your “things I’ll buy when I win the lottery”?  Search for the retailer and build it at a fraction of the cost!  Much more rewarding too with money left over for decorating accessories! (See Carbon Copy.) Don’t think you can do it?  Rayan is your cheerleader.  She’s accessible and there every step of the way, ready to answer your questions and offer tips, tricks and advice.  It’s almost like she’s right there teaching you. Learning as you go is a part of the DIY experience. 
You won’t find furniture only at The Design Confidential.  It doesn’t stop there.  Oh no! You’ll enjoy reading about DIY holiday, decor, home improvement and even kid and family friendly DIY projects and much, much more fun…

Here are some of my recent favorite posts at The Design Confidential…
Free DIY Plans Reclaimed Weathered Wood Standing Floor Mirror
Love the stencil!
Project Image
seriously super easy too!
Cheap Chic Striped Candles
tons of inspiration!
Project Image

So, what are you waiting for? Go visit Rayan. Introduce yourself. She isn’t aware of this post being written – I hope it brightens her day, out of the blue. I love planning surprises. Do you do know (e-know) her?  Leave a comment telling me about it.  Let’s discuss this DIY Blog Star…
Who’s next?  It might just be you! Thanks for stopping by! 
This post/series is NOT a paid advertisement.  It’s just a ::HIGH FIVE:: highlight that I’m writing to showcase amazing DIY friends – real people with amazing DIY projects IN ADDITION TO making blogging a pleasant, more personal, successful experience. Virtual friends in most cases, but every bit as real. 

Harllee Design- Globe Coffee Table Tutorial

First things first, my name is Meagan from Harllee Design. I am new to blogland and I am honored to be guest posting on DIY Showoff! I recently started Harllee Design and also a blog where I share all my DIY adventures, tutorials and home improvement mistakes wisdom.


This is how I look in my mind’s eye, put together and welcoming.  
  

This is how I really look. Like a mad scientist that specializes in home decor. That frantic smile must mean it is 3:45pm and my husband will be home soon. I wonder where I will hide the shattered wine bottles.

I DON’T KNOW why it smells like nail polish remover in here. What is this, the inquisition?
Now that we have formalities out of the way I would love to share my latest tutorial with you. It was my most ambitious project yet and it came together pretty easily. 
I saw this table on Pinterest and knew it would look perfect in my family room.


Look closely at the base, it looks JUST like a globe. 
*wheels turning*
I then uttered the 6 words my husband dreads most:

“I think I can make that!”


1-13″ Globe – purchase one cardboard or another material you can cut. (I purchased my globe from Goodwill 1- 24″x 24″ x 1″ piece of wood

 1- 19″x 19″ x 1″ piece of wood
 1- 14″ x 14″ x 1″ piece of wood
 1- 10″ x 10″ x2″ piece of wood
 2- 24 x 2x 4 piece of wood
 2- 20″ x 2″ x 4″  piece of wood
 1- 4″ x 4″ x 14″ piece of wood
 1- 13″ in diameter circle of wood
 Wood for table top (I used a 42″ top of an old table)
 3″ wood screws
 Stain
 Varnish
 Saw
 Electric screw driver
 Hammer
 Drywall plaster
 Tape Measure
 Sand paper


1. Start with building the base. Predrill holes (I recently started predrilling, it makes things SO much easier)

2. Take the (2) 20” x 4″ x 1″ and (2) 24″ x 4″ x 1″ pieces and attach to form a box.  Congrats! You just made the foundation for the table.
3.  Center and attach the  19″ x 19″ square to the top off the foundation, place screws in the center so they are covered up by the next layer.

< div class="MsoNormal" style="margin: 0in 0in 10pt;">5. Attach the 14″ x 14″ to your base by screwing through the top of the piece as shown below. You can cover the screw up with filler later.


Optional Steps
  • Pour a glass of wine and think about what a badass you are.
  • Think about all those weaker people that BUY their furniture.
  • Remember the time you almost cut your finger off.
  • Wonder why no one told you that the miter saw SUCKS things into the saw.
  • Finish your glass of wine, humbled and get back to work.
                                                                                                                              
6. Cut a hole in the top and bottom of your globe, each hole should be 4 1/4″ x 4 1/4″ so you can slip it over the 4″ x 4″ post. Don’t feel guilty about the globe, it is for the greater good. Use one that still has the USSR on it, that might help sooth the guilt. The globe is decorative only, the weight on the table is supported by the 4″ x 4″
Slip the globe over the 4″ x 4″ post.
7. Spread drywall plaster over the entire globe, fill in all screw holes and also fill  any gaps that might exist between the layers of the pedestal.
8. Once the plaster has dried use sandpaper to smooth the globe and all other patches.
Clean off ALL dust and prepare to paint.
Spray paint, feel smug and satisfied. Ahhh. This might actually turn into a table.( I used Rustoleum Espresso in Satin.)
This is where our steps may differ. You might cut your own table top, I used one from an old table. Often it is cheaper to use pieces from a salvaged piece of furniture than it is to buy new wood. Check your local thrift stores for something that might work or simply cut your own.
Here is a great tutorial on making a solid wood table top.

9. Attach the  14″ x 4″ x 4″ piece of wood to the center of the 14″ x 14″ square of wood. Drill up through the bottom of the 14″ x 14″ into the 4″ x 4″. I actually used an old cupboard door for this piece, the molding added a visual interest.

10. After your table top is made and finish is applied attach the 13″ circle of wood to the top of your base. Screw down through the top of the circle into your 4″ x 4″ post.
11. Finally, attach your table top to the 13″ circle of wood.


Optional Steps
  • Tell your husband you are painting the work area of the garage PINK as you are now the master craftsman
  • Kick your feet up and ask for a beer
  • Realize the beer is never coming.
  • Get your own beer, sit down and enjoy that gorgeous table


I hope you try this tutorial, it was fairly easy and turned out great. Make sure you show me pictures of the finished product, I would love to see one in a bright, funky color. 

It was great to meet you and I hope you visit me at Harllee Design. I have wine and cheese over there for everyone, honestly………
Remember, if at first you succeed try something harder!
http://harlleedesign.blogspot.com/


Welcome to blogging, Meagan!  Thank you so much for sharing your gorgeous coffee table tutorial!  I can’t wait to see more of your great DIY projects!