


I‘m honored to show off this beautiful chandelier for Amy at

Here is her tutorial/before and after photos. It’s stunning! Note the finish she did!
How to make your own Niermann Weeks: kinda
 Oh how I love the look of a Niermann Weeks chandelier, and oh how I hate the price of them. My friend Karen who is one of the most fashionable ladies walking the planet, got me thinking about how to create the look of a Niermann Weeks chandelier. She is a girl after my own heart and loves to decorate fabulous for less. I have told you before that I am a “faux, faux finisher”. I pretend a little with decorative finishes, but I had never experimented with applying any products to a fixture before. So I gave it a shot.
Here are a few finishes I liked from the Niermann Weeks collection, all priced over $5,500:


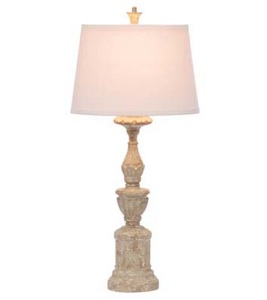
Here are a few of Brooke’s table lamps from her Giannetti lighting collection, love the finish of these as well:

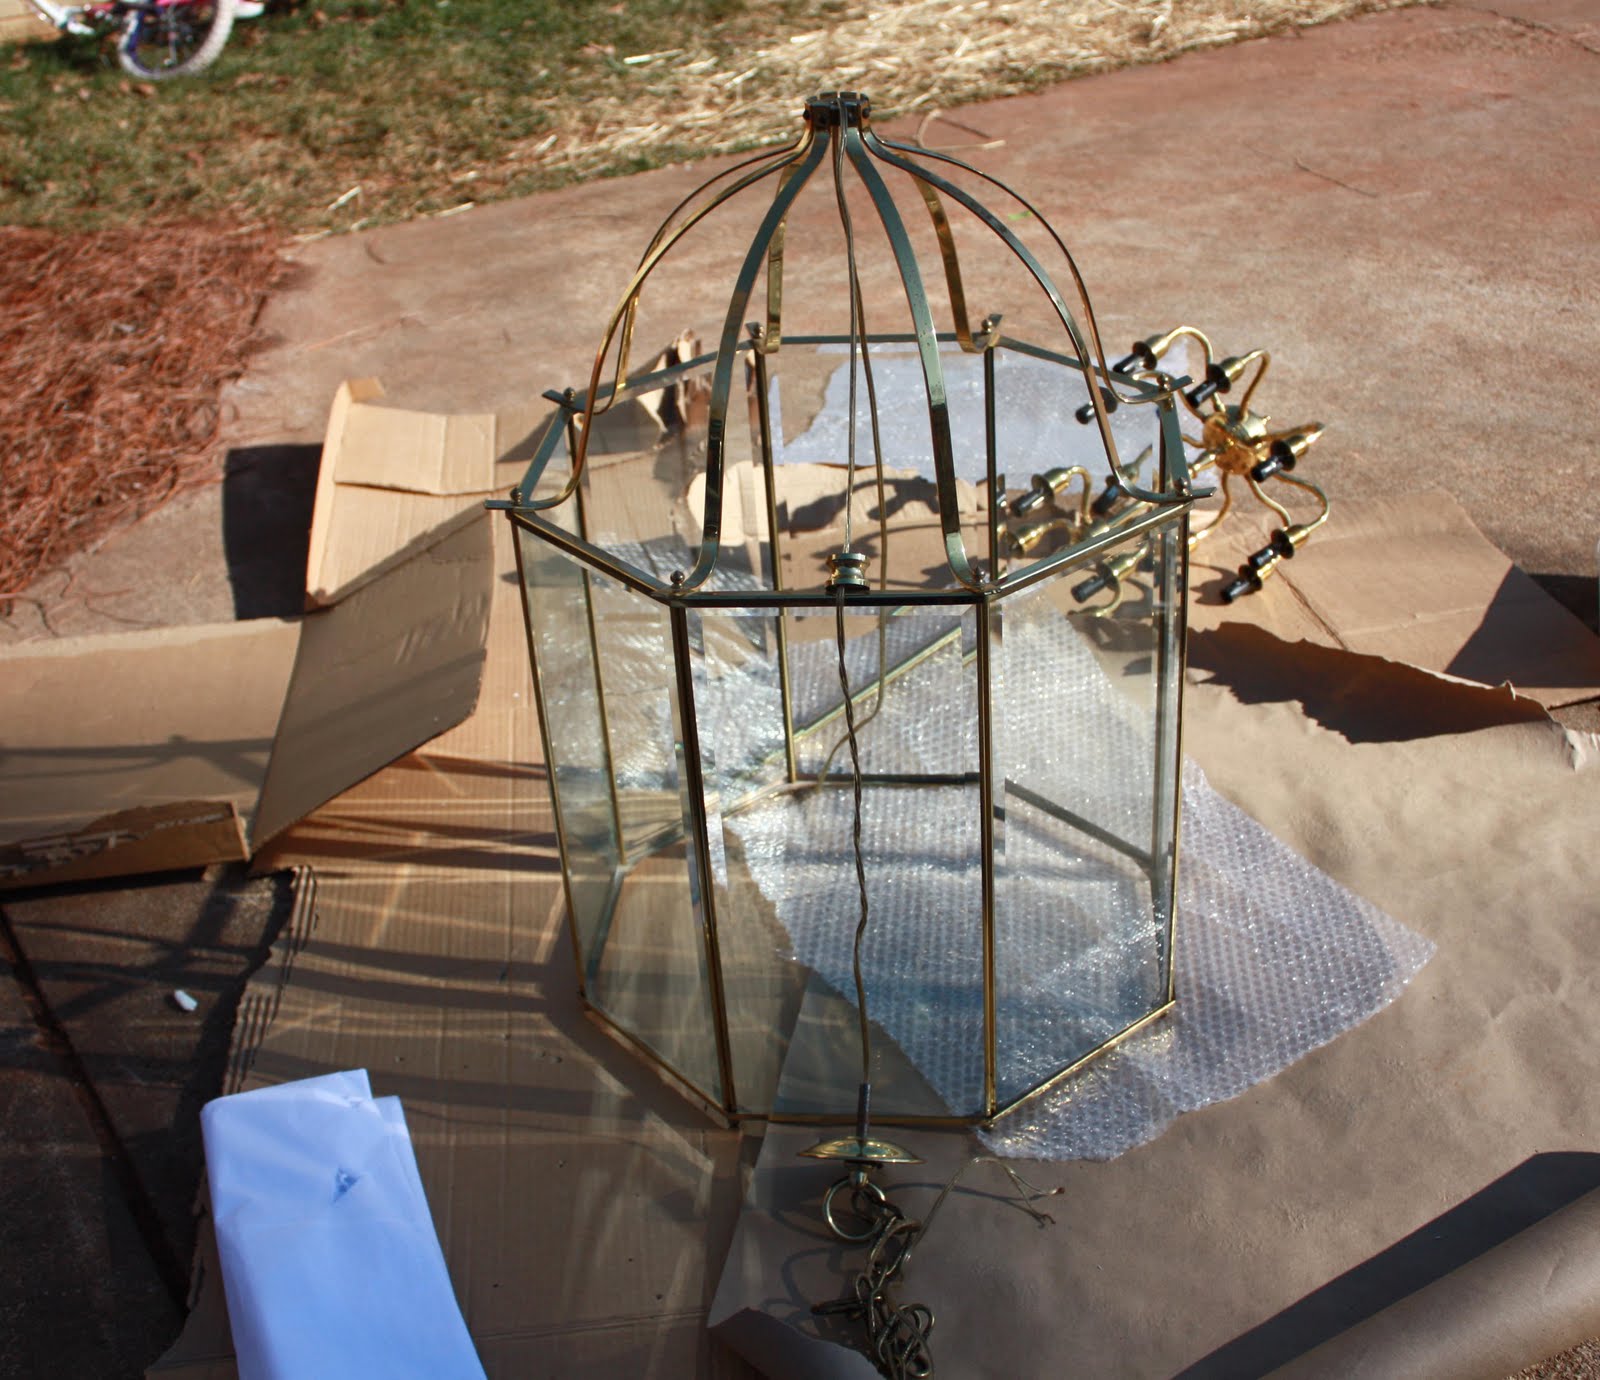
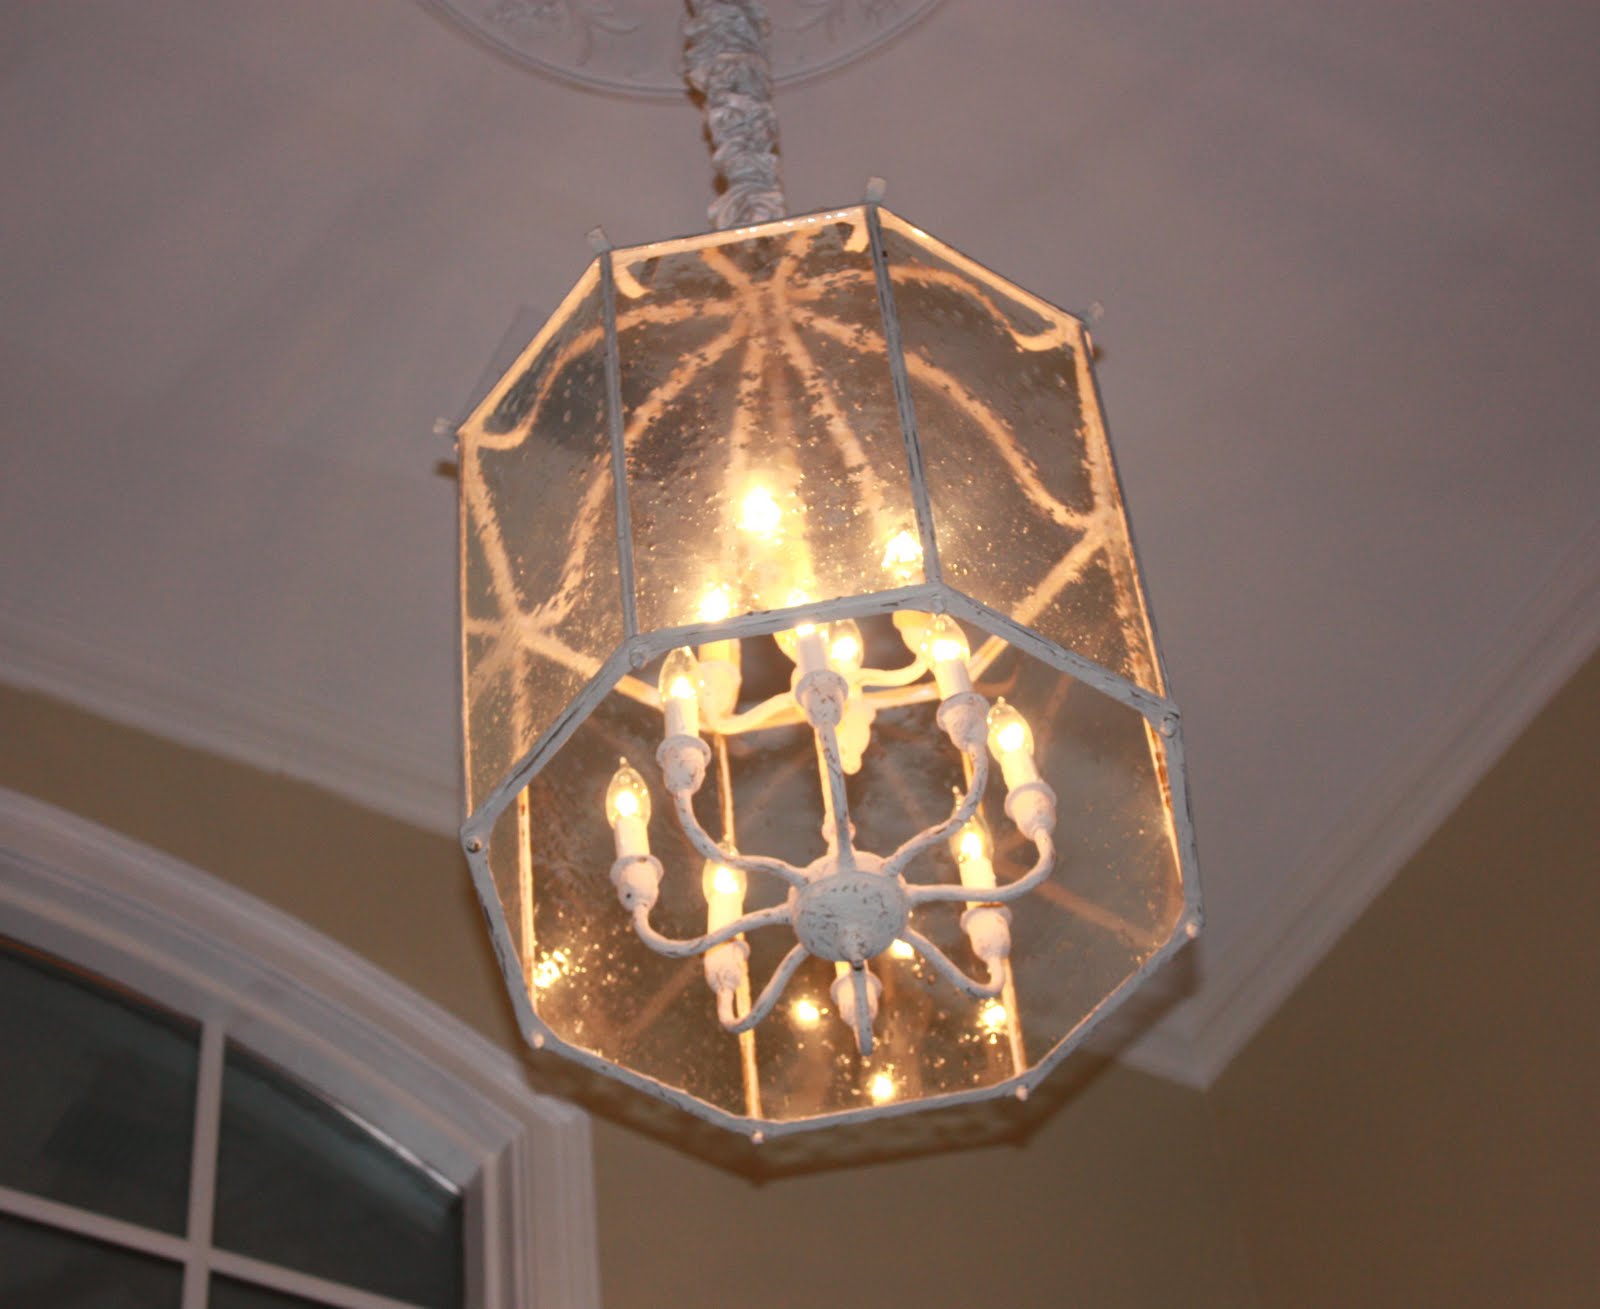
And this is what I wanted to transform into something lovely: a $25 brass consignment store find. I liked the lines of it, and it was large enough to go in my foyer.
 Everything I used was products that I had around my house (Faux Effects plaster), but you could use regular plaster and tint it any color you wanted. I scooped the product up in my hands and smeared it all over the chandelier. My first plaster color was a bronze shade. I let that dry and then I repeated the exact same “technique” with a neutral color plaster (I am using that term loosely as my five year old helped me cover the chandelier in plaster with her hands). Once both layers had dried I sanded it a little by hand to let the darker shade underneath show through.
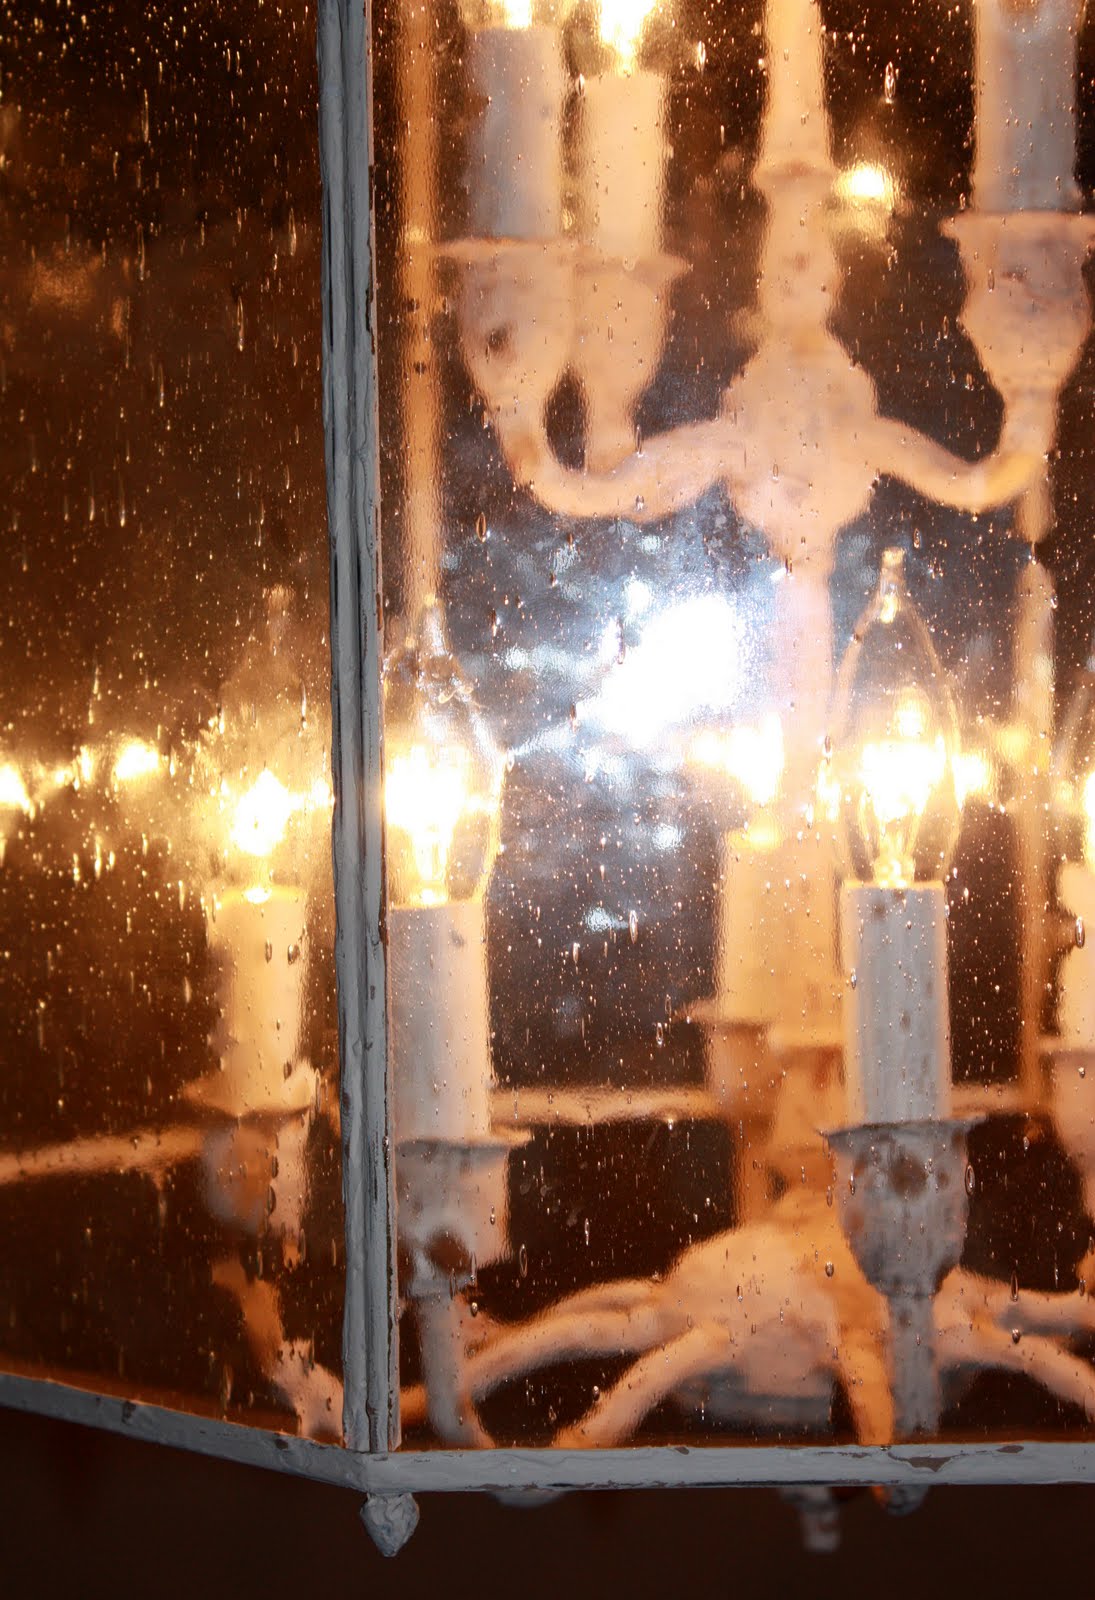
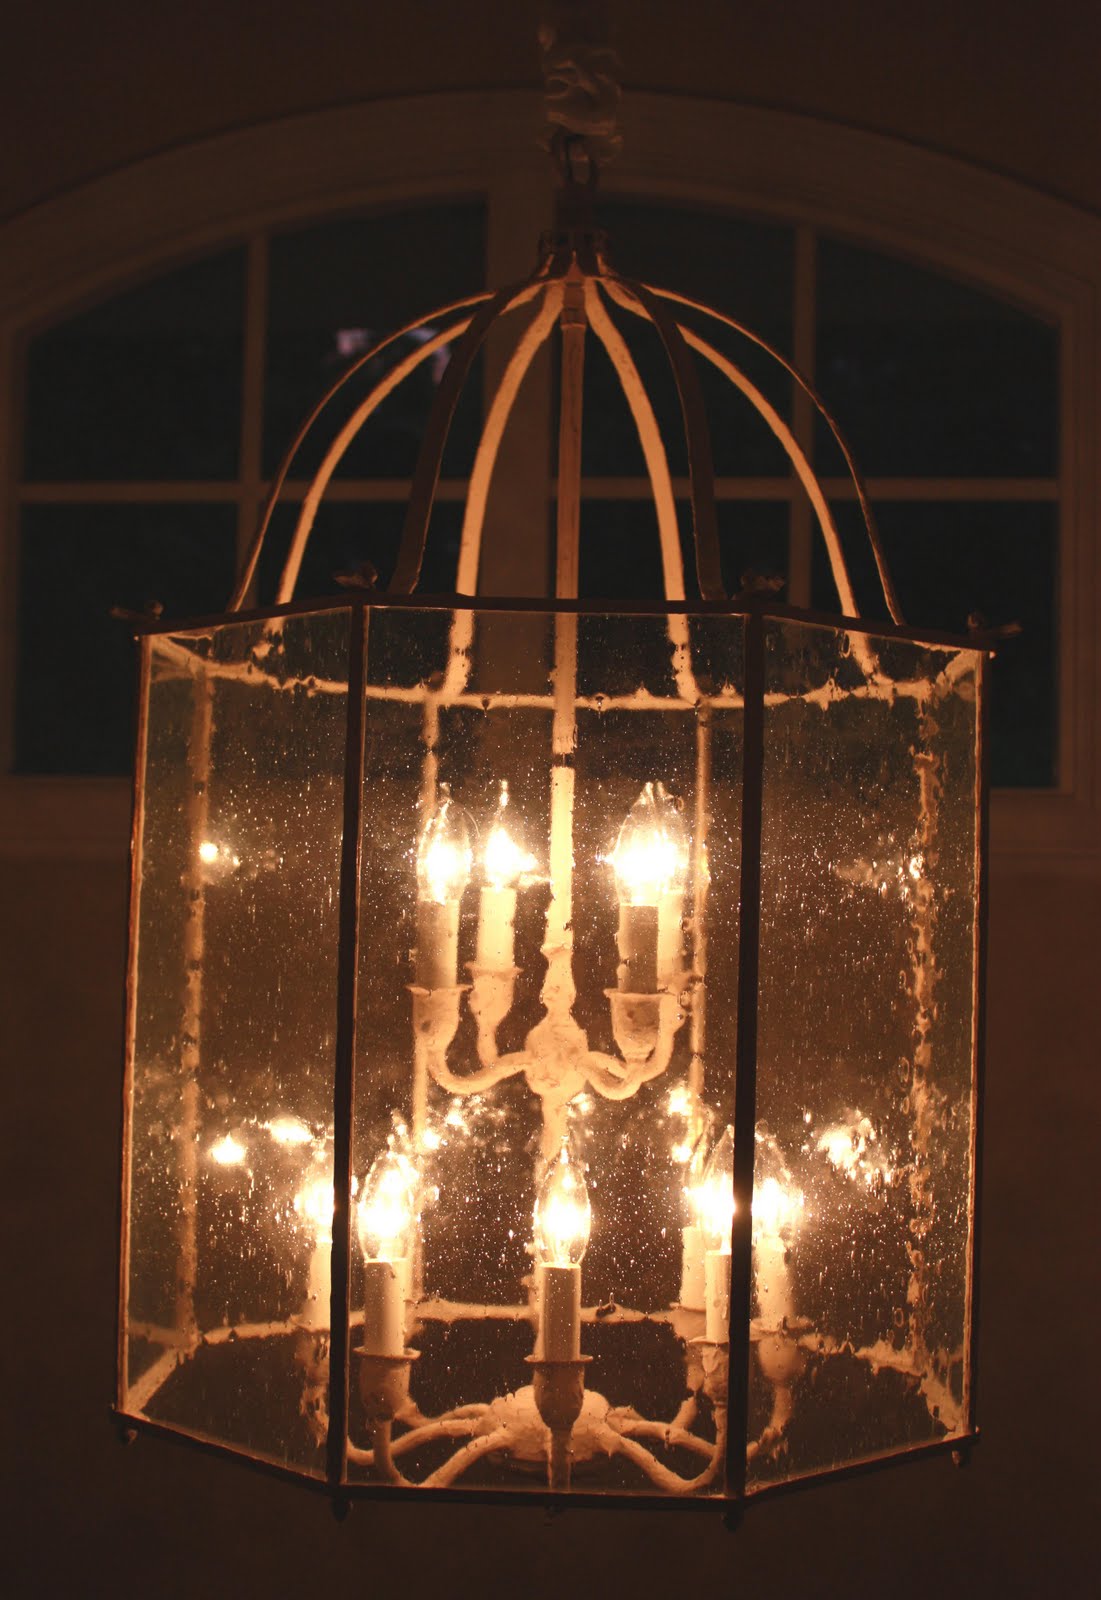
We did change out the glass because I wanted an “old look”. We replaced the plain glass with “seeded glass” for a vintage feel. I considered not putting any glass in it at all. I think that would have been a nice look also, but ultimately the “seeded glass look” won me over.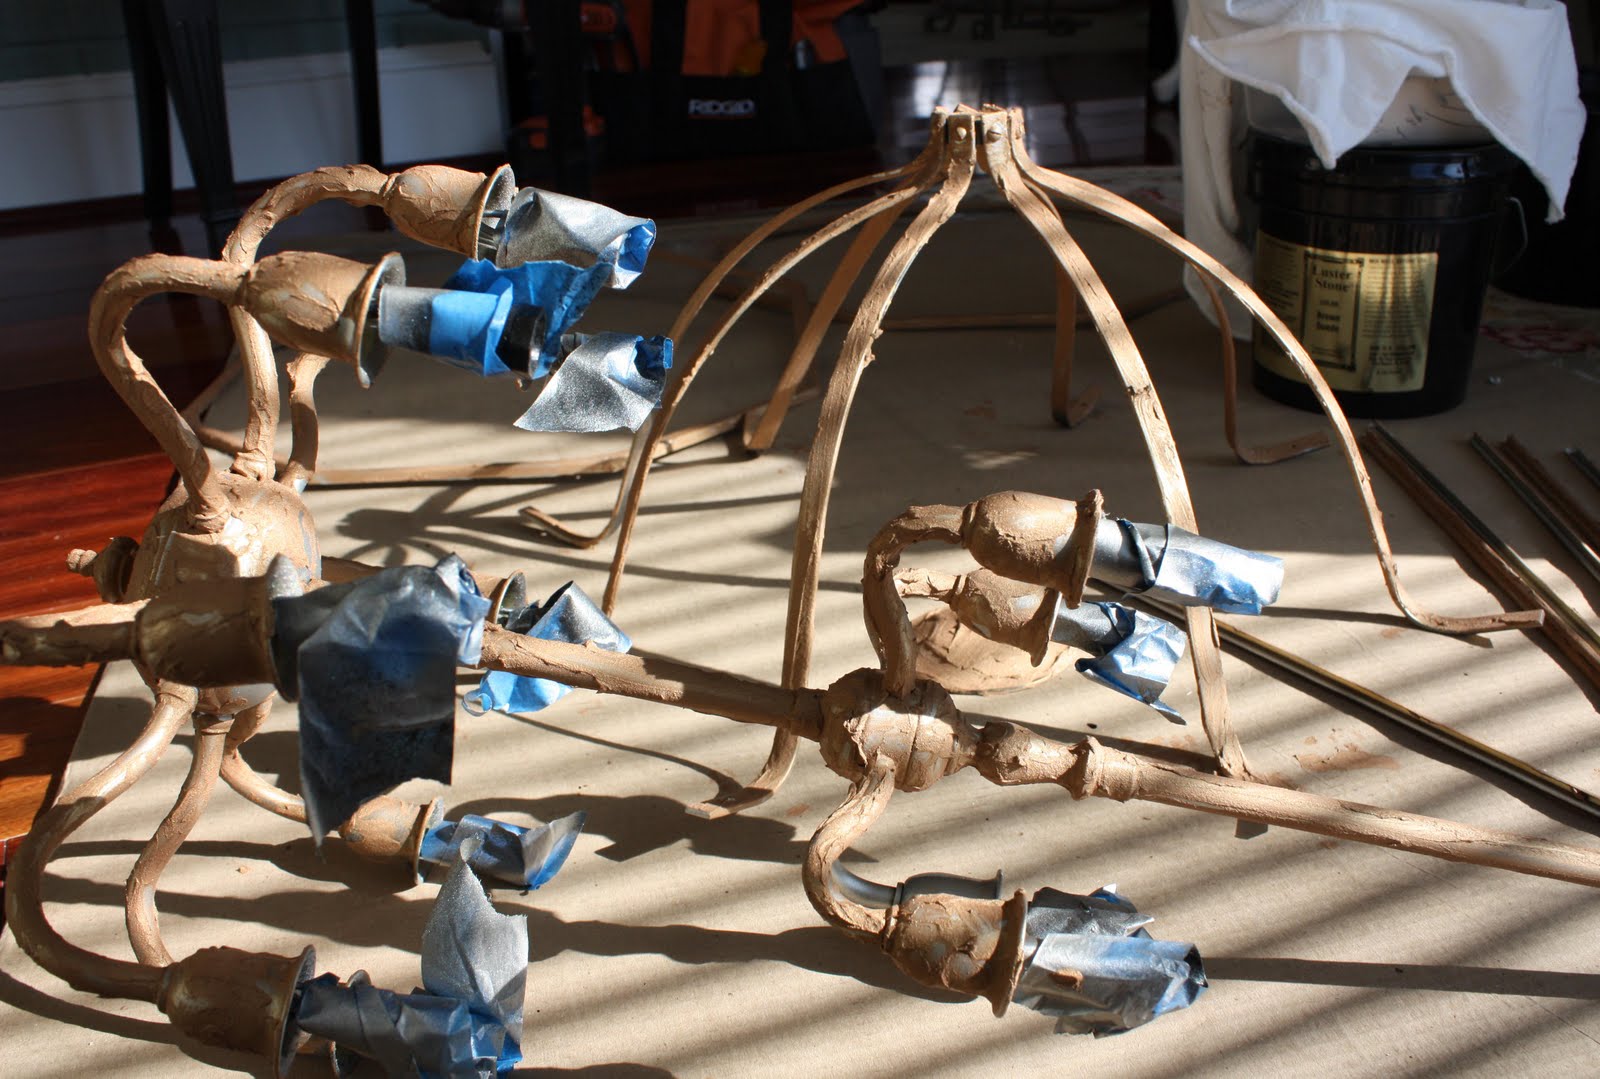 Then my cute carpenter risked his own life to hang my creation. He is a good man.
 Isn’t she lovely.
 Can you see the finish and texture?
 The seeded glass reflects specks on our walls at night…it’s dreamy.
 I love not having to spend $5,500 to get the look I want, and I love Karen for convincing me to try this.

bsp; I love the beautiful finish you did – and now I’m on board. I want one too! You’re the most fantastic talented faux, faux finisher! 🙂
and see more DIY inspiration!
Show off your DIY projects too!

- You must use the button above and link to this post to share the linky love.
- Include your name or blog name and project title. Add your permalink (not your blog url, but your DIY project post url). Feel free to link a Past Post, just invite your readers in a current post with a quick note.
- Or email your link to thediyshowoff@gmail.com and I will add it for you.
- If you notice your link has disappeared – pleaseadd the link back to The DIY Show Off to your post today with a quick note to your readers about the party and try again! I love when everyone participates and readers check out everyone’s links, but I think the return favor of linking back is the nice thing to do so everyone plays fair and enjoys all of the projects and links. Also – this blog party is for DIY projects only. Links not related to DIY will be deleted.
Hi Roeshel,
Wow I am the first to link up! I am usually not that lucky. Thank goodness I have a good project or it wold be embarrassing 🙂 Well at least I think it is a good project, turning an Ikea Billy Bookcase into a Built-in. Thank you for allowing me to share it here with you and your readers.
Have a wonderful week!
That lamp turned out great. I love the seeded glass. So pretty and vintage looking. Thanks for sharing. Love & blessings from NC!
What a fantastic project!! I LOVE this light fixture!!! ANd Thumbs up to your hubby for his bravery!!! I was on one of those 24 foot ladders today too- only I was trying to pick pears to can!
Thanks for letting me link to your fun party!
bee blessed
mary
Beautiful lamp! Thanks for hosting!
The lamp is great! Thanks so much for hosting!
~Morgan
Check out my awesome giveaway from Lisa Leonard HERE
Meet Virginia!
Meet Virginia!!
Thanks for hosting again. The light is gorgeous! Have a great week.
Thank you for sharong that awesome lamp and for hsoting the party this week!
Sharon@KeenInspirations
Beautiful light!
I saw a fixture (in the before stage) like this one at our local Thrift store for $30.
I didn't buy it because I didn't know what to do with it–now I do!
And if I see another one, I am gonna buy it and make it look like 5,000 bucks!
Thank you for the party, too!
It's always fun!
Hugs,
~Leslie
Beautiful transformation! Adding your site to my Link List of Link Parties! 🙂
😀 Lynda
nyclq-focalpoint.blogspot.com